- Editorial Process
- Why Trust Us?
- Affiliate Linking Policy
- Privacy Policy
- Terms of Service

Weekly Must-Reads View All
How to fix ‘your disk is almost full’ on mac: 9 best ways.
Clean up your Mac disk for peak performance
How to Clean Up Your Mac: 8 Easy Methods
Quickly clean your Mac to speed it up
How to Shut Down MacBook: 3 Quick Ways
Quick ways to shut down your Mac
What Is AppleCare for Mac? Coverage, Plans, and Benefits
Protect your Mac with AppleCare
Phone (407) 777-2211
Email [email protected]
Address 1317 Edgewater, Dr #4609 Orlando, Florida 32804
Popular Topics
- wi-fi connectivity issue
- What to Do With Your Old MacBook? 13 Useful Ways to Reuse an Old Mac
- What Software Comes With MacBook
- What Is the MacBook Flexgate Issue and How to Fix It
- What Is the MacBook Flexgate Issue
- volume issue
- video compression
- ventura install
- Update macOS on Your Mac
Trending Now View All

- Mac Tips and Tricks
How to Record a Video on Your Mac: 5 Best Ways
Reviewed by
Hashir Ibrahim
Last updated: July 27, 2024
Expert verified
To record a video on your Mac, you can use simple hotkeys and built-in apps like QuickTime Player, Photo Booth, and iMovie. You can also use third-party apps, like OBS Studio, Camtasia, and ScreenFlow if you want advanced recording features.
- Press Command ⌘ + Shift ⇧ + 5 to access the screenshot toolbar to record the entire screen or a selected portion.
- Popular conferencing apps like Zoom, Skype, and Microsoft Teams have built-in recording features.
- After recording on a Mac, use the built-in editor to trim videos. Press Command ⌘ + Shift ⇧ + 5 for settings like location, timer, and audio.
Ever thought about capturing your Mac screen like a pro? Whether you’re crafting a tutorial, seizing a fleeting moment, or showcasing your latest project, your Mac can help you capture it.
Discover the top methods to record a video on your Mac, each tailored to ensure crisp, high-quality results. No more sifting through endless apps or grappling with settings. Ready to elevate your recording game? Let’s roll!
How to Record a Video on Your Mac
Now that you know the “why” of recording videos on a Mac, it’s time to explore the “how.” Whether you’re seeking built-in solutions or third-party applications, the following section will guide you through the most efficient and user-friendly methods to record a video on your Mac. Let’s dive in.
1. With Hotkeys
One of the simplest and most direct methods to record a video on your Mac is by using hotkeys. These Mac keyboard shortcuts are not only quick but also eliminate the need for any external software.
Here’s how you can use hotkeys for video recording on Mac:
This method works on macOS Mojave or later.
- Press Command ⌘ + Shift ⇧ + 5 to bring up the screenshot toolbar.

- This toolbar offers options for recording the entire screen or a selected portion.
- Click Record Entire Screen or Record Selected Portion and select the portion of the screen you’d like to record.

- After making your choice, click the Record button to start.

- Click the Stop button in the menu bar when you want to stop recording.

- To save the recording, right-click the recorded file in the bottom right corner of your screen and select Save to Desktop or Save to Documents .
Using hotkeys is all about muscle memory. The more you use them, the more intuitive and efficient your recording process will become!
2. Using Photo Booth
Photo Booth is a pre-installed app on Mac that’s primarily known for taking selfies and applying fun effects. However, it’s also a handy tool for recording videos. While it might not offer the advanced features of dedicated screen recording software, it’s perfect for quick video captures using your Mac’s built-in camera.
Here’s how to use Photo Booth to record a video on your Mac:
- Navigate to your Applications folder and open Photo Booth .

- Once inside, you’ll notice three icons next to the red capture button. Click the video mode icon to switch from photo to video.
- With video mode activated, press the red button to start recording.

- Your Mac’s camera will capture everything in its view.
- To end the recording, click the red button again.

- Your video will automatically be saved to the Photo Booth library, and you can also export it to your desired location.
3. Via QuickTime Player
QuickTime Player, Apple’s default multimedia player, is more than just a tool for watching videos. It comes with a straightforward and efficient screen recording feature, making it a go-to for many Mac users.
Here’s how to use QuickTime Player to record a video on your Mac:
- Launch QuickTime Player via the Launchpad.

- In the menu bar, click File and select New Screen Recording .

- The screenshot toolbar will appear at the bottom of your screen.
- Before you start recording, you can opt to record the entire screen or drag to select a specific area.
- If you wish to include audio, click the arrow next to the Options button and choose the appropriate microphone source.

- Once you’ve made your selections, click the Record button.
- To stop the recording, click the Stop icon in the menu bar.
- After recording, QuickTime will automatically open the video. You can save, edit, or share it as needed.
4. Using iMovie
iMovie, Apple’s free video editing software, is renowned for its user-friendly interface and powerful editing tools. While primarily designed for video editing, it also allows you to record videos directly using the built-in camera.
Here’s how to use iMovie to record a video on your Mac:
- Open iMovie from the Launchpad.

- Click Create New .

- Select Movie from the dropdown.

- In the workspace, click Import Media .

- Select FaceTime HD Camera in the left sidebar and click the red record button.

- iMovie will capture video using your Mac’s built-in camera.
- Click the record button again to stop. The recorded clip will appear in the media library, and you can drag it to the timeline for editing or exporting.
5. Via Third-Party Apps
While Mac’s built-in tools are efficient, sometimes you might need advanced features or a different user experience. This is where third-party apps come into play. These applications often offer enhanced functionalities like annotations, webcam overlay, and more.
Here are some of my top picks for video recording apps on Mac:
- OBS Studio : A free and open-source software, OBS Studio is perfect for screen recording and live streaming. With its customizable scenes and sources, you can capture multiple windows, add overlays, and even integrate with streaming platforms.
- Camtasia : A professional-grade software, Camtasia offers a comprehensive suite of tools for screen recording and video editing. Its drag-and-drop editor, annotations, and effects make it a favorite for many.
- ScreenFlow : Tailored for Mac users, ScreenFlow boasts a sleek interface and powerful features. It’s especially known for its high-quality recordings and intuitive editing tools.
- Snagit : Beyond just screen recording, Snagit offers tools for capturing screenshots, creating GIFs, and annotating recordings, making it versatile for various tasks.
- CleanShot X : CleanShot X is a modern screen-capturing tool for Mac that offers a clutter-free recording experience. With features like scrolling capture, annotation tools, and cloud storage integration, it’s a powerful yet streamlined choice for those who value efficiency and aesthetics.
To use any third-party app, you’ll need to download and install it from the respective website or the Mac App Store.
Once installed, each app will have its unique set of instructions for recording, but most follow a similar pattern of selecting the recording area, choosing audio sources, and starting/stopping the recording.
How to Record a Video Call on Mac
Recording a video call on a Mac can be crucial for various reasons, such as keeping records of meetings, revisiting important discussions, or creating content.
Most popular video conferencing apps have built-in recording features:
- Zoom : During a meeting, click the Record button at the bottom. Once the meeting ends, Zoom will convert the recording and save it to a specified folder.
- Skype : Click More options (three dots) during a call and select Start Recording . Skype will save the recording in the chat for 30 days, and you can download it within that period.
- Microsoft Teams : Click More actions (three dots) during a meeting and select Start recording . The recording will be saved in Microsoft Stream.
Besides the built-in options, you can use QuickTime Player and third-party apps to record video calls on your Mac.
Always inform all participants before recording a video call. In many regions, it’s illegal to record someone without their knowledge or consent.
How to Edit and Change the Settings of the Recorded Video on Mac
Once you’ve completed a screen recording on your Mac, a thumbnail preview will momentarily pop up at the screen’s bottom right. If you don’t want to edit, you can dismiss this thumbnail by swiping it to the right or let it be and your recording will be saved on your Mac by default.

However, if you want to modify the video, clicking this thumbnail before it disappears will launch Apple’s built-in editor for screen recordings.

This editor lets you trim and adjust your video.

If you want to reposition the video on your Mac, drag the thumbnail to any folder on your desktop or in the Finder. You can also move this thumbnail to the Bin or attach it directly to an email via the Mail app.
For more options, right-click the thumbnail. This lets you select a different save location, delete the video, or open it with a preferred application.
By pressing Shift ⇧ + Command ⌘ + 5 , you can access the settings menu for screen recording. Here’s a breakdown of the available options:
- Location : Under Save to , decide where your recordings will be saved by default. You even have the option to save directly to the clipboard, making it easy to paste into messages or documents later.
- Timer : Set a delay of 5 or 10 seconds before the recording starts after hitting the Record button.
- Audio : Record external audio using your Mac’s built-in microphone. If you have an external device, adjust the default settings by navigating to System Settings > Sound > Input .
- Thumbnail Preview : Decide if you want a floating thumbnail to appear post-recording.
- Selection Settings : If you want to retain your current settings for subsequent recordings, select Remember Last Selection .
- Mouse Visibility : To highlight mouse clicks in your recording, toggle on Show Mouse Pointer .
By familiarizing yourself with these settings and features, you can optimize your screen recording experience on a Mac.
Why Record a Video on Your Mac?
Recording a video on a Mac offers several advantages and serves various purposes. Some common reasons for recording videos on Mac are as follows:
- 🎓 Tutorials and Demonstrations : Mac’s crisp display and robust software ecosystem make it ideal for creating educational content. Whether you’re teaching software usage or giving a presentation, recording it allows for easy sharing and replay.
- 📸 Digital Memories : Capture personal moments or events, turning them into digital memories that can be revisited anytime.
- 🎥 Content Creation : For vloggers, animators, and digital creators, Mac provides powerful tools for video recording, ensuring high-quality content for platforms like YouTube, Vimeo, and more.
- 💼 Professional Communication : Record meetings, webinars, or interviews, ensuring that no detail is missed and content can be reviewed later.
- 💻 Software Development and Testing : Developers can record app functionalities or software demonstrations for testing, feedback, or promotional purposes.
- 🎮 Gaming : With the rise of gaming on Mac, recording gameplay sessions for reviews, strategies, or sharing on platforms like Twitch becomes essential.
- 📚 Educational Purposes : Teachers and students can record lectures or lessons, facilitating asynchronous learning and revision.
- 🔧 Troubleshooting : If you’re facing an issue with software or an application, recording the problem can help technicians or support teams understand and resolve it faster.
Record Videos on Your Mac in No Time
Recording videos on your Mac has never been more accessible, thanks to a range of built-in tools and third-party apps. From quick hotkey commands to sophisticated software, there’s a method to suit every user.
Here are some more tips to enhance your video recording experience on Mac:
- If your Mac camera is not working , you won’t be able to record videos. So, troubleshoot the camera before recording videos on your Mac.
- You can record audio on your Mac to add it as a voice-over to your videos.
- If you want to upload your videos to social media, you can compress a video on Mac to make it easy to upload.
- Learn how to screen record on a MacBook in 5 easy ways.
Frequently Asked Questions
Do macs allow screen recording, can i screen record on a mac with sound, how do i record my mac screen with a keyboard, how do i record on a mac without an app, why is there no sound when i screen record on a mac.

Hi there! I'm Ojash, a tech journalist with over a decade of experience in the industry. I've had the privilege of contributing to some of the world's largest tech publications, making my mark as a respected Mac expert. My passion lies in exploring, using, and writing about MacBooks, and I enjoy sharing my expertise to help others make informed decisions and get the most out of their MacBook experience. Join me as we delve into the fascinating world of MacBooks together!

I'm Hashir, a tech journalist with a decade of experience. My work has been featured in some of the top tech publications like MakeUseOf and MakeTechEasier. I have a bachelor's degree in IT, a master's in cybersecurity, and extensive knowledge of Apple hardware, specifically MacBooks. As the senior writer at MacBook Journal, I write in depth guides that help you solve any issues you have with your mac and unbiased reviews that help you make the right buying decisions.
You May Also Like

How to Safely Transfer Files from Mac to Mac: 11 Best Ways
Written by Ojash Reviewed by Hashir Ibrahim Last updated: July 27, 2024 Expert

Best Free Video Editor for Mac: Top 10 Expert Picks
Edit like a pro with these free video editors for Mac users

Mac Sleep Modes Explained: Sleep, Hibernate, Safe Sleep, and Standby

How to Download and Install Older Versions of macOS [6 Proven Steps]
Get back to a reliable macOS experience

Record Video Presentations With You In Them Using Keynote
Check out Record Video Presentations With You In Them Using Keynote at YouTube for closed captioning and more options.
Comments: 17 Responses to “Record Video Presentations With You In Them Using Keynote”
....and I thought _ I _was a master of Keynote. Turns out, I'm an amateur compared to Gary. Thanks to MacMost for showing me the MOST Mac-useful tip about recording an explainer video, using Keynote. I can almost smell the money this is going to make me. :-) Thanks, Gary! You've mastered video produced in Keynote.
Thanks bunches
Brilliant - just what I need. Thanks Gary. Amazing.
Great insight Gary, many thanks. I have recently moved all the way up from Mojave-then Monterey up to Sonoma, and I had missed this in the corresponding Keynote updates. Thank you very much!
Excellent presentation - very helpful and provides for a new dimension for Keynote work. What is your recommendation on recording the whole presentation or add the recording on a slide by slide basis. You said you could replace some of the recording - how do you do that?
Bill: In the recording interface you can go back to a point and start recording from there, leaving the previous slides the same. Experiment with the recording interface to get the hang of it.
Thank you for a very simple yet useful way to use my Mac for great looking presentations. Your presentations are straightforward and include well thought out ways to show how to do things simply yet professionally. I also appreciate being able to replay them at any time to refresh and help along where things moved quickly. This is a wonderful help for both teachers and students.
Excellent! Just what I needed for some tutoring I do.
Great job as always. what do you use for the green screen background and green chair?
Paul: Do you mean where did I get them? I don’t remember brands or anything, but probably just bought from Amazon. Tons of options there.
Hello Garry, why I don't see "Background" check box? I'm using OS Big Sur. Thank you.
Rami: Because you are using an older version of macOS.
This is fabulous! Now I don't need to spend money on expensive 3rd party software to make explainer videos. Thanks so much.
Gary - You are the top of the pops. I have dreamed of doing this. Making a movie on a topic and putting it on YouTube. It is all there if you know how to do it.
Another great, useful video.
Gary, Thank you for this super useful tutorial.
This is so so helpful, thank you!
Leave a New Comment Related to "Record Video Presentations With You In Them Using Keynote"
Welcome to macmost, free weekly newsletter.
- MacMost Online Courses
- macOS Sonoma
- Mac Shortcuts
- Mac Numbers
- Mac Keynote
- Final Cut Pro
Keyboard Shortcuts PDF

Connect with MacMost
- Free Email Newsletter
- YouTube Channel
- Follow Gary on Threads
- Follow Gary on Mastodon
- Follow Gary On Bluesky
- MacMost @ Apple News
- iPhone/iPad App
MacMost Sections
- The Practical Guide To Mac Security
- Videos by Category
- Video Archive
- Virus and Malware Information Center
- Protect Yourself From Online Scams
- A Graphical Guide To iCloud
- Free iPhone Ringtones
- Recommended Products
- Printable Mac Keyboard Shortcuts PDF
- macOS System Requirements List
Popular Tutorials
- Quickly Markup and Send Mac Screenshots
- What's New In ClipTools 1.5
- How To Get Photos Out Of the Photos App
- Track Your Stocks In Mac Numbers
- Reduce Photo Size For Mail
- How To Erase and Reset Your Mac
- Everything You Can Do With Video and Audio Files Without Launching an App
- How To Learn Mac After Switching
Information
- About MacMost
- Support MacMost
- Contact MacMost
- MacMost Video List
- MacMost Site Map
- MacMost Site Policies
Copyright © 2006-2024 CleverMedia, Inc. All Rights Reserved.
- English Español Deutsch Português Italiano Français 日本語 한국어 繁體中文 Türkçe Dutch Polish Thai Indonesian Malay
- Free Download For Windows For macOS
- Screen Recording RecExperts For Windows Screen recorder for PC RecExperts For Mac Screen recorder for macOS Online Screen Recorder Record screen online free ScreenShot Take Screenshot on PC
- Buy Now Buy Now
- Student Discount
- Resources Screen Recorder Windows 10 Record Zoom Meeting Record Internal Audio Mac Record Gameplay on PC Video Recording Software
- Support Support Center Guides, License, Contact Chat Support Chat with a Technician Pre-Sales Inquiry Chat with a Sales Rep
How to Record a Presentation on Mac with Audio and Webcam
Learn how to record a presentation on Mac. This article guides you through recording Microsoft PowerPoint, Keynote presentations, Google Slides, and other PPT apps on a MacBook. You can capture audio, video, and your face while you are presenting.
Trustpilot Rating 4.7

Don’t forget to share this post!
Page Table of Contents
Updated on Aug 08, 2024
Looking for how to screen record a presentation on Mac ? Whether you're using Keynote or Microsoft PowerPoint to create a lecture, record a meeting, or launch a product, follow this guide to learn more about how to record a presentation on Mac .
How Do You Record a Presentation on Mac?
If you want to record presentation on MacBook, there are three options:
- Record Keynote presentation with its internal recording feature. This Apple presentation tool lets you record slides with audio. However, you cannot record yourself on Mac because it cannot capture the webcam overlay.
- Record presentation on PowerPoint for Mac with its built-in recorder. It lets users record slideshows as videos with audio and webcam. However, it has some limitations. For example, it may cause lag during recording and save recordings on each slide separately.
- Use a reliable Mac screen recorder , like EaseUS RecExperts, to screen record a presentation on Mac. This tool lets you seamlessly capture slideshows, audio, and your face without any lag. It is suitable for almost all your needs.
Share this post on your social platform to help more users!
The Best Way to Record Presentations on Mac with Audio and Webcam
Compared with recording presentations with Apple Keynote and MS PowerPoint, EaseUS RecExperts provides a more optimal recording experience.
It lets you record PowerPoint presentation with audio and video on Mac in just a few clicks. Apart from recording MS PowerPoint, it also records slides from Keynote, Google Slides, Zoom meetings, and more.
When recording is finished, you can trim the content using the AI-empowered editing functions. Then, export a recorded PPT video in high quality with MP4, MOV, and other file types. Download the software below to record lectures on Mac with ease.
Let's see how to record a presentation on Mac with the EaseUS screen recording software.
⭐ Before you begin :
- To record a presentation with your face , connect a webcam (e.g., Logitech C920 or similar) or a digital camera or HD camcorder with video recording capabilities to your computer.
- To capture your narration sound, connect an external microphone (USB condenser microphones, Lavalier mics, or Headset mics) to the device.
- Prepare good lighting for high-quality video.
- Set up a clean and professional background.
- Practice your presentation and be familiar with the content.
Now, open the PPT on Keynote, PowerPoint, Google Slides, or other presentation apps. Then, follow the steps below:
Step 1. Firstly, launch EaseUS RecExperts on your Mac. There are two options, "Full Screen" and "Region," for you to select the recording area.

Step 2. Then, click on the "Webcam" button at the bottom. When a "Record webcam" window pops up, click the button to activate the webcam, and you can select the device you want to use from the dropdown menu.

Step 3. If you want to capture the screen with audio, the "Sound" button beside "Webcam" can help. You can click on the two buttons on the "Select recording sound" window to choose the audio source, such as the system sound, the microphone audio, or two of them.

After adjusting the settings appropriately, click on the "REC" button to start recording.
Step 4. Now, you can record the Mac screen and your webcam at the same time. After capturing all the content you need, hit the "Stop" button to end it, and this software will offer you a built-in video player to view the video you captured.

Record a PowerPoint Presentation with the Internal Recorder
MS PowerPoint for Mac is not only a tool for creating, editing, and sharing presentations but is also equipped with an internal audio recorder to help presenters capture the screen, audio, and webcam simultaneously on macOS.
People who want to record presentations on Mac with themselves showing faces can use the Cameo feature in PowerPoint. Cameo enables users to insert a live camera feed directly on a slide.
Let's look at how to record PowerPoint presentations with audio and video Mac.
If you don't need to record yourself on Mac , skip the first two steps, which aim to add a webcam overlay to the PPT.
Step 1. Open the slides on PowerPoint. Go to Insert > Cameo.

Step 2. A new tab of Camera will appear along with a placeholder for your camera feed. Click the on-off icon to turn on the video feed. You can see yourself on the slide.
- If you have multiple cameras, click Preview to pick another one.
- You can apply effects to your camera.
- You can use the anchor to change the placement and size of your camera feed.

Step 3. Go to Slide Show > Record Slide Show. Select Record from Beginning… or Record from Current Slide….

Step 4. In the recording toolbar, toggle on video (camera icon) and audio (speaker icon) in the dropdown options.
- Select Blur Background in the camera options menu to avoid any background distractions for your audience.
- To make a video from PPT with audio only, toggle the camera (video button) off.

Step 5. Click on the red record button in the top right corner. A three-second countdown timer will appear. When it ends, the recording starts.

Step 6. During the recording session, you can use pause and resume buttons to manage narration and navigation.

Step 7. Click the red button again to stop recording. You can preview the records.
Step 8. If you want to re-record your narration, click the Clear recording button (trash can icon) left to the red record button to delete the existing capture. Then, start recording again.

Step 9. After pressing Esc or clicking End show to exit the Record Slide Show experience, you will see the narration (audio/video) applied to the slides, as well as the appropriate slide timing and inking animations.
Step 10. Go to File > Export to export your presentation as a video. Select a video format you need (MP4 or MOV).

Record Keynote Presentation with the Built-in Recording Feature
Keynote is part of the iWork productivity suite developed by Apple Inc. for presentations on Mac, iPad, and iPhone. It is embedded with an integrated recording feature to help record a PowerPoint presentation on Mac.
However, this feature records PPT with audio only. If you only need to record a presentation on Keynote without showing your face, you can use it to perform a smooth recording.
Let's see how to record a presentation with voiceover narration on macOS devices with Keynote.
Step 1. Open the presentation in Keynote. Click Document in the upper right corner.

Step 2. Go to the Audio tab and click Record….

Step 3. This will launch a new, full-screen window. Click the red recording button. The timer counts down from 3 before the recording starts. You can use the right or left arrow key to go to the next or previous slide.

Step 4. Click the red button again to stop recording. You can click the play button to preview the recording.
- To re-record from a specific location: Drag the playback slider at the bottom of the screen to the location where you want to start recording, then click the red recording button. Select Record in the pop-up menu to start recording.
- Delete the entire recording: Click the trash can icon at the bottom right corner of the screen and then select Clear.
Step 5. Press the Esc key to exit the presenter's display.
Step 6. To export the Keynote presentation, go to File > Export To. Select a file format and click save. Type a filename, choose a location, and click Export.

This article offers three wayson how to record a presentation on Mac . Follow the guide above, and the recording task will be easy to operate. After making the presentation a video, you can share it offline or online to engage audiences .
To simplify your slide presentation recording task, we recommend EaseUS RecExperts. It lets you record presentations on Mac with audio, video, and a webcam. Whatever presentation apps you use, EaseUS RecExperts works properly.
Record Yourself on Mac FAQs
Learn more frequently asked questions on how to record yourself presenting a presentation on Mac.
1. How do you voice over a presentation on a Mac?
You can record a voiceover narration on Mac with the QuickTime Player.
Step 1. Open the presentation slides in advance. Launch QuickTime Player
Step 2. Click File > New Screen Recording.
Step 3. In the Recording window, select the microphone used to record your voice. Click the red Record button.
Step 4. You can record your entire screen or drag it to select areas of your presentation. Start the presentation and talk while looking at the slides.
Step 5. Click the Stop button in the menu bar at the top of the screen.
Step 6. QuickTime prompts you to save your recording. Select the desired format and save.
2. Why is PowerPoint not recording audio on Mac?
If PowerPoint is not recording audio on Mac, there can be several reasons and according methods:
- Check the microphone settings : Go to System Preferences > Sound > Input.
- Check PowerPoint permissions : Go to System Preferences > Security and Privacy > Privacy tab > Microphone.
- Update PowerPoint : Go to Help > Check for Updates in PowerPoint.
- Simply restart PowerPoint or your Mac.
- Test audio recording in other applications.
- Check PowerPoint settings : Open PowerPoint and navigate to the Slide Show tab. Make sure you follow the appropriate steps to begin recording audio.
- Reinstall PowerPoint .
- Contact Technical Support .
3. How to turn a video to an audio file on Mac?
You can turn a video into an audio file on a Mac using QuickTime Player.
Step 1. Open the video in QuickTime Player.
Step 2. Go to File in the menu bar.
Step 3. Select Export As and then choose Audio Only.
Step 4. Choose a location to save the audio file and give it a name.
Step 5. Click Save. Your audio file will be saved in .m4a format.
4. What is the shortcut for screen record on Mac?
On Mac computers, use the shortcut Shift + Command + 5 at the same time to use the built-in screen recording feature. This will open the screen recording toolbar, where you can choose to record the entire screen, a selected portion of the screen, or a screenshot.
EaseUS RecExperts

One-click to capture anything on screen!
No Time Limit, No watermark
Melissa Lee
Related Posts

How to Record VooV Meeting [2024 Guide]

How to Record a Skype Meeting on PCs and Phones

How to Record Facebook Live Videos/Video Calls Easily

2 Ways | How to Transcribe a Skype Recording🔥
Success, thanks for submitting!
- Refund Policy
- Terms & Conditions
- Do Not Sell
Copyright © 2004 - 2023 EaseUS. ALL RIGHTS RESERVED.
How to Record Video on Mac: 4 Methods

Your changes have been saved
Email is sent
Email has already been sent
Please verify your email address.
You’ve reached your account maximum for followed topics.
How I Make a Subject Pop and Create Dimension in My Smartphone Photos
Here's how i turn these 7 common smartphone photography disasters into wins, this is the one "boring" mac app you won't regret installing.
When it’s time to record a video, your first thought may be to take out your phone or grab a digital camera, but you can also record a video directly on your Mac. All MacBook and iMac models come with a dedicated webcam. It may not be of the best quality, but it can get the job done pretty well.
Recording a video on a Mac with the webcam is quite simple, and there are plenty of apps you can use to do it. We’ve covered them all for you below.
This is a guide on recording a video using your Mac’s webcam. If you’re looking to record the screen instead, check out our guide to how to make a Mac screen recording .
Preparing to Record a Video
Before you set out to record your video, you must make sure your system is fully prepared to do so. The most vital element, in this case, is a webcam. All MacBook and iMac models released since 2006 have webcams built-in, so as long as yours is working, there shouldn’t be an issue.
However, if you’re using a Mac mini, Mac Pro, or Mac Studio, you’ll need to purchase an external webcam as an add-on. If you don’t already have one, be sure to check out our guide on the best webcams you can buy . In addition, you may also be able to use an external camera, such as a DSLR or a mirrorless camera, to record your video (which might require a bit of extra expertise to set up).
Apart from the camera, you should also follow our home video tips to make sure you set up the surrounding scene. You should have plenty of light facing you, you shouldn’t be backlit (for example, with a window behind you), and there shouldn’t be any excessive background noise.
Once everything is set up, you can start recording a video on your Mac. There are a couple of options that you can use to record this, we’ve covered them below.
1. Record a Video Using Photo Booth
The first app you can use to record a video on your Mac is using Photo Booth . All Macs come with Photo Booth pre-installed, which allows you to take photos and videos using your webcam.
The main advantage of using Photo Booth is that it doesn’t flip your video horizontally, unlike QuickTime Player. Another benefit is that it allows you to apply various effects to your video recording. While these are quite amusing, chances are that they won’t be of any use in a professional video. Still, it’s nice to know that you have the option.
To use Photo Booth to record a video:
- Open up Photo Booth on your Mac. You can do this from Spotlight or the Applications folder in Finder .
- Once Photo Booth is open, you’ll see a preview of what your webcam sees. Make sure everything looks good, and you are fully in the frame.
- Switch to Video mode by clicking on the video icon in the bottom-left corner.

- Click on the video thumbnail in the filmstrip to preview your video once it’s recorded. If you’re happy, Control-click on the thumbnail, choose Export , and save it anywhere on your Mac.
That’s it! You can also monitor the amount of time recorded in the bottom-left corner of your screen while recording. Also, note that your recording time is limited by the amount of free storage available on your Mac .
2. Record a Video Using QuickTime Player
You can also record a video on your Mac using QuickTime Player. QuickTime is Apple’s native app for video playback. However, it also offers loads of additional options, including the ability to record a video using your webcam.
To record a video using QuickTime Player:
- Open up QuickTime Player on your Mac.

- If you have multiple webcams or audio mics connected, you can change the video and audio sources by clicking on the small arrow to the right of the recording button. You can also choose your recording quality here.

- QuickTime Player will show you the final recording, which you can watch to make sure you’re satisfied with it. You can also make some minor edits to the video from the Edit menu.
- Once you’re done, save the video by either pressing Cmd + S or by selecting Save from the File menu.
3. Record a Video Using iMovie
Our third option to record a video on your Mac is using iMovie. As iMovie is a slightly more complicated app compared to the other two we’ve mentioned, we only recommend this if you’re looking to heavily edit your video after you’ve finished recording it. iMovie is also a good option if you’re importing your video into a larger project.
iMovie isn’t installed on Macs by default, but it’s free to download from the Mac App Store . Once that’s done, you can record from your Mac’s webcam directly into iMovie using the steps below:
- Launch iMovie on your Mac. Then go to File > New Movie . Alternatively, you can select Create New from the iMovie Projects screen.
- Click on the Import button (down-facing arrow) at the top of the iMovie screen.
- Select Cameras from the left panel, and select FaceTime HD Camera (or your desired webcam). You may need to grant the app access to the webcam’s microphone and camera.
- Select the project you’ll be importing the video to from the top of the screen.
- Once you’re happy, click the Record button at the bottom of the screen to start recording. Click it again to stop recording. Once you’re done, click Close at the bottom of the screen to close the recording window.
- Click on Projects in the upper-left corner of the iMovie window to save the recording and import it into a project.
That’s it! As you can see, the process is a bit more complex with iMovie, but it is really helpful if you’re creating a larger video (such as a documentary) and only want to record a small clip for it.
4. Record Using Third-Party Apps
Fortunately, Apple’s apps do such a good job recording videos that you shouldn’t need to use a third-party app. But if you’re looking for more powerful recording software, we recommend you check out OBS Studio for recording your screen and webcam . It can be very useful if you’re looking to create a video guide or a live stream.
Should You Switch to a More Professional Setup?
Recording videos using a Mac’s webcam is perfectly good for short videos, but if you are aiming for professional recordings, or creating videos for a content series, it may be worth either investing in a better webcam or an external camera to record your videos. Doing this will not only allow you to improve the quality of your recording, but it should give you more flexibility over different camera settings, including exposure, audio control, and more.
Watch Reimagine Education and learn what's new with responsible AI in education >
- Published Oct 26, 2020
Record Slide Show in PowerPoint for Mac coming soon, plus additional PPT updates available today
- Content type
- Education decision makers
Record Slide Show is an easy to use tool that allows you to create narrations to go along with your slides. During a time of remote meetings and learning, alternate methods of presenting are becoming more and more important in our day to day lives.
We’re excited to announce that new updates are now available on PowerPoint for Mac that allow users to record presenter video and inking during their Record Slide Show sessions. These new capabilities will enable you to create more robust recorded presentations. We hope that this feature can help simplify your presentation recording process and better engage your audience.
Here are some features that will be new in Record Slide Show on PowerPoint for Mac:
Presenter video recording
You can now record a video of yourself to go along with slides that you are presenting. Draw your audience’s attention by making it feel like you are giving the presentation live.
Use the new recording toolbar right under your camera to configure, start, pause, and stop your recording. Playback what you’ve recorded and rerecord when necessary.
Presenter drawing recording
You can also now record notes taken with the pen or highlighter tool. Any drawing done in the recording state will be captured. When you or your audience member plays the presentation back, it will seem like you are drawing on the slides in real time.
Laser pointer recording
Similar to recording for the pen tool, you can now record your laser pointer movements while using Record Slide Show. Motion towards different portions of your slides to pull the audience’s attention.
Want to be among the first to use the new feature? Make sure you join our Office Insiders Program to get the first look at new features from Office.
Additional new PowerPoint features available today:
Record Audio
Recording audio for your PowerPoint presentation is easier than ever. Recent upgrades to PowerPoint for Mac make recording audio and inserting it into your slides simple with the new Record Audio pane.

Learn more about the experience here .
Export PPT as Animated GIF
Have you ever had an idea for an animated GIF but didn’t know where to get started? With the Export/Save As Animated GIF feature, you can create your ideas in PowerPoint! Use shapes, images, ink, animations, and transitions to create a wide variety of GIFs.

Learn more about how to use the experience here .
Link to this Slide
Have you ever been working with a colleague on a PowerPoint presentation, and wanted to send them a link to a particular slide? With the Link to this Slide feature, you can save time and avoid any confusion by creating a link that will open the file and take them directly to a specific slide in your presentation. Save your file to OneDrive, right-click on the slide you want to link to and select “Link to this Slide” to help your colleagues quickly access the location you’d like to reference.

Learn more about this feature here .
Mike Tholfsen
Principal Product Manager
Microsoft Education
This post was originally published on this site .
Related Posts

Inspiring students during Women’s History Month 2024

- Tips and guides
Comprehensive quick start guides for Microsoft Education tools

Reimagine Education: A digital event on March 6, 2024
Ai in education brings opportunity to life.
Watch Reimagine Education
Connect with us on social

Subscribe to our newsletter
Stay up to date with monthly newsletters from Microsoft Education.
School stories
Get inspired by stories from Microsoft Education customers.
Microsoft Learn Educator Center
Expand possibilities with educator training and professional development resources.
Contact sales
Connect with a Microsoft Education sales specialist to explore solutions for your school.
Discover a collection of resources to support a variety of educational topics.
How to record screen on a Mac
The ultimate guide for how to record screen on a Mac

When it comes to figuring out how to record screen on a Mac, you've got a few options, including a trick that will let you narrate your own video (my preferred choice). Capturing the actions on your MacBook screen might sound like magic or like something that should be really easy, but once you get a hang of it, you'll wonder how you lived without it.
For starters, this is how I show proof of all sorts of lottery drawings that I do for side projects, because when it's time to show that yes I used a number randomizer, this is a lot cleaner than recording my screen with my phone.
- How to use macOS — essential tips and tricks
- The best laptops right now
- MacBook Air vs Pro : What's right for you?
I've also used these steps to show my parents how to use things they're not as familiar with, so they can watch the best Netflix shows on their laptops. I've also shown my parents how to record screen on a Mac, so I can remote diagnose issues on their MacBooks, and solve their weird Wi-Fi issues when I can't get near their house.
No matter why you want to record screen on a Mac, once you've read both of our walkthroughs, you'll have everything you need to know. To decide where to start, think about if you'll want to edit the file immediately or not. If so, move to "How to record screen on a Mac with Quicktime."
How to record screen on a Mac with keyboard shortcuts

- Hit Command + Shift + 5
- Click Options to make sure your settings are correct.
- You can opt to show your cursor or hide it: select Show Cursor if you're teaching someone how to do something.
- Select Built-in Microphone (or any audio input device available) under Microphone if you want to narrate.
- Change the destination of your video under Save To
- Click the 4th icon from the left if you want to record an entire screen
- Click the 5th icon from the left if you want to capture a specific part of your screen (you'll need to select the region after you click this option)
- Click Capture or hit Enter
- When you're done, hit the Stop button in the Menu bar.
- Your screen recording will appear on your desktop , or wherever you chose to save it.

How to record screen on a Mac with Quicktime
- Hit Command + Space
- Type in Quicktime
- Select Quicktime Player
- Select "New Screen Recording"
- Click the little arrow next to the Record button.
- Select an audio source if you want to narrate.
- Enable "show mouse clicks" if you want your video to walk someone through the steps you took.
- Click to start recording screen on a Mac. You can also click and drag your cursor to record a part of the screen.
- Click the Stop button when you're done.
- Your recording will now show up as a Quicktime Player video you can edit using Trim.
More macOS tips
- How to screenshot on a Mac
- How to print screen on a Mac
- How to force quit on Mac
- How to copy and paste on a Mac
- How to show the hidden files in Mac
- How to uninstall apps on a Mac
- How to reset a MacBook Pro — and any other Mac
Sign up to get the BEST of Tom's Guide direct to your inbox.
Get instant access to breaking news, the hottest reviews, great deals and helpful tips.
Henry is a managing editor at Tom’s Guide covering streaming media, laptops and all things Apple, reviewing devices and services for the past seven years. Prior to joining Tom's Guide, he reviewed software and hardware for TechRadar Pro, and interviewed artists for Patek Philippe International Magazine. He's also covered the wild world of professional wrestling for Cageside Seats, interviewing athletes and other industry veterans.
Microsoft’s Copilot+ PCs can’t play many popular games — what’s happening?
ExpressVPN now supports the latest Arm Windows machines
How to use Gemini AI to create the perfect workout music playlist
Most Popular
- 2 My parents weren't convinced about AI until I showed them these 7 apps
- 3 7 student cleaning essentials for a fresher dorm
- 4 Forget sit-ups — build a stronger core and improve your posture with this 6-move standing dumbbell workout
- 5 'Beetlejuice Beetlejuice' review: A satisfying sequel and return to form for Tim Burton
Setapp stops service in Russia and Belarus
In response to Russia’s invasion of Ukraine, which was aided by Belarus, we terminate Setapp’s services in Russia and Belarus.
Our team is based in Ukraine and we see the atrocities of this war with our own eyes. If you seek truth, check these trustworthy sources .
Team Setapp
© 2024 MacPaw Way Ltd. 6 Maximou Michailidi Str, Maximos Plaza Tower 3, 4th floor, Flat/Office 401, 3106, Limassol, Cyprus
- Services & Software
Record your Mac screen the easy way. Here's how to do it
You don't need any fancy tools or apps to capture video of your Mac's screen; the feature is built right in.

Record the screen of your Mac with just a few clicks. Really, it's that easy.
Capturing the screen of your MacBook Air or iMac can be useful in so many ways. Whether you're recording a presentation for school, showing a loved one how to set up an app or documenting your fastest run in your favorite Apple Arcade game, screen recording can help.
Don't let the idea of capturing your screen intimidate you, though. MacOS comes with all of the tools you'll need to create a video recording of your Mac's screen, complete with audio. In fact, it's so easy to use, if you know how to take a screenshot on your Mac, you're already well on your way to being a pro at screen recordings.
Below I'll walk you through how to record your Mac's screen and adjust its settings to fit your needs.

We all have that one time when a screen recording would have come in handy.
How to screen record on your Mac
Every Mac comes with QuickTime Player preinstalled. It's the video player that opens up when you're watching a video you've downloaded or synced from your phone to your Mac. That same app also has every tool you'll need to record your screen.

If you're more comfortable opening QuickTime Player, there's nothing wrong with that.
There are two ways to start a recording. For me, the keyboard shortcut is the easiest, but I'll show you both methods so you can decide for yourself.
Use this keyboard shortcut, it's faster
On your Mac's keyboard, press CMD-Shift-5 at the same time. I usually press CMD+Shift and then just tap the number 5 key. When you do that, the Mac's screenshot toolbar will show up on your screen.
Open QuickTime Player to start recording
The longer way to open the screenshot toolbar is to open QuickTime Player. You can do that by going into your Applications folder and double-clicking on the app icon, or by pressing CMD+Spacebar and searching for QuickTime Player using the Spotlight tool.
With the app open, click on File in the menu bar followed by New Screen Recording .
Adjust the settings before you record your Mac screen
The first three icons on the left side of your Mac's screenshot toolbar will take screenshots, so we're going to ignore those for now. You can read more about them in this handy guide .
The next two icons are dedicated to screen recording. The first one is for recording your entire screen, while the second one with the dotted lines allows you to limit the recording to an area of your choosing. Click on either option to select how you want to record, then click on Options .

Tweak your settings before you press record.
Some of these settings apply to screenshots and recordings alike, such as where to save anything you capture, along with the timer that gives you a few seconds to get everything on your screen arranged before it's captured.
The Microphone option is what you'll want to adjust if you plan on capturing audio while you record your Mac's display. For example, if you're giving a presentation, it makes sense to use an external microphone or a pair of AirPods. If that's the case, this is where you'll tell the QuickTime Player what you want to use as a microphone.
Under the Options section, you'll find a setting that will cause an animated ring of circles, much like water rippling, to surround your cursor every time you click on something while you're recording your screen. Again, this is perfect for a presentation or even as a teaching tool.
When you're ready to record, click the Record button. A small stop sign-like icon will show up in your menu bar on the top-right side of your display. Click on that when you're done recording. A few seconds later, your video will show up, allowing you to use QuickTime to save, export or edit the clip before sharing.
Did you know you can also record the screen of your iPhone or iPad? It's true, and it's just as easy as on the Mac . If you're looking for more ways to take screenshots on your Mac, we have your back .
Services and Software Guides
- Best iPhone VPN
- Best Free VPN
- Best Android VPN
- Best Mac VPN
- Best Mobile VPN
- Best VPN for Firestick
- Best VPN for Windows
- Fastest VPN
- Best Cheap VPN
- Best Password Manager
- Best Antivirus
- Best Identity Theft Protection
- Best LastPass Alternative
- Best Live TV Streaming Service
- Best Streaming Service
- Best Free TV Streaming Service
- Best Music Streaming Services
- Best Web Hosting
- Best Minecraft Server Hosting
- Best Website Builder
- Best Dating Sites
- Best Language Learning Apps
- Best Weather App
- Best Stargazing Apps
- Best Cloud Storage
- Best Resume Writing Services
- New Coverage on Operating Systems
How to screen record on a Mac
It's easy to record your screen activity on Mac

- Quick steps
- Detailed steps
Final thoughts
● System: macOS Mojave or newer ● Tools: a MacBook or an iMac ● Skill Level: Novice
Knowing how to screen record on a Mac is a skill that will come in handy. That's especially if you use your MacBook or iMac for work presentations or content creation - although its uses extend far beyond work stuff.
Screen recording allows you to capture screen activity for later use, whether it's to save YouTube fitness videos you'd like to watch daily for your workouts, record an epic game session to show off to your friends, or retain a workshop or tutorial for those who couldn't attend. You can even use it to record an issue on your laptop for technical support to pinpoint the problem.
Despite having a lot of uses, it's surprisingly easy to do, too. In fact, it's so easy even a Mac newbie can do it, and we're here to show you how. You've spent a lot of money on the best MacBook or Mac on the market; learning this trick is one of the many ways you can maximize it.
Quick steps for screen recording on a Mac
- Press Shift-Command-5
- Tap either Record Entire Screen or Record Selected Portion
- If selecting Record Selected Portion , make necessary frame adjustments
- Press Stop when done recording
Step by step guide for screen recording on a Mac
1. press shift-command-5.

To get started you need to access the Screenshot toolbar, which not only lets you record your screen activity but also take screenshots. Be sure to prep everything you need for your video beforehand, just to make your video a little cleaner and easier to follow.
Accessing it is easy. Simply press and hold Shift-Command-5 , and the toolbar should appear near the bottom of your screen just above the Dock. This toolbar is separated into four sections, the first one housing the screenshots buttons and the second containing the screen record buttons.
2. Tap either Record Entire Screen or Record Selected Portion

The second section of the Screenshot tool bar will contain two buttons, the Record Entire Screen and the Record Selected Portion options .
Before you start recording, you should decide whether you want to record your whole screen or just a portion of it, the latter being the wise choice if you don't want the rest of your desktop in full display or if it contains sensitive information you don't want seen in the video.
When you've decided, tap on your choice .
3. Make necessary frame adjustments

If you've chosen the Record Selected Portion button, an adjustable frame will appear on your screen. This frame will determine the area of the screen that will be captured on video.
Make necessary frame adjustments by clicking and dragging the edges or corners.
Note that you're skipping this step if you select the Record Entire Screen option.
4. Hit Record

Once you've made the necessary frame adjustment (again, only if you've selected Record Selected Portion ), it's time to record. To do so, simply hit Record on the rightmost side of the Screenshot toolbar.
5. Press Stop when done
When you're done recording, simply hit Stop , which you'll find on the menu bar at the top of the screen. Your recording will automatically be saved as a .mov file on your desktop, but you will be given the chance to preview it and make edits as well.
The built-in Screenshot toolbar on macOS is not only readily available to all Mac users, whether you have a MacBook or an iMac AIO, but it's also incredibly user-friendly and streamlined, which is always the case with Apple proprietary apps. So much so you don't even need to have any prior experience in screen recording or making videos to successfully use it on your first attempt.
Bear in mind that you can also use the QuickTime Player to record your screen on a Mac instead; this is really your only option if you're using a version of macOS that's older than macOS Mojave. However, what you're using is truly out of date at this point, considering that support for Mojave ended in late 2021.
We highly recommend upgrading your macOS to the latest version that's compatible with your Mac model, though if you can't, Apple has a quick tutorial on how to screen record using QuickTime Player as well.
Get daily insight, inspiration and deals in your inbox
Sign up for breaking news, reviews, opinion, top tech deals, and more.
Michelle Rae Uy is the former Computing Reviews and Buying Guides Editor at TechRadar. She's a Los Angeles-based tech, travel and lifestyle writer covering a wide range of topics, from computing to the latest in green commutes to the best hiking trails. She's an ambivert who enjoys communing with nature and traveling for months at a time just as much as watching movies and playing sim games at home. That also means that she has a lot more avenues to explore in terms of understanding how tech can improve the different aspects of our lives.
Apple’s big Mac M4 reveal could happen in October, ahead of rumored on-sale date of November
Waiting for an iMac with a bigger screen? It’s en route according to rumors, but you might have to be very patient
Ubigi review
Most Popular
- 2 Windows 11’s 24H2 update is almost here — let’s talk about some of the features we’re expecting to see
- 3 These elite headphones mix planar magnetic and dynamic drivers for hi-res, noise-cancelling audio nirvana
- 4 DJI Neo leak gives us a taste of the drone's 4K video quality – and how noisy it might be
- 5 LG XBoom XO2T review: a groovy Bluetooth speaker that does the business sonically
- Vote: Reader’s Choice
- Meta Quest 4
- Google Pixel 9
- Google Pixel 8a
- Apple Vision Pro 2
- Nintendo Switch 2
- Samsung Galaxy Ring
- Yellowstone Season 6
- Recall an Email in Outlook
- Stranger Things Season 5
How to record a video on your Mac
When it’s time to record a video, you might whip out your smartphone or grab a dedicated camera , but you can also record video on your Mac directly. Since Apple introduced the original MacBook in 2006, all Macs come with their own webcam; that is, unless you’ve purchased the Mac Mini , which will require an additional purchase. Once you’re ready to record a video on your Mac, it’s quite simple, and we’ll show you how to get the job done with only a few clicks.
Preparing to record video
Recording video on your mac, extra features.
Before getting started, ensure that you have a webcam attached to your Mac. All MacBooks and iMacs have webcams built-in, but users with Mac Minis and Mac Pros will need to purchase an external webcam as an add-on. Installation is generally as easy as plugging the new webcam into an available USB port on your machine.
If you don’t already have a webcam, be sure to check out our guide on the best webcams you can buy . Additionally, you may be able to use a professional camera, such as a DSLR or mirrorless camera , from the likes of Sony, Canon, Nikon, Fujifilm, or others, with a bit of software or hardware tweaking .
Once you have confirmed that your Mac either has a built-in webcam or has an external webcam connected, you can begin the recording process. All Macs include Photo Booth preinstalled, an application that allows you to take photos and videos using your webcam. When ready to proceed, begin by opening the Photo Booth app. There are a few ways to accomplish opening an app within MacOS:
Option 1: Click on the Finder icon (a blue smiling face) in the Dock , navigate to the Applications folder, then double-click on Photo Booth .
Option 2: Invoke Spotlight by tapping CMD + Spacebar on your keyboard, type the phrase Photo Booth , and click Enter .
Option 3: Open Launchpad by tapping F4 on your keyboard, then scroll through the available apps until you find Photo Booth — click on it once.
Switching into video mode
Once Photo Booth is open, you will see a preview of what your webcam sees, but it is not recording yet. First, we need to put Photo Booth into video recording mode; we can do this by clicking on the video icon in the window’s lower-left corner. Once you are in video mode, the red recording button will show a video camera icon.
Recording your video
Step 1: Open Photo Booth .
Step 2: Select the Video Mode by clicking on the photo of the video camera in the lower-left corner of the screen.
Step 3: Begin recording by pressing the red record button.
Step 4: Stop recording by press the red button once again.
Step 5: Click on the video thumbnail in the filmstrip to preview it once finished. Right-click the thumbnail and choose Export and save it anywhere.
You can monitor the amount of time recorded in the bottom-left corner of the screen, but your recording time is only limited by the amount of free storage space available on the hard drive or solid-state drive in your Mac.
To review the video you just recorded, click on the thumbnail of it in the filmstrip below the recording window. To exit the preview mode, press the gray circular button in the Photo Booth window’s bottom-center. You can always access the recorded video by selecting Photo Booth as a source when in Finder, or merely right-click on the thumbnail preview and click Export to save it elsewhere.
Photo Booth offers a few extra features for those who wish to have fun with their videos and photos. If you want to add a fun effect to your video, click on the Effect button in the lower-right corner, then click on the effect you wish to use. A few pages of effects are available, so be sure to use the Left and Right buttons at the bottom of the window to view them all. Click on the Normal effect option in the center of the screen to remove all effects.
One last tip to note is that if you have multiple webcams or microphones attached to your Mac, you can easily switch between them by navigating to the Camera menu shown in the Menu bar at the top-left of your monitor.
Editors’ Recommendations
- There’s more good news about the upcoming M4 MacBook Pros
- The best MacBook to buy in 2024
- Best MacBook deals: Get an Air for $605 and save on M3 MacBook Pro
- Best Mac Mini deals: Save over $100 on an Apple desktop
- The new Mac mini may be almost as small as the Apple TV

One of the big reasons that Apple is popular is because of its very straightforward ecosystem, which lets you use all your devices almost as if they're one, making it great for those who want something that isn't difficult to use and learn. Luckily, Apple also makes some of the best wireless earbuds, the best smartwatches, the best laptops, and even the best tablets, so if you're in the Apple ecosystem, you can expand without having to worry about buying something subpar. Of course, higher quality does mean having to spend more money, and if you're planning to grab something from Apple, then you'll likely want a deal.
That's why we've gone out and searched through various big retailers to find you some of the best deals we can find. That includes everything from the MacBook deals, AirPods deals, Apple TV deals and Apple Watch deals to the AirTag, so hopefully, you can find the perfect deal that fits your needs and budget. Apple AirTag (4-Pack) -- $80, was $99
The best Macs have a reputation for being easy to use, and as someone who switches between Windows and macOS every day, I can confirm that that reputation is well-earned. But macOS isn’t just a straightforward, easy-peasy system with about as much depth as a puddle -- it’s also a brilliant platform for power users.
A lot of that comes down to the thriving ecosystem of apps that are available on macOS. Load up your Apple computer with a few choice selections and you’ll be able to get so much more out of it than you ever thought possible, from automating tedious processes to making clever use of AI and everything in between.
As spotted by the folks at iMore, the macOS Sonoma 14.6 update released on July 29 has added support for two external displays on the M3 MacBook Pro. People have been waiting for this since the M3 MacBook Air launched in March with this feature, and now it's finally here.
Apple confirmed its intentions to bring this update to the M3 MacBook Pro around the time the M3 Air launched, but it's unknown why it took so long. The feature shares the same limitation as the M3 Air -- you can only use two external displays while the laptop is closed. This is different from models using the M1 Pro, M2 Pro, or M3 Pro level chips that can handle two external monitors and the native display all at once.
Unsupported browser
This site was designed for modern browsers and tested with Internet Explorer version 10 and later.
It may not look or work correctly on your browser.
- Presentations
- Presentation Techniques
How to Record a Google Slides Presentation for Video Playback
When you work in Google Slides, you’re really building content to share with the world. Whether your topic is informative or persuasive, shareability is key. It helps to learn how to record a video on Google Slides so that you can save and share your meeting.

Not everyone can attend every single meeting. Therefore, you need to know how to record a Google Slides presentation. This way, you can share it with an audience so they can review on their own schedule. This is especially useful if you work with global teams spread across many time zones.
Why Record a Presentation on Google Slides?
Google Slides is a popular online app for creating presentations. Working in your web browser, you can build stunning slide decks quickly. With the online nature of Google Slides, it’s built for collaboration. You can work with teammates around the globe to create presentations.
You need to build slide decks that audiences can experience when they've got the time to focus. It’s essential to record slides with audio and video. When you do, you can create a shareable video copy of your presentation.
Additionally, Google Slides makes it easy to share presentations. You can easily invite viewers and collaborators to your slides. But what if you’re not able to present in real time? How can you share your presentation for review later?

Plus, recording a Google Slides presentation gives you a more robust delivery than simply emailing a copy of your slides. With a recording, you can capture your narration, annotations, and more. This way, you provide the full experience that an audience would enjoy when you present in real time.
Once you know how to record a video on Google Slides, you’ll enjoy another key benefit. With a shareable video copy, users can watch your presentations without being online. Saved Google Slides videos can be played back on almost any device - no internet connection needed.
As you can see, it’s important to know how to record a presentation on Google Slides. When you do, you can reach a worldwide audience. They can enjoy your content when it’s most convenient for them. Let’s get started!
How to Record a Google Slides Presentation
We’ve explored the benefits of recording a video on Google Slides. When you know how to make a Google Slide into a video, you unlock vast abilities to share your content. Break away from busy calendars so that everyone can learn and understand your content.
Let’s learn how to record a Google Slides presentation in just a few quick steps. Once you learn, you’ll find yourself using this easy process every time you build a slide deck in Google Slides.
1. Build Slides With a Premium Template
Before you record a Google Slides presentation, you need to build a winning slide deck. This means that you need a stylish and engaging design to convey your message.
The best way to start is with a premium Google Slides template from Envato Elements. Elements has thousands of options to choose from. For a flat monthly rate, you’ll enjoy unlimited downloads of each and every one.

For this tutorial, we’ll use the beautiful Commerce Google Slides Template from Envato Elements. Download it today to follow along.
With the template open in Google Slides, you can quickly fill in your content. Of course, your presentation video capture happens at the end of the design process. Be sure to finish making all of your edits, and always record your final version.
2. Launch Screencast Software and Configure a Recording
Let’s learn how to record a video on Google Slides. For this, you’ll need to install screen recording (screencasting) software. That’s because Google Slides doesn’t have recording features built in. Fortunately, for screencasting, there are many great options.
For this example, we’ll use Telestream’s Screenflow , built for Mac. It’s a great option with a full feature set. But you can easily use your favorite screen recorder for this process. Just ensure that it offers the ability to record both audio and video.
With Google Slides open in the background, go ahead and launch Screenflow. You’ll see a settings menu appear in the middle of your screen. Here, you can specify the dimensions for your screen recording. By default, Screenflow uses 1080p HD. You can elect to use this or alter the dimensions to best fit your screen.

When you’ve made your dimension choices, click on the Page button in the lower center to launch a new document. You’ll see the full Screenflow app launch, where you can now capture your Google Slides audio and video recording.
Next, click on the Screenflow icon at the top of your screen on the toolbar. It’s shaped like a small camera. From the drop-down menu, choose Configure Recording. On the New Recording menu, ensure that you select the display that you want to record. Here, that’s our Built-in Retina display.

Then, be sure to use the lower Record menu to specify the audio input you want to use. Here, the default option works for us: MacBook Pro Microphone. This way, you’ll be able to capture both audio and video recordings of your Google Slides presentation.
Now, you’re ready to record. You've got settings in place to ensure that your presentation captures perfectly. Now, let’s jump back to Google Slides and learn how to record a presentation on Google Slides.
3. Present and Record Google Slides Presentations
With your Google Slides presentation open, it’s time to record the playback. Remember, your recording will capture everything shown onscreen. This means that viewers will see each slide play back in video format.
Plus, your recorded narration will be captured, too. Be sure that you’re working in a quiet space to ensure background sounds won’t record when you present. As you learn how to record a presentation on Google Slides, remember to keep audio distraction-free.

Now, let’s record! Begin by clicking again on Screenflow’s Camera icon in your menu bar. Then, choose Record . A window appears onscreen counting down five seconds until the recording starts.
In Google Slides, go to View > Slideshow on the menu bar. This displays your slides in full screen mode so that you can present.

Your recording starts, recording your screen and your microphone. From here, present. This is exactly how to make a Google Slide into a video. Follow your normal process knowing that your finished format is a shareable video file.
Work through each slide in turn, recording your narration, just as you would speaking to a live audience. As you move across slides, everything you see and say will be captured in your Google Slides recording.

Finished? Click on the Screenflow Camera icon again, this time choosing Stop Record. A menu appears asking if you want to name your recording and place it in your video timeline.
Make your selections, and you’re all set. In moments, you’ve captured a full audio and video recording of your new Google Slides presentation deck.
4. Export and Share a Google Slides Video Recording
You’ve just learned how to record a video on Google Slides! As you can see, it’s easy to capture a recording. Now, it’s time to save and share your recorded Google Slides with your global audience.
Our final step here is to export a finished copy of the Google Slides recording. Back in Screenflow, go to File > Export. The Screenflow Export menu launches.

First, you’ll be asked to give your Google Slides recording a name at the top. By default, Screenflow uses the popular MP4 format for video sharing. This is a widely used format that’s viewable on many devices, including phones. It’s a good choice here.
Additionally, you can change where to save your video file. And below, options exist to change the video encoding quality and more. In general, it’s best to use the default settings. By doing so, you can be sure that you’re exporting a usable, viewable video file.
When you’re finished with these options, click Export in the lower right corner. Screenflow saves your finished Google Slides video in MP4 format.
Just like that, you’ve learned how to record a presentation on Google Slides. Now, you can share your slides with the world. Audiences will thank you for the ability to enjoy your presentation at times that work best for their busy schedules.
The Best Source for Top Google Slides Presentation Templates (For 2023)
Envato Elements is your top source for premium Google Slides templates in 2023. For a flat monthly rate, you can download and use as many of these stunning templates as you want. Plus, Elements includes millions of other digital assets. As a subscriber, you’ll enjoy unlimited fonts, stock photos, audio, and so much more.
Elements is the ultimate resource for creatives in 2023 and beyond. The unlimited downloads offer gives you limitless flexibility. You’re free to try out as many designs as you want until you find the perfect one.
You may find free Google Slides templates online. But remember, these are basic, no-frills designs. For stunning creative styles and features, it pays to go premium. Elements templates are designed by creative experts with your needs in mind.
Explore Google Slides Themes

With an Envato Elements template, you’ll enjoy features like:
- Easy-to-edit layouts. With premium templates, you benefit from professional styles. Yet, you’ll still enjoy complete creative control. Sleek, modern text styles. Bold font layouts help text look its best.
- Stunning charts and graphs. You can bring data to life with these powerful and stylish illustrations.
- Image and content placeholders. It’s easy to add content with placeholders, which you can swap out for your own photos, videos, and more.
As you can see, you can’t afford to miss out on Envato Elements. Join today and start downloading your favorite Google Slides templates and more. It's a major assist as you learn how to make a Google Slide into a video.
Record Google Slides Presentations and Share With the World
Now that you know how to record a Google Slides presentation, how will you start sharing slides? Imagine the new possibilities. You can easily produce fully featured videos that connect with viewers across this globe.
You’ve learned how to record a video on Google Slides. Now, it’s time to put your new skills to the test. In moments, you’ll be sharing your own Google Slides videos. It’s a top skill in 2023, and now it’s in your creative arsenal.

How to Screen Record on Mac With Audio | Full Step-by-Step

Looking for a way to effortlessly screen record on your mac with audio?
You’ve come to the right place. Believe it or not, this task is as easy as can be. In fact, there’s not merely one way to create your screen recording.
Whether you’re a pro content creator or simply want to make a quick video, we have the answers you’ve been looking for. Read on for our advice.
Can you screen record both audio and video on Mac?
The short answer to that question is yes. There are a few different ways that you can record both audio and video on Mac. You may choose to use the built-in Screenshot toolbar or alternative screen recording software to create your content. Which option you choose will depend on the quality recording you need. In this guide, we will quickly walk you through some great options.
How to screen record video and audio on Mac using keyboard shortcuts
Want to screen record video and audio on Mac without using a particular app? You can use the QuickTime Player Screenshot toolbar. This option is rudimental, but it helps you to get the job done. You can use this method when you are in a rush or need to create a quick screen recording. If you want to get started, follow the steps that we have outlined here:
Step 1: Start by pressing “ Shift + Command + 5” on your keyboard.
Step 2: This will bring up the Screenshot toolbar, where you can see specific onscreen controls.
Step 3: Select options in the toolbar, and then under Microphone, check your Mac microphone (or an external microphone). Then, press Record.
Step 4: When you are ready to stop recording, press “Command + Control + Escape” . You can also press “Shift + Command + 5 again” and then select “Stop Recording” .
The video that you have captured will appear on your desktop. If you have followed the above steps, the screen recording should include audio as well as the video.
How to screen record video and audio on Mac using QuickTime
QuickTime Player is an Apple product that was once preinstalled on all Mac devices. Your Apple MacBook likely already features the application. Apple discontinued the multimedia program and has since replaced it with AV Foundation. However, QuickTime Player is still downloadable online and can help you to screen record video and audio on a Mac device.
While the program is relatively basic, it includes a range of straightforward features. If you want a quick solution to your screen-recording conundrum, follow the below steps:
Step 1: Open QuickTime Player on your Mac. You can find it in your Applications folder. (If you can’t see it immediately, use the search bar at the top.)
Step 2: When the application is open, go to “File” and then “New Screen Recording” . You will see a full-screen Recording window at the top of the screen.

Step 3: Next up, click the small arrow button next to the Record button. You can then choose a microphone (either your internal microphone or an external one).
Step 4: When you are ready, click the “Record” button to get started. You should then do one of the following to begin the recording session:
- Record the entire screen by clicking anywhere on your screen.
- Create a box by using the drag function on the screen. Then click the “Start Recording” button to record within the box alone.
Step 5: Record your content. You can speak — or use other audio — while you are making the screen recording. This will record through your chosen microphone input.
Step 6: When you are ready to finish your session, simply press Stop Recording. Alternatively, you can press “Command-Control-Esc” (Escape) to exit the recording.
Step 7: Once you have done the above, QuickTime Player will automatically launch and show you the recording. You should review it and ensure that the sound quality is right before editing or saving the recording on your Mac device.
How to screen record on Mac with your webcam using Riverside
Riverside is an affordable and straightforward remote recording platform. Capture astounding, top-quality content in up to 4K video and 48kHz audio. You can use the software to create your own virtual recording studio. Invite guests to join you in the studio, and each participant’s audio, video, and screen automatically records onto separate tracks. Use the screen-sharing function to make a clear, crisp recording of your screen while also capturing high-end audio content. There’s also a presentation recorder that allows you to upload slides and assign controls to any participant.
When you have finished recording your video, there are plenty of ways to optimize your video. The Editor makes it easier than ever to put your stamp on your content by arranging the layout, adding your logo, and trimming your video. With text-based editing, trimming your video becomes as easy as deleting text. The platform also uses AI transcription technology to create highly accurate transcripts which you can also use for captions.
If you want to screen record on a Mac using Riverside, follow the simple steps below:
Step 1: Sign up for Riverside and log into your account. Click the “+ New Studio” button to launch your own virtual studio.
Step 2: Name your studio and then select “Audio & Video” .
Step 3: When you are ready, press “Enter Studio”, and it will take you to a new screen.
Step 4: Select whether you are using headphones and then use the dropdown menus to make sure your sound and camera input is correct.
Hint: If you are using an external microphone, make sure it is selected at this point!
Step 5: Press “Enter Studio” again to begin your session.
Step 6: Click the “Share” button at the bottom of the screen and then click “Screen” .
Step 7: A pop-up box will appear. You can select either browser tab, window, or entire screen and then press “Share” .
Note: You will only be able to share audio from your computer if you select the browser tab.
To share the audio from your computer, toggle on “Also share tab audio” and then click “Share” .
Alternatively, you can record audio through your microphone while presenting your screen recording.
Step 8: Press “Record” and then create your video.
Step 9: When you finish recording, click “Stop” and wait for all of your recording files to upload.
Step 10: You can then press “Leave” . You will leave the studio and enter another lobby. Wait for your recording to upload successfully.
Step 11: Save your video to your Mac. Press “Export” at the top of the screen and choose from the options in the dropdown. Click “Export” again to download your video.
What screen recorder is best for recording on Mac with audio?
Now that we’ve gone through the simple steps you can follow to screen record on your Mac, let’s talk about which program is the best. The screen capturing app or software you choose will depend on your needs. Here’s what you need to know about the two that we have highlighted:
%20(1).webp "record presentation with video mac")
If you want to create a slick screen-recording that boasts flawless audio, using Riverside is the answer. Simply enter your own virtual studio and start your recording session. With the flexible platform, you can share your screen with ease. Present your screen recording, add real-time commentary, or simply record the audio from the screen with ease. When you have done all of the above, use the Editor to finalize your project. Let’s take a look at some of Riverside’s additional features now:
- Highly accurate AI Transcriptions available in 100+ languages, straight after recording
- Create ultra high-quality recordings with up to 4K video and 48kHz audio resolution
- Speaker detection so you can easily navigate through your transcript
- Automatic audio fine-tuning with background noise removal and level normalization
- Text-based Editor so you can cut and adjust your recordings as easily as reading through a text transcript.
- Record with up to 8 participants at the same time, no matter where they’re located.
- Stay on track with a built-in teleprompter and script feature in your studio
- Spice up your recording with sound effects, or videos using our Media Board
- Presentation recorder to record your entire session
Best for: High-quality, professional screen recordings with crisp audio
QuickTime Player

While Apple discontinued the QuickTime Player some time ago, it remains a firm favorite with Mac users. Aside from allowing you to screen record on Mac with audio, the app also has basic video editing features . You can trim, split, and rearrange clips with ease, for example. However, it’s worth noting that this free software lacks some of the more complex features you may be looking for, such as automatic AI-powered transcriptions.
Best for: Quick screen recordings with audio on a Mac

Loom is a free screen recorder extension for Mac devices. You can download the extension for your Chrome web browser. When you’ve done that, simply enable it in the top right corner of the screen. The extension includes screen recording for your voice, computer audio, and video. You can record videos in up to 4K quality and trim and stitch your recordings together. If you’re looking for a third-party extension, you can try this one.
Best for: Simultaneous audio and voice recording
FAQs on How to Screen Record On Mac (with Audio)
Can QuickTime record screen and audio?
Yes. If you want to screen record with audio in QuickTime, you need to set it up properly. Once you have opened the program, click on the small arrow button next to the Record button. You can then select which microphone you want the software to use when recording.
How do I make a video of my computer screen?
On a Mac, you can use QuickTime, the Screenshot toolbar, or a third-party app, like Riverside. To use the Screenshot toolbar, simply click “Shift + Command + 5” to get started. You can then use the “Options” menu to select the microphone you want to use.
Looking for a more in-depth guide? Check out our full guide above for details of how you can use either QuickTime Player or Riverside to screen record.
Where do screen recordings go on Mac?
If you are using the Screenshot toolbar, your screen recordings will automatically save to your desktop. When using QuickTime Player or Riverside, you can choose where to save your screen recordings when you export or share them.
Can you record your screen and webcam together?
Yes! With the Riverside platform, screen record and record from your webcam on Mac at the same time. To use this feature, get a free account on the platform and launch your virtual studio. You can share your screen while presenting to the camera seamlessly. The platform uses a split-screen format that looks slick. Create high-quality audio and video content now.
Stephen Robles
is a video producer with over 15 years of experience in podcasting. He runs AppleInsider’s podcast and is your handbook for tech gadgets, video production, and recording equipment! Find him on Riverside’s YouTube channel, where he educates over 20K subscribers.
Table of contents:
Try Riverside today
Record in studio quality without the studio. Transcribe, clip, and edit within seconds.

Keep reading
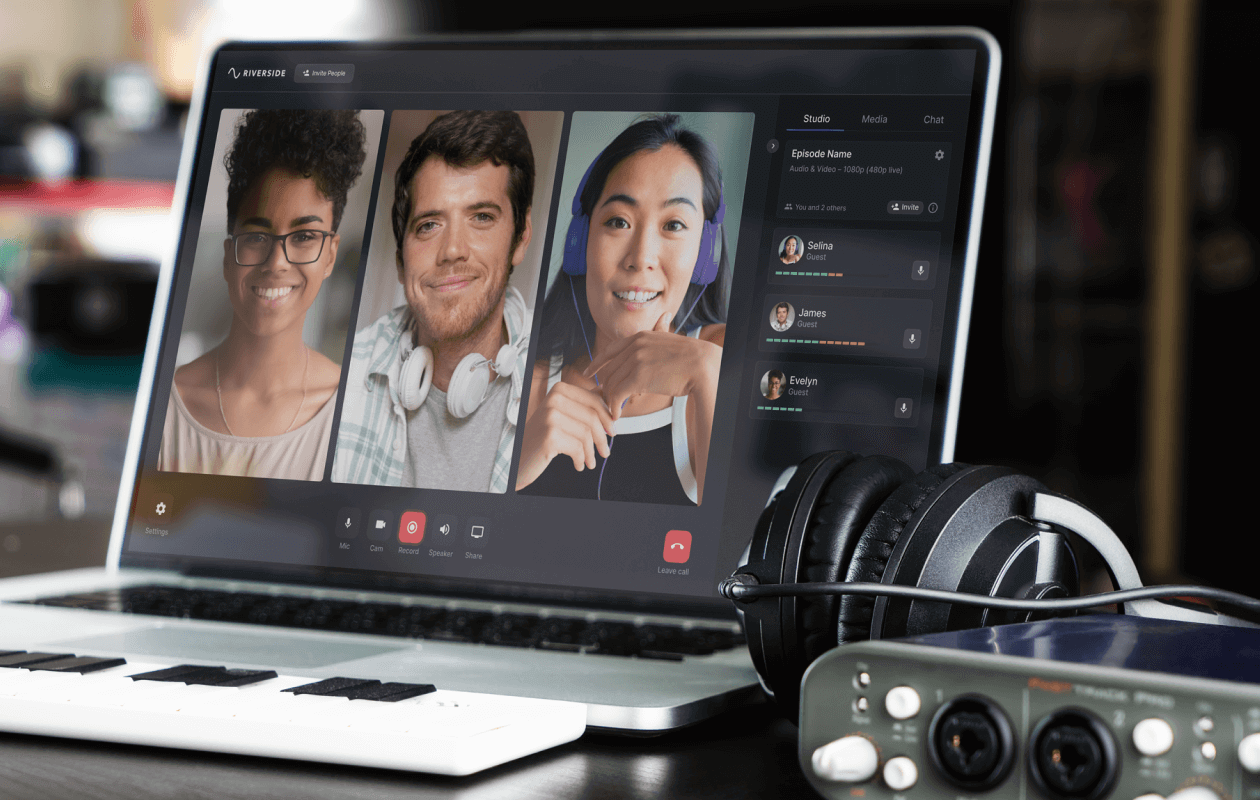
Riverside resources
Screen recorder.
Easy-to-use HD screen recorder with local audio and video recordings, simple editing tools, and customization.
Easily record your screen and presentation slides.
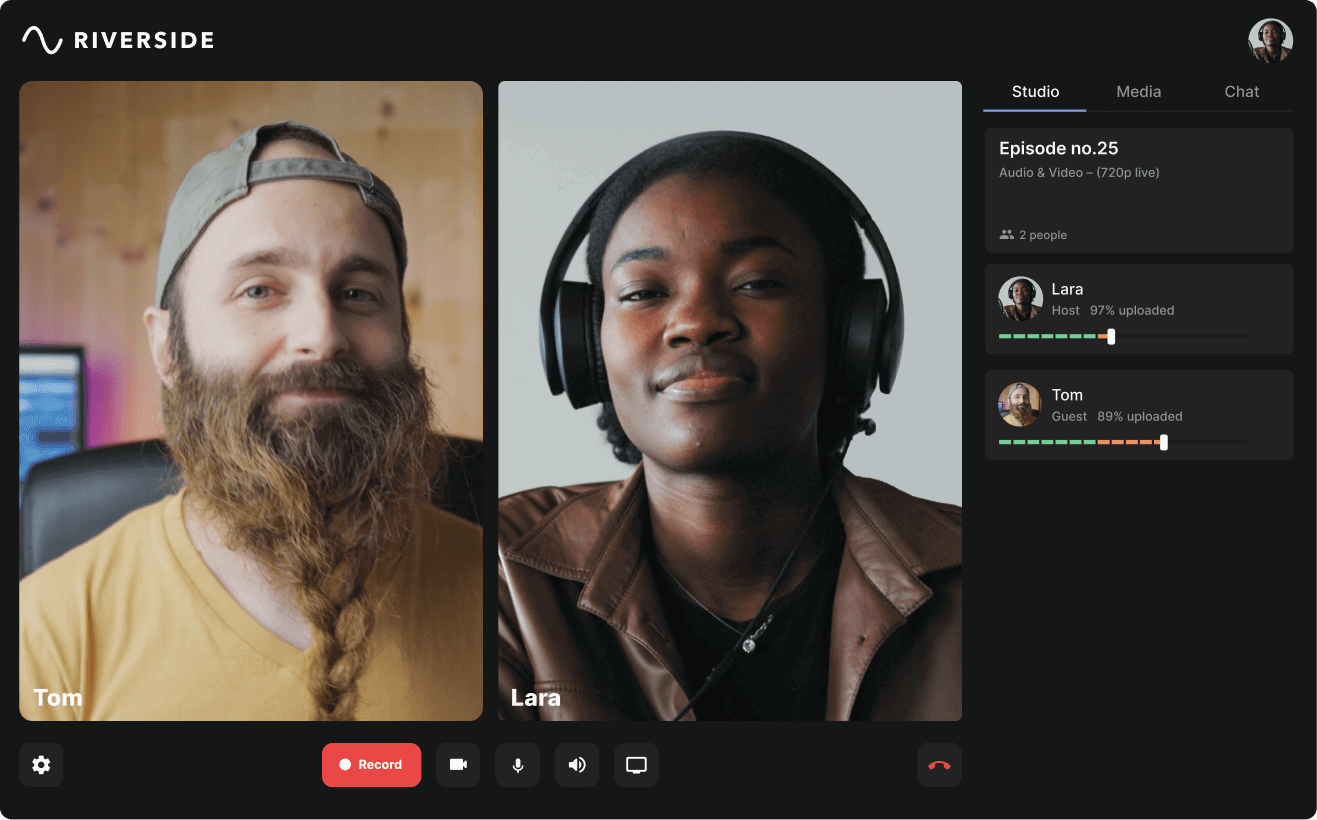
Online video recorder
Riverside’s video recorder lets you record in HD anywhere, on any device, no expensive equipment needed.
Record high-quality video anywhere, on any device.

Start creating with Riverside

Podcast guides
© 2023 RiversideFM, Inc.

Jul 11, 2023
Elevate your presentations with Recording Studio in PowerPoint for Mac
Ridhima Gupta
- Add our blog to your RSS feed reader" href="/rss/blog.xml" data-bi-name="RSS Subscription" data-bi-id="rss_feed" data-bi-bhvr="120" data-bi-socchn="RSSSubscription" title="Microsoft 365 Insider Blog RSS" target="blank" class="d-inline-block">
Hey, Microsoft 365 Insiders! My name is Ridhima Gupta, and I’m a Product Manager on the Office Video team. I’m always looking for ways to help you tell your story in the most compelling way, which is why I’m excited to introduce you to Recording Studio in PowerPoint for Mac!
Elevate your presentations with Recording Studio in PowerPoint for Mac
Are you anxious before you give a presentation? Do you wish you could present like a pro? With Recording Studio, you can alleviate your presentation anxiety and present like a professional. Just record your presentation and share it. You can do it all asynchronously, at your own pace, in your own words, in your own space. No more worrying about coordinating schedules or finding the perfect meeting time.
Say goodbye to boring, static slides and say hello to the power of video!
How it works
- Open the PowerPoint presentation for which you want to record a video to share.
- In the top-right corner, select the Record button, or select Record > From Beginning or Record > From Current Slide .
NOTE: To record engaging and dynamic camera layouts, design your slides with cameo object by select Record > Cameo .

- To personalize your recording view, select the Views

- You can choose to record your video or just your audio by using the Camera and Microphone
- You can also blur your background to help your viewers focus on your message by selecting Camera > Blur Background .

- When you’re ready, select the Record button.
NOTE: All animations, transitions, and inking on the slide are also recorded.
- To preview your recorded video, select the Play
NOTE: If you’re not happy with your recording, you can delete and re-record.

- When you’re done, select Record > Export as Video to export your presentation as a video.

Tips and Tricks
- You can use keyboard shortcuts to easily record your video in Recording Studio. Select the Tips button to view the full list of shortcuts available.
- Noticed a typo on your slide? Don’t worry! You can correct the typo and export again without re-recording your video.
- Can’t make it to a meeting where you need to present? Record your video on the slides to present even when you’re not there.
Requirements
- You must use a computer equipped with a webcam and microphone to record audio or video in Recording Studio.
- You must give camera permission to PowerPoint in your computer’s privacy settings.
Availability
This feature is rolling out to Insiders running Beta Channel Version 16.75 (Build 23060201) or later.
Don’t have it yet? It’s probably us, not you.
Features are released over some time to ensure things are working smoothly. We highlight features that you may not have because they’re slowly releasing to larger numbers of Insiders. Sometimes we remove elements to further improve them based on your feedback. Although this is rare, we also reserve the option to pull a feature entirely out of the product, even if you, as an Insider, have had the opportunity to try it.
We hope you love this PowerPoint feature. To submit feedback, please click Help > Feedback and let us know what you think.
Sorry, JavaScript must be enabled to use this app.
How to Record a Presentation with Webcam, Narration, and More

Justin Simon

Table of contents
- Benefits of Recording a Presentation
How to record your presentation (with Snagit)
How to record a presentation from powerpoint with audio and webcam, how to turn your powerpoint presentation slides into a video.
- How to edit a presentation video (in Camtasia)
Recording a PowerPoint Presentation, the FAQs
Subscribe to techsmith’s newsletter.
Everyone has, at some point, put a load of time and effort into creating the perfect PowerPoint presentation, only to use it once or twice. But isn’t it a shame for all that hard work to be discarded so quickly? Is every slide deck destined for deletion after just a couple of uses?
Isn’t there a better way to make the most out of your presentations? Well, yes. Yes, there is.
Rather than simply creating and presenting your work once or twice, recording your presentations can give them a new lease of life. Whether it’s a data report or a self-recorded PowerPoint, you can record a presentation in real-time, or in advance to make it available on-demand.
In this guide, we’ll explore two distinct ways of recording your presentation. First, we’ll discuss how to record a presentation from PowerPoint with audio and webcam, and then we’ll look at how to turn your .ppt slides into a video.
Benefits of Recording a Presentation
As well as there being many different ways to record a presentation, there are also many benefits of recording them. So, before we show you the ‘how,’ let’s talk about the ‘why.’
- Encouraging asynchronous communication : One key benefit is fostering asynchronous communication . By recording presentations, you’re letting your audience engage with the content in their own time, breaking the constraints of time zones and scheduling conflicts. This also ensures your viewers can absorb information at their own pace, and revisit it as needed.
- Boosting SEO : You can use your presentation to create a YouTube video and share it on your website to increase your online visibility and attract prospective customers. This can be a great way to expand your audience, increase web traffic, and establish yourself as an expert in your field.
- Perfecting your presentation : Whether it’s in-person or over Zoom, you don’t get second chances with live presentations. However, a pre-recorded keynote lets you perfect the content and the narration before anyone sees it. This is a great way to combat stage fright while honing your presentation skills and building confidence.
With this in mind, turning your slides into a video is a no-brainer. It’s an easy way to grow your audience and make the information you’re sharing more accessible and easier to digest.
Video messages > meetings
Record your screen and camera with Snagit for quick updates and feedback.

Depending on your audience and the type of presentation you need to deliver, TechSmith’s Snagit could just be the perfect tool for recording your PowerPoint. With its user-friendly interface and advanced features, Snagit is ideal for capturing top-notch presentation videos, in just a few clicks.
Now, there’s no denying that presentations are better when you can see the presenter… Fortunately, Snagit lets you capture your screen and webcam at the same time to create a Picture-in-Picture video.
In this section, we’ll guide you through the steps to record your presentation and webcam with Snagit.
Step 1: Open video capture
First, open Snagit and navigate to the Capture window. Select the Video tab, and start by clicking the big red Capture button.
Step 2: Select a recording area
Next, you’ll be prompted to choose which parts of your screen you want to record. Use Snagit’s orange crosshairs to select a specific region, window, or your entire screen.
Step 3: Configure recording settings
With the Video Recording toolbar, you can set options like Cursor Capture and Effects, System Audio, and Webcam.
If your webcam isn’t showing, click on the webcam icon. If you have an external webcam, select the one you want to use by clicking the dropdown arrow next to the webcam icon.
Step 4: Adjust your webcam
Next, adjust your webcam options to ensure your Picture-in-Picture recording looks how you want it. Here you can change the Picture-in-Picture placement as well as the shape and size of your webcam recording. You can even toggle between Picture-in-Picture and fullscreen webcam modes as you like.
The best part? You can make these adjustments even while recording.
Step 5: Manage recording
When you’re ready to roll, hit the Record button and click the Stop button when you’re finished. It’s that simple!
And remember, if there’s an interruption (like an unexpected visit from the mailman), just hit Pause. It’s okay to take a break — your video won’t be ruined by a little interruption.
Step 6: Edit your video
Once you’ve finished recording, Snagit will automatically open your video in the Snagit Editor, which is super easy to use. From here, you can make light edits to the footage as needed.
For example, if you need to cut or trim your footage , you can! Here’s how:
- Set Start Point : Drag the Start handle (green) on the timeline to your desired starting point.
- Set End Point : Similarly, drag the End handle (red) to where you want to end the cut.
- Review the Segment : Before making any cuts, you can review the segment by dragging the Playhead (white) left and right across the timeline. This ensures you’re only cutting the footage you intend to.
- Make the Cut : Once you’re satisfied with the selection, click the Cut button, which will pop up once you’ve made a selection.
And that’s all there is to it! If you want to go the extra mile, you can also use Snagit to save individual frames of your video as images , which can be used to create a thumbnail for your video .
Record your screen with Snagit
Snagit makes it easy to share quick updates and how-to’s by capturing exactly what’s happening on your screen.

Now, Snagit is great for recording less formal videos in a flash, but if your presentation is intended for a particularly large or important audience, you might be looking to create something more polished. This is where TechSmith’s Camtasia comes in.
Camtasia is one of the smartest and most intuitive pieces of editing software out there, but it also makes for a pretty nifty screen recorder too. Camtasia is great for recording presentations when you need more control and editing powers over the final product.
But best of all, Camtasia streamlines the process by letting you record your presentation and voice over directly within PowerPoint.
Step 1: Set up your presentation video recording
If you’re a Windows user, you’ll have the option to include a PowerPoint Add-in Toolbar when you install Camtasia. While this feature isn’t currently available on MacOS, the Camtasia Add-in Toolbar allows you to start, stop, and control your recordings from within PowerPoint — so you don’t need to switch between applications.

Just open the presentation you want to record and locate the Add-in toolbar under the Add-ins tab.
Don’t see the add-in toolbar? Go to File > Options > Add-ins, to enable it. Click on the Manage drop-down, select Disabled Items, then click Go. If the Camtasia Add-in is listed, select it, and click Enable.
If you’re an Apple user, don’t panic! You can still record your screen (with audio) on a Mac using Camtasia, and it’s just as easy. Alternatively, you can skip ahead to the next section and import your slides directly into Camtasia.
Step 2: Customize your recording options
Now let’s walk through each of the options on the toolbar before we begin recording.

Record audio
The microphone button controls whether or not audio is recorded as part of your presentation. When you enable it, you’ll be able to record your narration using a microphone.
If you are planning to record audio, this is where you’ll select your microphone. If you want to record great audio , we suggest using an external microphone, rather than the one that’s built into your laptop.
Some of the best microphones for recording video are likely to be less expensive than you think. But, if you’re on a shoestring budget, even the mic that’s built into your headphones could produce better audio than your laptop.
Once you’re set up, be sure to test the mic and adjust the volume slider as needed. You’ll also need to decide whether or not to record your system audio, which is any sound that comes out of your speakers, such as email notifications.
Record webcam
If you have a webcam, you can also record your camera during the presentation to create a Picture-in-Picture clip — just as you can with Snagit!

To customize even more of the recording settings, click the Recording Options button. Here you’ll find settings that let you record with a watermark and adjust your video frame rate . There are a few more options too, but the default settings should work just fine.
When you’re ready, click OK to close this window and save any changes made.
Step 3: Record your presentation
The final step is as simple as clicking the Record button in the toolbar. This will launch your slides into the Presentation Mode and start recording.
When you exit Presentation Mode or reach the end of your slideshow, you can either continue recording your screen, or stop recording and save your file. Pretty easy right?
Before you get started, let us show you another way to turn your presentation into a video, without recording your desktop .
Another way to create a video from your presentation is to import your PowerPoint slides into Camtasia. This way you can adjust how long each slide appears on screen, as well as add Behaviors and Annotations to personalize your presentation and highlight important information.
By importing your slides into Camtasia, and recording your voice over separately, you get a lot more flexibility with the editing process, which means you have more control over the finished article.
If you do decide to record your audio separately, you might want to take a look at TechSmith’s Audiate . This advanced audio recorder will transcribe your voice over in real-time and let you edit the audio file as if it were a text-based document. We don’t want to brag, but it’s probably the best way to add a voice over to a PowerPoint .
Regardless of how you decide to narrate your PowerPoint, here’s how to turn your presentation into a video:
1. Import your PowerPoint slides
First, start by importing your PowerPoint slides directly into Camtasia. Once your media is imported, you can edit it by dragging your slides into the Editing Toolbar.

You can now add the images to the Timeline, and edit them like any other media in a Project.

If you drag your slides to the Timeline, the slides will be placed in the order of the presentation, each with a default 5-second duration.

With your presentation on the timeline, use Ripple Move to create space in between slides to adjust the timing of each one. To do this, hold shift, then click and drag.

Once you’ve imported your slides and adjusted the duration of each one to correlate with your voice over, it’s time to start editing.
How to edit a presentation video (in Camtasia)
Add behaviors.
Firstly, add some visual interest with Camtasia Behaviors . A Behavior is an animation that brings movement to your slides, making them stand out on screen. This is a great way to bring parts of your presentation to life and take it from ordinary to extraordinary — because nobody likes a boring presentation .
To add a Behavior, click and drag the Behavior you wish to use onto the slide you want to animate. Once added, you can adjust the Behavior using the Properties tab.
Add annotations
Another good way to grab and direct your audience’s attention is to add some Annotations, which are great for highlighting important information.
To insert an Annotation, click the Annotation tab on the left side of the screen and drag it into the designated slide. You can then re-position and edit the Annotation in the Properties tab as needed.
Absolutely! Both Snagit and Camtasia are excellent choices for recording a professional and polished presentation. Snagit is perfect for no-fuss recording and editing. If you require more sophisticated editing capabilities, Camtasia is the ideal choice, offering the added convenience of recording your slideshow and voice over directly within PowerPoint.
Click the Record button in the toolbar to launch your slides into the Presentation Mode and start recording. When you exit Presentation Mode or reach the end of your slideshow, you can either continue recording your screen or stop and save your file.
If you’re planning to record audio, select your microphone in the recording options. The microphone button controls whether or not audio is recorded as part of your presentation. If you have a webcam attached to your computer, you can also record your camera to create a Picture-in-Picture clip, perfect for showing the presenter during the presentation.
With Snagit, you can conveniently record your voice over as you go through your presentation, capturing both the audio and visuals in one go. If you’re looking for more advanced recording and editing options, you might also consider using Camtasia, which allows you to record your voice over while presenting. For even more control, use Audiate to record your audio separately and then import it into Camtasia for fine-tuning.
Additional Resources
Camtasia vs. clipchamp: which screen recorder is best, how to screen record on iphone: the ultimate guide, how to make money on youtube: 7 effective strategies.
How to Record Keynote Presentation with Audio, Webcam etc.

Keynote is a presentation software application developed by Apple company. It’s designed to compete against existing presentation software like most notably Microsoft PowerPoint. It can not only assist your face-to-face presentation but also make video presentation so that you can send without limitation. Since Keynote is only competent for video presentation making with audio, this post will introduce another workarounds to meet your different video-making requirements. Now let’s directly move to the key point- how to record Keynote presentation on Mac with audio, webcam and more.
Method 1: Record Keynote Presentation with All-in-one Screen Recorder (Recommendation)
Pairing with an all-in-one screen recorder is the easiest solution to produce Keynote presentation videos. RecMaster is such a handy yet professional screencast application to make video presentation . On one hand, it allows you to capture Keynote slideshows as video with audio and webcam. On the other hand, it permits you to edit, annotate during presentation recording , highlight mouse effect and schedule video recording. Additionally, you can set up involved parameters to meet your actual needs. Here download the trial version of RecMaster and follow the workflow.

Step 1: Download and install RecMaster software package on your Mac computer.
Step 2: To create Keynote presentation video, Full screen is our best suggestion to capture the whole computer screen. If you only want to record Keynote slide in small area, you can set a designated-area recording by virtue of Custom Area mode.
Step 3: Make configuration of video format (MP4, MOV, M4V), video quality (HD, SD, Original), audio source (microphone, system sound) and frame rate (up to 60 fps) . Here you can also toggle on webcam button to produce picture-in-picture effect. In case that you want to record in fixed time, RecMaster comes with a task schedule tool to conduct this task.
Step 4: Begin your Keynote presentation video recording with REC button. Annotation tool will appear along with the timer panel and you can annotate with ease. When you want to finish recording, you can end with menu. If you think it’s a little time-consuming to operate by hand-click action, free turn to the keyboard combination.
Step 5: The editor is ready to cut out wasted clips from the recorded video. After that, you can upload the video file to YouTube and Google Drive.
Method 2: Record Keynote Presentation with Audio (Built-in Solution)
Apple Keynote is not only a slick presentation application but also a powerful yet low-cost video creation tool. If you want to record slideshow on your Mac with audio, you can follow the guidance as below. First of all, open your slideshow in Keynote on your Mac and then follow these steps to record your presentation with audio .
Step 1: Click the Document button on the top right of the Window and then move to Audio tab in the dropdown interface.
Step 2: Choose Record and your presentation will open in a new, full screen window. At the bottom of the controls bar, you can see many playback controls including a Record control.
If you want to record narration for each slide, you can open Show Navigator on the top left. Click a slide and speak to record. After finishing this action, repeat what you’ve done again and again until you terminate the whole slideshows.
Step 3: You will notice that a red bar displays across the top of the window during your recording and when you finish recording, it turns to green which is a clear indicator of the recording process. Hit the Record button again to stop the recording.
Step 4: Back in the Keynote window, you’ll see in the sidebar in the right that you have a recording. To play it, click the Play button in the toolbar. There is a Timeline here and you can slide back and forth to check your narration. If you’re unsatisfied with some moments, you can re-record it again.
Keynote is a good tool to record narration but it can’t record your webcam while you’re making presentation. If you want to record presentation with webcam and audio, keep on reading the next part.
Method 3: Record Keynote Presentation with Audio and Webcam (QuickTime Plus iMovie)
Want to record presentation as video also showing your face? With the help of QuickTime Player and iMovie application, you can meet this goal if you don’t mind a complicated operation workflow.
Step 1: Firstly, you need to open your presentation slide on Keynote and then launch the QuickTime Player running on your Mac.
Step 2: Then use QuickTime to record screen as normal. First of all, choose the New Movie Recording mode to add webcam option into your presentation recording. Simultaneously, also click the New Screen Recording mode to start a new recording. Here you need to select microphone to let your voice recorded.
Step 3: Hit the Record button to capture your presentation. You can also leverage the mouse cursor effect to do graphics highlight in your recorded video. When the whole recording finishes, press Record button again to end.
Step 4: Now you’ve got two separate video files: one is capturing your face and the other is recording Keynote presentation. How to combine two videos into one? iMovie is the tool to combine screen shoot and webcam recording. Drag two video files into the iMovie operation interface >> hold down Shift and select these clips >> Go to Modify and then select Join Clips, then you will see the clips are merged as one.
For more detailed operations, you can refer to this YouTube tutorial: https://www.youtube.com/watch?v=yRnANp2kS3c
There are three ways to record Keynote presentation and each of them has its strengths and weaknesses. Choose the most suitable for you to meet the recording goal according to your actual needs.
See also: How to Record PowerPoint Presentation with Narration & Webcam on Mac
Screen recording made easy.
Record every moment on your PC or Mac within few clicks.
How to Record Black Myth: Wukong?
How to Record Sky Go?
How to Record on Xumo?
How to Record VooV Meetings on PC and Mac?
How to Capture and Save Olympic Event Replays?
How to Record Olympic Games Paris 2024 Lives?
How to Record FutureLearn Videos with RecMaster?
How to Record edX Videos with RecMaster?
How to Record Coursera Videos?
How to Record Big Think Videos?
How to Record Alison Videos?
How to Record Funbrain Gameplay and Videos?
How to Create New Employee Onboarding Videos with RecMaster?
How to Screen Record without Showing the Screen Recorder?
How to Record Full Gaming Screen on Desktop
RecMaster is professional screen recording software which offers different kinds of recording modes. RecMaster is professional screen recording of recording modes.
--> Free Trial --> MacOS X 10.11 or above --> Free Trial --> window 10/8/7 -->