Like what you're reading?

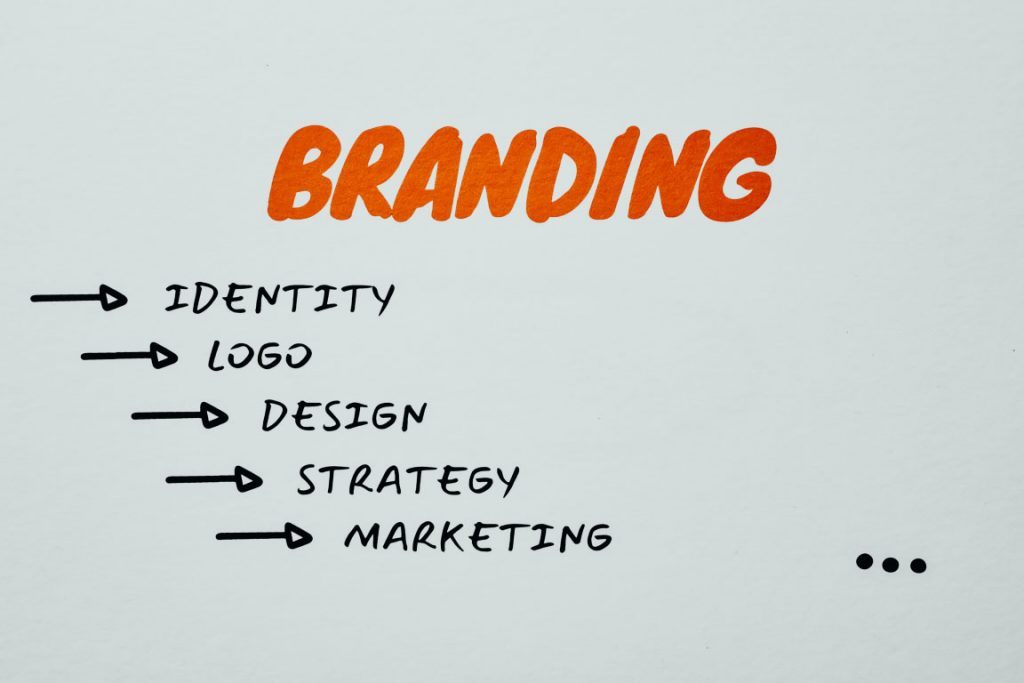
Presentation design guide: tips, examples, and templates
Get your team on prezi – watch this on demand video.

Anete Ezera January 09, 2023
Presentation design defines how your content will be received and remembered. It’s responsible for that crucial first impression and sets the tone for your presentation before you’ve even introduced the topic . It’s also what holds your presentation together and guides the viewer through it. That’s why visually appealing, easily understandable, and memorable presentation design is what you should be striving for. But how can you create a visually striking presentation without an eye for design? Creating a visually appealing presentation can be challenging without prior knowledge of design or helpful tools.
With this presentation design guide accompanied by Prezi presentation examples , templates , and AI functionalities , you’ll have no problem creating stunning and impactful presentations that’ll wow your audience.

In this guide, we’ll start by looking at the basics of presentation design. We’ll provide a simple guide on creating a presentation from scratch and offer helpful tips for different presentation types . In addition, you’ll discover how to organize information into a logical order and present it in a way that resonates with listeners. Finally, we’ll share tips and tricks to create an eye-catching presentation, and showcase some great presentation examples and templates you can get inspired by!
With our comprehensive guide to the best presentation design techniques, you’ll be able to develop an engaging and professional presentation that gets results!
What is presentation design?
Presentation design encompasses a variety of elements that make up the overall feel and look of the presentation. It’s a combination of certain elements, like text, font, color, background, imagery, and animations.
Presentation design focuses on finding ways to make the presentation more visually appealing and easy to process, as it is often an important tool for communicating a message. It involves using design principles like color, hierarchy, white space, contrast, and visual flow to create an effective communication piece.

Creating an effective presentation design is important for delivering your message efficiently and leaving a memorable impact on your audience. Most of all, you want your presentation design to support your topic and make it easier to understand and digest. A great presentation design guides the viewer through your presentation and highlights its essential aspects.
If you’re interested in learning more about presentation design and its best practices , watch the following video and get practical insights on designing your next presentation:
Types of presentations
When creating a presentation design, you have to keep in mind several types of presentations that shape the initial design you want to have. Depending on your presentation type, you’ll want to match it with a fitting presentation design.
1. Informative
An informative presentation provides the audience with facts and data to educate them on a certain subject matter. This could be done through visual aids such as graphs, diagrams, and charts. In an informative presentation, you want to highlight data visualizations and make them more engaging with interactive features or animations. On Prezi Design, you can create different engaging data visualizations from line charts to interactive maps to showcase your data.
2. Instructive
Instructive presentations teach the audience something new. Whether it’s about science, business strategies, or culture, this type of presentation is meant to help people gain knowledge and understand a topic better.
With a focus on transmitting knowledge, your presentation design should incorporate a variety of visuals and easy-to-understand data visualizations. Most people are visual learners, so you’ll benefit from swapping text-based slides for more visually rich content.

3. Motivational
Motivational presentations try to inspire the audience by giving examples of successful projects, stories, or experiences. This type of presentation is often used in marketing or promotional events because it seeks to get the audience inspired and engaged with a product or service. That’s why the presentation design needs to capture and hold the attention of your audience using a variety of animations and visuals. Go beyond plain images – include videos for a more immersive experience.
4. Persuasive
Persuasive presentations are designed to sway an audience with arguments that lead to an actionable decision (i.e., buy the product). Audiences learn facts and figures relevant to the point being made and explore possible solutions based on evidence provided during the speech or presentation.
In a persuasive presentation design, you need to capture your audience’s attention right away with compelling statistics wrapped up in interactive and engaging data visualizations. Also, the design needs to look and feel dynamic with smooth transitions and fitting visuals, like images, stickers, and GIFs.

To learn more about different types of presentations and how to structure them accordingly, read our article on presentation types .
How to design a presentation
When you first open a blank presentation page, you might need some inspiration to start creating your design. For this reason, we created a simple guide that’ll help you make your own presentation from scratch without headaches.
1. Opt for a motion-based presentation
You can make an outstanding presentation using Prezi Present, a software program that lets you create interactive presentations that capture your viewer’s attention. Prezi’s zooming feature allows you to add movement to your presentation and create smooth transitions. Prezi’s non-linear format allows you to jump between topics instead of flipping through slides, so your presentation feels more like a conversation than a speech. A motion-based presentation will elevate your content and ideas, and make it a much more engaging viewing experience for your audience.
Watch this video to learn how to make a Prezi presentation:
2. Create a structure & start writing content
Confidence is key in presenting. You can feel more confident going into your presentation if you structure your thoughts and plan what you will say. To do that, first, choose the purpose of your presentation before you structure it. There are four main types of presentations: informative, instructive, motivational, and persuasive. Think about the end goal of your presentation – what do you want your audience to do when you finish your presentation – and structure it accordingly.
Next, start writing the content of your presentation (script). We recommend using a storytelling framework, which will enable you to present a conflict and show what could be possible. In addition to creating compelling narratives for persuasive presentations, this framework is also effective for other types of presentations.

Tip: Keep your audience in mind. If you’re presenting a data-driven report to someone new to the field or from a different department, don’t use a lot of technical jargon if you don’t know their knowledge base and/or point of view.
3. Research & analyze
Knowing your topic inside and out will make you feel more confident going into your presentation. That’s why it’s important to take the time to understand your topic fully. In return, you’ll be able to answer questions on the fly and get yourself back on track even if you forget what you were going to say when presenting. In case you have extra time at the end of your presentation, you can also provide more information for your audience and really showcase your expertise. For comprehensive research, turn to the internet, and library, and reach out to experts if possible.

4. Get to design
Keeping your audience engaged and interested in your topic depends on the design of your presentation.
Now that you’ve done your research and have a proper presentation structure in place, it’s time to visualize it.
4.1. Presentation design layout
What you want to do is use your presentation structure as a presentation design layout. Apply the structure to how you want to tell your story and think about how each point will lead to the next one. Now you can either choose to use one of Prezi’s pre-designed templates that resemble your presentation structure the most or start to add topics on your canvas as you go.
Tip: When adding content, visualize the relation between topics by using visual hierarchy – hide smaller topics within larger themes or use the zooming feature to zoom in and out of supplementary topics or details that connect to the larger story you’re telling.
4.2. Color scheme
Now it’s time to choose your color scheme to give a certain look and feel to your presentation. Make sure to use contrasting colors to clearly separate text from the background, and use a maximum of 2 to 3 dominating colors to avoid an overwhelming presentation design.

4.2. Content (visuals + text)
Add content that you want to highlight in your presentation. Select from a wide range of images, stickers, GIFs, videos, data visualizations, and more from the content library, or upload your own. To provide more context, add short-format text, like bullet points or headlines that spotlight the major themes, topics, and ideas in your presentation.
Also, here you’ll want to make a final decision on your font choice. Select a font that’s easy to read and goes well with your brand and topic.

Tip: Be careful not to turn your presentation into a script. Only display text that holds significant value – expand on the ideas when presenting.
4.3. Transitions
Last but not least, bring your presentation design to life by adding smooth, attractive, and engaging transitions that take the viewer from one topic to another without disrupting the narrative.
On Prezi, you can choose from a range of transitions that take you into the story world and provide an immersive presentation experience for your audience.
5. Practice your delivery
Even with a great presentation design, how you deliver it is crucial in leaving an impression. Practice your presentation’s timing to become familiar with the rhythm and pace. It might help to record yourself to pinpoint areas for enhancement. Practicing in front of a friend or family member can also offer insights. Keep in mind the more you rehearse, the more self-assured and at ease you’ll be when giving the presentation.
6. Engage your audience
Engaging with your audience can enhance the impact of your presentation. You could prompt discussions, invite participation, or incorporate features such as surveys or puzzles. For instance, when introducing a marketing plan you could kick off with a survey to assess how well the audience grasps the subject. This boosts interactivity in your presentation and also fosters a connection with your listeners and sustains their interest throughout.

7. Use storytelling techniques
Using stories can be a way to captivate your audience and ensure that your message sticks with them. When creating a presentation, consider incorporating a narrative structure that incorporates a beginning, middle, and end. For example, when outlining a business strategy, kick off with a story that highlights a challenge in need of resolution. Then delve into your proposed solution before illustrating the results that can be achieved. This storytelling approach can foster a connection with your audience and enhance their grasp of the main ideas you’re conveying.
8. Prepare for technical difficulties
It’s common to encounter glitches, so being ready is key. Make sure you have a strategy in place if things go south during your presentation. For instance, store your presentation on devices like a USB drive and online storage, and keep hard copies of important slides handy. Also, get acquainted with the equipment and software you’ll use for the presentation. Planning ahead for any issues can help you navigate them smoothly and maintain the flow of your presentation.
9. Include high-quality visuals
Good visuals play a role in the success of your presentation. Incorporate top-notch pictures, graphics,3 and videos to ensure your slides are visually captivating and interesting. Steer clear of using low-quality images that may come off as pixelated and amateurish. When presenting data, think about using charts or infographics to present the information clearly. Prezi provides access to a selection of high-quality visuals that can elevate the design impact of your presentation.
10. Be unique
It’s crucial to make sure your design is original to set yourself apart from the crowd. If you’re a student, aim to craft a presentation that showcases your flair and avoid imitating others. This approach helps you differentiate yourself and ensures that your work is more memorable. In the business field, make sure that your design elements, such as colors, fonts, and overall aesthetics are different from those used by similar companies. Steer clear of templates that might give your presentation a generic feel. By developing a unique design, you establish your identity and leave a lasting impact on your audience.

For more practical tips read our article on how to make a presentation .
Presentation design tips
When it comes to presentations, design is key. A well-designed presentation can communicate your ideas clearly and engage your audience, while a poorly designed one can do the opposite.
To ensure your presentation is designed for success, note the following presentation design tips that’ll help you design better presentations that wow your audience.

1. Keep it simple
Too many elements on a slide can be overwhelming and distract from your message. While you want your content to be visually compelling, don’t let the design of the presentation get in the way of communicating your ideas. Presentation design elements need to elevate your message instead of overshadowing it.
2. Use contrasting text colors
Draw attention to important points with contrasted text colors. Instead of using bold or italics, use a contrasting color in your chosen palette to emphasize the text.
3. Be clear and concise
Avoid writing long paragraphs that are difficult to read. Limit paragraphs and sections of text for optimum readability.
4. Make sure your slide deck is visually appealing
Use high-quality images and graphics, and limit the use of text to only the most important information. For engaging and diverse visuals, go to Prezi’s content library and discover a wide range of stock images, GIFs, stickers, and more.

5. Pay attention to detail
Small details like font choice and alignments can make a big difference in how professional and polished your presentation looks. Make sure to pay attention to image and text size, image alignment with text, font choice, background color, and more details that create the overall look of your presentation.
6. Use templates sparingly
While templates can help create a consistent look for your slides, overusing them can make your presentation look generic and boring. Use them for inspiration but don’t be afraid to mix things up with some custom designs as well.
7. Design for clarity
Create a presentation layout that is easy to use and navigate, with clear labels and instructions. This is important for ensuring people can find the information they need quickly and easily if you end up sharing your presentation with others.
8. Opt for a conversational presentation design

Conversational presenting allows you to adjust your presentation on the fly to make it more relevant and engaging. Create a map-like arrangement that’ll encourage you to move through your presentation at your own pace. With a map-like design, each presentation will be customized to match different audiences’ needs. This can be helpful for people who have different levels of expertise or knowledge about the subject matter.
9. Be consistent
Design consistency holds your presentation together and makes it easy to read and navigate. Create consistency by repeating colors, fonts, and design elements that clearly distinguish your presentation from others.
10. Have context in mind
A great presentation design is always dependent on the context. Your audience and objective influence everything from color scheme to fonts and use of imagery. Make sure to always have your audience in mind when designing your presentations.

11. Use white space effectively
In slide design, whitespace, also known as negative space, refers to the areas surrounding elements. It plays a role in decluttering your slides, enhancing readability, and directing focus towards content. Utilizing whitespace results in a sophisticated appearance for your slides. Remember, simplicity is key – avoid overwhelming your audience with information on each slide.
12. Incorporate visual hierarchy
When it comes to visuals, the key is to organize elements in a manner that naturally directs the viewer’s attention towards the crucial parts of the presentation. Utilize variations in size, color, and positioning to establish a flow for the viewer to navigate through. For instance, opt for fonts to highlight headings, colors for significant points, and position essential elements at the top of the slide. These tactics aid in ensuring that your audience grasps the ideas promptly and effortlessly.

For more presentation tips, read the Q&A with presentation design experts and get valuable insights on visual storytelling.
Make the presentation design process easier by pairing up with Prezi AI
Presentation design may not come naturally to everyone, and time constraints often limit our ability to dedicate hours to perfecting our designs. Enter Prezi AI , a tool that streamlines the presentation design process enabling users to prioritize content over appeal. Let’s explore some ways in which Prezi AI can elevate your presentation design.
- Template suggestions: Prezi AI provides a range of crafted templates that are customized to match your presentation’s theme, guaranteeing that your slides have a unified appearance with minimal hassle.
- Smart formatting: When using Prezi AI , your text and images will be formatted automatically, eliminating the need for layout adjustments. This results in a professional appearance without the hassle.
- Design consistency: Prezi AI ensures that your presentation maintains a design by keeping color schemes and fonts consistent, eliminating the need to fret over discrepancies.
- Image and media integration: Enhance the appeal and engagement of your slides by adding relevant images, videos, and graphics with the help of Prezi AI smart media recommendations.
- Customizable animations: Enhance your slides with custom animations using Prezi AI to create transitions and captivate your audience. These dynamic animations can emphasize points and ensure a smooth flow throughout your presentation.
Using Prezi AI allows you to simplify the design process and craft appealing presentations, even if you lack time or design skills.
Presentation templates
Creating a presentation from scratch isn’t easy. Sometimes, it’s better to start with a template and dedicate your time to the presentation’s content. To make your life easier, here are 10 useful and stunning presentation templates that score in design and engagement. If you want to start creating with any of the following templates, simply go to our Prezi presentation template gallery , select your template, and start creating! Also, you can get inspired by the top Prezi presentations , curated by our editors. There you can discover presentation examples for a wide range of topics, and get motivated to create your own.
Business meeting presentation
The work desk presentation templates have a simple and clean design, perfectly made for a team or business meeting. With all the topics visible from the start, everyone will be on the same page about what you’re going to cover in the presentation. If you want, you can add or remove topics as well as edit the visuals and color scheme to match your needs.
Small business presentation
This template is great for an introductory meeting or pitch, where you have to summarize what you or your business does in a few, highly engaging slides. The interactive layout allows you to choose what topic bubble you’re going to select next, so instead of a one-way interaction, you can have a conversation and ask your audience what exactly they’re interested in knowing about your company.
Mindfulness at work presentation
How can you capture employees’ attention to explain important company values or practices? This engaging presentation template will help you do just that. With a wide range of impactful visuals, this presentation design helps you communicate your ideas more effectively.
Business review template
Make your next quarterly business review memorable with this vibrant business presentation template. With eye-capturing visuals and an engaging layout, you’ll communicate important stats and hold everyone’s attention until the end.
History timeline template
With black-and-white sketches of the Colosseum in the background, this timeline template makes history come alive. The displayed time periods provide an overview that’ll help your audience to grasp the bigger picture. After, you can go into detail about each time frame and event.
Storytelling presentation template
Share stories about your business that make a lasting impact with this stunning, customizable presentation template. To showcase each story, use the zooming feature and choose to tell your stories in whatever order you want.
Design concept exploration template
Not all meetings happen in person nowadays. To keep that face-to-face interaction even when presenting online, choose from a variety of Prezi Video templates or simply import your already-existing Prezi template into Prezi Video for remote meetings. This professional-looking Prezi Video template helps you set the tone for your meeting, making your designs stand out.
Employee perks and benefits video template
You can use the employee benefits video template to pitch potential job candidates the perks of working in your company. The Prezi Video template allows you to keep a face-to-face connection with potential job candidates while interviewing them remotely.
Sales plan presentation template
Using a clear metaphor that everyone can relate to, this football-inspired sales plan presentation template communicates a sense of team unity and strategy. You can customize this Prezi business presentation template with your brand colors and content.
Flashcard template
How can you engage students in an online classroom? This and many other Prezi Video templates will help you create interactive and highly engaging lessons. Using the flashcard template, you can quiz your students, review vocabulary, and gamify learning.
Great presentation design examples
If you’re still looking for presentation design ideas, check out the following Prezi presentations made by our creative users.
Social media presentation
This presentation is a great example of visual storytelling. The use of visual hierarchy and spatial relationships creates a unique viewing experience and makes it easier to understand how one topic or point is related to another. Also, images provide an engaging and visually appealing experience.
Leadership books presentation
Do you want to share your learnings? This interactive presentation offers great insights in an entertaining and visually compelling way. Instead of compiling leadership books in a slide-based presentation, the creator has illustrated each book and added a zooming feature that allows you to peek inside of each book’s content.
Remote workforce presentation
This is a visually rich and engaging presentation example that offers an interactive experience for the viewer. A noteworthy aspect of this presentation design is its color consistency and matching visual elements.
A presentation about the teenage brain
Another great presentation design example that stands out is an engaging viewing experience. The zooming feature allows the user to dive into each topic and choose what subject to view first. It’s a great example of an educational presentation that holds the students’ attention with impactful visuals and compelling transitions.
Remote work policy presentation
This presentation design stands out with its visually rich content. It depicts exactly what the presentation is about and uses the illustrated window frames in the background image as topic placements. This type of presentation design simplifies complex concepts and makes it easier for the viewer to understand and digest the information.
Everyone can create visually appealing presentations with the right tools and knowledge. With the presentation design tips, templates, and examples, you’re equipped to make your next presentation a success. If you’re new to Prezi, we encourage you to discover everything it has to offer. With this presentation design guide and Prezi, we hope you’ll get inspired to create meaningful, engaging, and memorable content for your audience!

Give your team the tools they need to engage
Like what you’re reading join the mailing list..
- Prezi for Teams
- Top Presentations
.css-1qrtm5m{display:block;margin-bottom:8px;text-transform:uppercase;font-size:14px;line-height:1.5714285714285714;-webkit-letter-spacing:-0.35px;-moz-letter-spacing:-0.35px;-ms-letter-spacing:-0.35px;letter-spacing:-0.35px;font-weight:300;color:#606F7B;}@media (min-width:600px){.css-1qrtm5m{font-size:16px;line-height:1.625;-webkit-letter-spacing:-0.5px;-moz-letter-spacing:-0.5px;-ms-letter-spacing:-0.5px;letter-spacing:-0.5px;}} Best Practices The #1 rule for improving your presentation slides
by Tom Rielly • May 12, 2020

When giving presentations, either on a video conference call or in person, your slides, videos and graphics (or lack of them) can be an important element in helping you tell your story or express your idea. This is the first of a series of blog posts that will give you tips and tricks on how to perfect your visual presentations.
Your job as a presenter is to build your idea -- step-by-step -- in the minds of your audience members. One tool to do that is presentation graphics, such as slides and videos.
Why graphics for your presentation?
A common mistake is using slides or videos as a crutch, even if they don’t actually add anything to your presentation. Not all presentations need graphics. Lots of presentations work wonderfully with just one person standing on a stage telling a story, as demonstrated by many TED Talks.
You should only use slides if they serve a purpose: conveying scientific information, art, and things that are hard to explain without pictures. Once you have decided on using slides, you will have a number of decisions to make. We’ll help you with the basics of making a presentation that is, above all, clear and easy to understand. The most important thing to remember here is: less is more.
Less is so much more
You want to aim for the fewest number of slides, the fewest number of photos, the fewest words per slide, the least cluttered slides and the most white space on your slides. This is the most violated slide rule, but it is the secret to success. Take a look at these examples.

As you can see in the above example, you don’t need fancy backgrounds or extra words to convey a simple concept. If you take “Everything you need to know about Turtles”, and delete “everything you need to know about” leaving just “turtles”, the slide has become much easier for your audience to read, and tells the story with economy.

The above example demonstrates that a single image that fills the entire screen is far more powerful than a slide cluttered with images. A slide with too many images may be detrimental to your presentation. The audience will spend more mental energy trying to sort through the clutter than listening to your presentation. If you need multiple images, then put each one on its own slide. Make each image high-resolution and have it fill the entire screen. If the photos are not the same dimensions as the screen, put them on a black background. Don’t use other colors, especially white.

Your slides will be much more effective if you use the fewest words, characters, and pictures needed to tell your story. Long paragraphs make the audience strain to read them, which means they are not paying attention to you. Your audience may even get stressed if you move on to your next slide before they’ve finished reading your paragraph. The best way to make sure the attention stays on you is to limit word count to no more than 10 words per slide. As presentation expert Nancy Duarte says “any slide with more than 10 words is a document.” If you really do need a longer explanation of something, handouts or follow-up emails are the way to go.
Following a “less is more” approach is one of the simplest things you can do to improve your presentation visuals and the impact of your presentation overall. Make sure your visuals add to your presentation rather than distract from it and get your message across.
Ready to learn more about how to make your presentation even better? Get TED Masterclass and develop your ideas into TED-style talks.
© 2024 TED Conferences, LLC. All rights reserved. Please note that the TED Talks Usage policy does not apply to this content and is not subject to our creative commons license.
- SUGGESTED TOPICS
- The Magazine
- Newsletters
- Managing Yourself
- Managing Teams
- Work-life Balance
- The Big Idea
- Data & Visuals
- Reading Lists
- Case Selections
- HBR Learning
- Topic Feeds
- Account Settings
- Email Preferences
How to Make a “Good” Presentation “Great”
- Guy Kawasaki

Remember: Less is more.
A strong presentation is so much more than information pasted onto a series of slides with fancy backgrounds. Whether you’re pitching an idea, reporting market research, or sharing something else, a great presentation can give you a competitive advantage, and be a powerful tool when aiming to persuade, educate, or inspire others. Here are some unique elements that make a presentation stand out.
- Fonts: Sans Serif fonts such as Helvetica or Arial are preferred for their clean lines, which make them easy to digest at various sizes and distances. Limit the number of font styles to two: one for headings and another for body text, to avoid visual confusion or distractions.
- Colors: Colors can evoke emotions and highlight critical points, but their overuse can lead to a cluttered and confusing presentation. A limited palette of two to three main colors, complemented by a simple background, can help you draw attention to key elements without overwhelming the audience.
- Pictures: Pictures can communicate complex ideas quickly and memorably but choosing the right images is key. Images or pictures should be big (perhaps 20-25% of the page), bold, and have a clear purpose that complements the slide’s text.
- Layout: Don’t overcrowd your slides with too much information. When in doubt, adhere to the principle of simplicity, and aim for a clean and uncluttered layout with plenty of white space around text and images. Think phrases and bullets, not sentences.
As an intern or early career professional, chances are that you’ll be tasked with making or giving a presentation in the near future. Whether you’re pitching an idea, reporting market research, or sharing something else, a great presentation can give you a competitive advantage, and be a powerful tool when aiming to persuade, educate, or inspire others.
- Guy Kawasaki is the chief evangelist at Canva and was the former chief evangelist at Apple. Guy is the author of 16 books including Think Remarkable : 9 Paths to Transform Your Life and Make a Difference.
Partner Center
Engage your audience with powerful visual presentations.
Visual tools are critical to have in any presentation as they’re one of the key presentation aids that will help enhance your overall presentation .
We’ll give you tips on how to develop a sense of good presentation design whether you’re using PowerPoint, Prezi, Google Slides or any presentation software under the sun. The secret to creating a great presentation does not lie in a superior software, but understanding a few universal design concepts that can applied for all types of visual presentations.
Don’t be afraid to use a few presentation templates – there are ways to make the presentation ideas in those templates your own ideas and advance it in several different ways. Let’s make your next presentation on point and designed beautifully.
Presentations Are The Visual Communication Tool To Your Story

In the age of information, people remember facts faster through stories. Keep your bullet points and information short. You can use a rule of thumb to not put more than a paragraph and 3 points per slide to start.
Make your presentation the visual component of your story, but not something your audience has to read. Something that is short and succinct on screen will capture your audience’s attention and make sure they retain the main points of your message.
This does not mean incomplete slides. A common mistake presenters make is putting too little information on a slide in the name of simplicity when in fact they’re leaving out the main context.
A well designed visual presentation has a great story behind it and a well rehearsed voice telling it as well. Engaging the audience is also a great way to associate meaning or connection to the content of your slide decks. Ask questions and tell stories while showing off a great visual presentation! Think of writing the copy like writing for social media – you only have a certain amount of characters to use and a short audience attention span.
General Tips For Visual Presentations
Before you begin creating your presentation, you first need to know what makes effective presentations – storytelling. Such presentations target the audience’s emotions leading to a stronger connection to the audience member and the main point of the presentation.
Below are some storytelling tips for your slides, but remember to keep the presentation itself simple and practice makes perfect. And again, these are more for your spoken component that accompanies the visual component. These tips can be useful because they can be applied to all your presentations in general.
Step 1 is to ask yourself who your audience is and how to convey the key message you have in mind to them. Once you settle on your message, you can start designing your slides with that direction in mind.
You may wonder how to connect with an audience with your slides. Look to your own experiences, your own speaking style and tailor your message to what you know. Not many people want to hear others recite facts with no real meaning driving the story. Ask yourself, “Why does this matter to the audience and why should they care?”.
There is a lot of trust that can be built when the audience has a genuine connection to the presenter. Overall, if you have something that can solve a problem or teach someone complex things, that is enough to form a connection with your audience.
Think of the last app you used, the last email you read or perhaps the last business you purchased from. What was the content or visual elements that pulled you in?
Are you making a PowerPoint, Prezi or other form of visual presentation but it’s taking too much of your time? Enlist the help of Presentation Geeks and consider outsourcing your presentation design . Outsourcing your presentation slides allows you to free more of your time while still getting the results of an interesting presentation. You’ll have the support of expert slide designers who know what presentation visuals work and don’t work thanks to years of presentation feedback and background knowledge.
Color Design Tips For Presentation Slides
When designing your presentation, make sure you take into consideration the colors you’re using. We’ve listed a few background color combinations you might want to consider when developing the overall slide deck and the font to use.
Color Wheel Alignments:
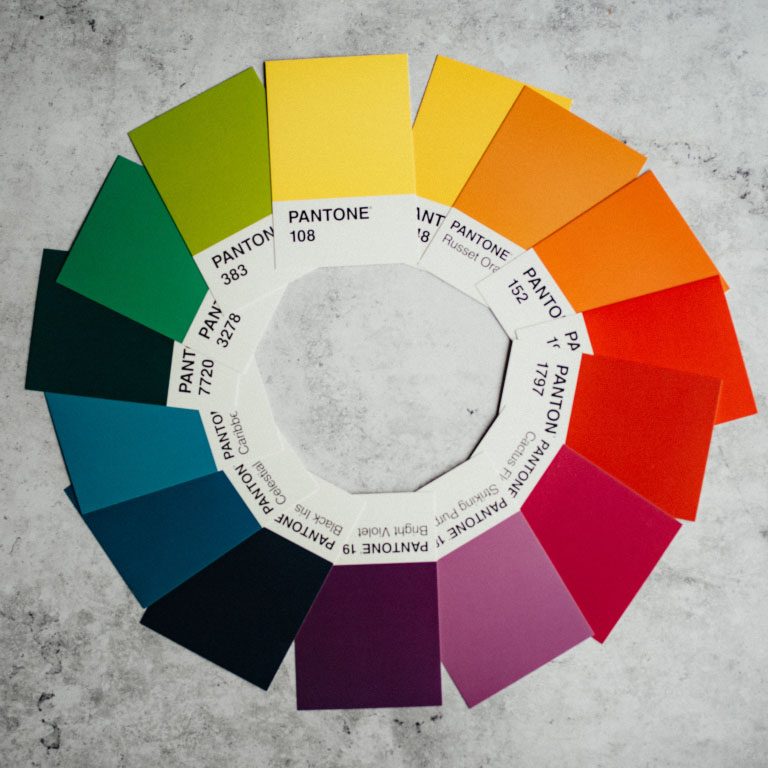
Primary Colors: Red, yellow, blue
Secondary Colors: Green, orange, purple
Tertiary Colors: Yellow-orange, red-orange, red-purple, blue-purple, blue-green & yellow-green
Analogous Colors: These are any three colors which are side by side on a color wheel. (Think green, lime green, yellow)
Complementary Colors: These are colors that are directly opposite of a color wheel. (Think green vs. purple, red vs. blue)
Monochromatic Colors: This is when you use one color and various shades or hues of it. It works well for minimal looks.
Color moods:
Red/Orange/Yellow: Generally these convey a sense of energy, are warm colors and catch your attention. Yellow is a happy warm color on one end and red is very striking and can warn of danger, and symbolizes importance, passion and sometimes violence.
Blue/Purple/Green: These colors are calming, reserved, elegant and often used for corporate slides. Think of how indigo blue is used for many large corporate entities. Green often is branded with earth or medical brands. Purple often conveys a sense of royalty, money and creativity.
Use The Power Of Photography Or Video

Pictures and videos are great visuals to incorporate into any presentation. Remember the saying, “A picture is worth a thousand words”? Well, it’s true! Photos help visualize complex information. You’ll often come across a lot of photos in research presentations as they help the audience understand examples better.
They can also save you from having to put a thousand thoughts into the PowerPoint presentation slide!
The first tip we can give to make a great visual presentation is to choose all your photos before you start. This way you can keep the consistency of the images across your slide deck and make sure they’re somewhat alike in terms of composition, mood and brand.
Use free stock photos
You don’t have to take the photos or videos yourself.
There are plenty of free resources and web pages for stock photos online – Unsplash , Pexels , Pixabay , Free Range , Creative Commons and some photos from Freepik are free to use with some accreditation.
Effective photo use
Make sure you pick an image that will focus on the main theme of the slide. One image is usually enough if the image choice is very relevant to the slide. If you have multiple photos, avoid poor or loose placement of photos all over the slide. Try to use a grid or gallery placement and it will immediately enhance the layout of the slide.
If you pick great images, making presentations can be faster. Instead of having to create an elaborate template with multiple elements, a photo with a couple of bullet points can go a long way in terms of capturing attention and making your presentation slides look professional. This is true on any presentation design platform – whether its PowerPoint, Google Slides, etc.

You can also embed videos whether they’re located on your computer, YouTube, Vimeo or other major video streaming sites. If you’re feeling nervous about your presentation or have a complex message that would be hard to condense in one slide, a video is a dynamic way of conveying your message in any type of presentation.
The Typography You Use Matters

Typography is how you will arrange and present the words in your presentation. An audience can engage when text is readable, functional and works well with the other elements in the presentation. Fonts and sizing are a good place to start establishing the tone of your presentation.
Overview of Font Choices
Elegant fonts often denote a sense of luxury or lifestyle tone. Use script fonts sparingly, but as titles they immediately give this polished and high-end look. This should not be used as body text or something lengthy to read. Think about if you sent an email in that text – it would be tedious to read. However, maybe if it were a title or a way to name email, the choice may be more correct.
Corporate fonts often are traditional, serif fonts or clean sans serif fonts that evoke a sense of trust and a clear message. Think of the fonts Lato, Helvetica or Arial – they’re go-to fonts that are easy to read, and work across many systems. This is especially helpful if you are working across teams when creating content or having to approve the content, idea or visuals.
Of course, you can incorporate more stylistic or playful fonts if you want to give your presentation a personal feel. Much like the scripted font, when used sparingly but in large titles, this choice of font can be very effective at conveying a certain personality.
Adding Symbols & Icons To Your Presentation

You can consolidate information by using symbols or icons to direct your eye to information such as an arrow symbol. What if you used a symbol instead of a bullet point? Think of symbols as anchors for the eye to quickly find information. You can collect symbols off free stock sites or use the built-in ones in PowerPoint that are free to use!
Depending on if your presentation is formal or informal , you may also want to consider adding emojis! Emojis are fun ways to express different emotions and can help connect with a younger demographic.
Overall Branding, Tone of Voice & Consistency
Another tool you may have at your disposal is if your brand, business or company has brand guidelines. It will be the guide and compass to your presentation’s information that goes within it. By keeping consistent you can achieve a polished look even if it looks very simple.
Use your business voice to communicate ideas and set the tone for your presentation. Are you in an investment banking business and want people to rely on the information given to you? That would inform perhaps using blues and purples, which are calmer colors and a cleaner look. Are you an influencer who’s buying power and spending choices matter to your audience? Maybe choosing bright colors with personal touches will make the connection. Are you designing an innovative app? Maybe more interactive slides would do the trick.
Use these questions to make sure your text and tone is consistent as this is a foundation of a well articulated brand or personal identity.
Consistent Hierarchy
Visual hierarchy is how you will arrange objects and text in relation to one another to guide your user and not confuse the objects and how they should read them in your slides. Setting rules helps differentiate and prioritize what’s important in order.
Look at the difference between these two.
Snoop Dogg just launched a wine and it’s coming to Canada
Daily hive branded content | aug 11 2020, 6:30 am.
Australian winery 19 Crimes recently announced that its new Cali Red wine, created in collaboration with Entertainment Icon, entrepreneur, and hip-hop artist Snoop Dogg, will be hitting shelves across Canada later this summer.
The collaboration offers a refreshing take on celebrity partnerships as the apparent shared values and history between the brand and famous rapper make for a perfectly organic pairing.
Comment Name:
By browsing the site, you agree to the use of cookies on this website. see our user agreement for the use of cookies..
You can see a clear distinction in the example below:
Think of hierarchy of a form of narration or story structure. Your eye goes to the title, then to the subtitle, then to the body copy in a logical manner. Where the eye travels is one of those things we don’t think about often. But you can also utilize eye lines in photos. Is your subject in the photo looking left or right? Consider placing text to where your subject is looking and see how effectively your eye travels to that text.
We’ll look at hierarchy strictly as sizing of words for now, but note you can establish hierarchy with type, white space, alignment, etc. As a general rule of thumb, you should have consistent sizing for your Header (or title slide / slide title), your subtitles and your body text. That’s it! If the sizing in your PowerPoint is consistent, your words will look uniform and clean. Everything will be much easier to read and the eye will be trained to move each slide.
Don’t Forget Your Own Style
Also don’t forget to incorporate your own style and what kind of visuals you like. Even if your early visuals may seem simple, build up that design muscle with the basics and design techniques that look clean and consistent.
You’ll find as you design these basics, you’ll probably start noticing other visuals and things you like in other mediums and presentations. Keep a note or screenshot the presentation that inspired you. Create a mood-board that you can refer to in the future for quick idea inspiration. Copying gets a bad rap, but learning how to design something you like even if it’s a clone copy will teach you many things about design. Build a collection of images that informs everything you do: for your color scheme, your designs, the cadence of images, etc.
That being said, you can also use free stock websites like Freepik for some design layouts inspiration. Creative Market is a paid website but the site offers a ton of design inspiration. This site has design templates for what’s currently in and trending. You can subscribe to an email newsletter on either site to get bite sized design influence each day that goes straight to your inbox.
However, don’t be afraid to try something new!
Once you get to a level of comfortable designing, these new ideas will be much easier to execute with the technical knowledge you amassed when you started. You could even try using a new app to design your ideas to keep your knowledge fresh! (Keep in mind that most online apps like SlideShare use cookies to improve functionality and performance.)
Ask your friends or people at your organization to give you feedback and critique, as that’s also crucial to honing your design skills. The people around you also represent different audiences!

The above image looks boring, right?
That’s because there are no visual elements!
Powerful visual presentations can engage audiences psychologically with both the presentation itself and the energy of the presenter. By understanding a few universal design concepts, you can begin your journey creating wonderful visual presentations and becoming a better presenter ! Thanks for reading this blog post, tell us your tips in the comments below.

Author: Content Team
Related posts.

FREE PROFESSIONAL RESOURCES DELIVERED TO YOUR INBOX.
Subscribe for free tips, resources, templates, ideas and more from our professional team of presentation designers.

A step-by-step guide to captivating PowerPoint presentation design
november 20, 2023
by Corporate PowerPoint Girl
Do you often find yourself stuck with a lackluster PowerPoint presentation, desperately seeking ways to make it more engaging and visually appealing? If your boss has ever told you to "please fix" a presentation and you didn't know where to start, you're not alone. In this article, we'll walk you through a straightforward method to transform your PowerPoint slides into a visually captivating masterpiece.
Let's dive right in!
Clean up your slides
The first step in this journey to presentation excellence is all about decluttering your slides and elevating their impact. Say goodbye to those uninspiring bullet points that often dominate presentations. Instead, focus on what truly matters – the key call-out numbers. By increasing the font size of these numbers, you ensure they take center stage, immediately drawing your audience's attention.
To make those numbers pop, consider breaking the text after the numbers into the next line and adding a touch of color. The contrast created by pairing a dark color with a lighter shade, like dark teal and light teal or burnt orange with peach, can work wonders. This simple adjustment makes your data more engaging , enhancing the overall impact of your presentation.
Add dimension with boxes
Now, let's introduce an element of depth and organization to your slides. By adding boxes, you'll create a visually pleasing structure that guides your audience through the content. In the "Insert" menu, select "Table" and opt for a one-by-one table. Change the table color to a light gray shade, elongate it, and position it neatly to the left of your text.
To improve readability and aesthetics, increase the spacing between text phrases. A small adjustment in the before spacing setting (setting it to 48) significantly enhances the visual appeal of your slides.
Insert circles
To further enhance the visual appeal and engagement of your slides, let's introduce circles. In the Insert menu, navigate to Shapes and choose the circle. Adjust the circle's height and width to 1.2, ensuring it complements your content seamlessly. Match the circle's shape fill color with the corresponding text color for a harmonious look.
Avoid using colored outlines for the circles, as they may distract from the overall aesthetic. This simple addition of circles adds an element of visual interest to your presentation, making it more captivating.
Choose icons
Now, it's time for a touch of creativity. Selecting icons to complement your text can elevate the clarity and appeal of your slides. In the "Insert" menu, you can search for relevant keywords to find the perfect icon from PowerPoint's extensive library .
For instance, if your text discusses investment portfolio yield, search for "growth" and choose an upward arrow growth icon. These icons add an extra layer of visual appeal and clarity to your content, making it more engaging and informative.
Final touches
To wrap up the transformation process, we come to the final touches that give your presentation a polished, professional finish. Align your icons with their corresponding circles and change the shape fill color to white. This simple adjustment creates a crisp, cohesive look that ties everything together seamlessly.
In conclusion, by following these steps, you've embarked on a journey to enhance your PowerPoint presentation . These initial steps are just the beginning of your exploration into the world of design elements and styles that can cater to your specific presentation needs. The key to a stunning PowerPoint presentation lies in the details. By following these steps, you can turn a lackluster set of slides into a visually engaging and dynamic presentation that will captivate your audience. So, the next time your boss says, "Please fix," you'll know exactly where to start. Happy presenting!
Related topics
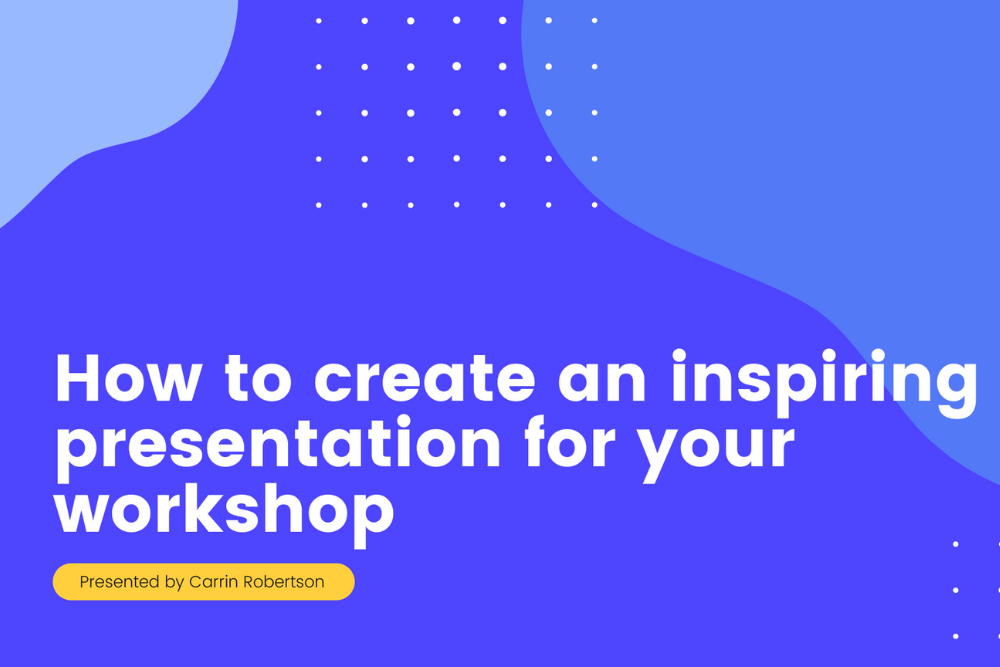
How to Create an Inspiring Presentation for your Workshop
Have you ever been at a presentation or workshop and found yourself forcing your eyes to stay open?
Bored out of your mind, and struggling to focus, the host is bleating on… and on. The concepts are too hard to follow, the words becoming a meaningless, tiresome cloud. Next time you struggle to sleep, it’ll be this guy’s waffling drivel that’ll send you to the land of nod.
Together, we’ll discover how to put the “Pow!” back into PowerPoint.
Design your next session with SessionLab
Join the 150,000+ facilitators using SessionLab.
Recommended Articles
A step-by-step guide to planning a workshop, 54 great online tools for workshops and meetings, how to create an unforgettable training session in 8 simple steps.
- 18 Free Facilitation Resources We Think You’ll Love
In this article we’ll explore:
- Why visual presentations are important
- What to consider when planning presentations
How to design an engaging visual presentation
- How to choose an engaging format
- Which tools are best for designing presentations
- Tips on how to deliver your workshop presentation
Why Are Visual Presentations Important?
The purpose is to share brilliant ideas with an audience. This might be a piece of work or an educational concept in a workshop; the aim is to communicate with people, make them feel something , and take action. We all want our audience to leave an event feeling motivated and inspired, and that the workshop was of value.
The importance of visuals is often overlooked, either due to a lack of confidence in working with visual design, lack of time or both. For a workshop facilitator, using visual aids could actually save time, better represent our ideas and concepts to a group, and help you present more confidently. “How?”, you ask.
When it comes to saving time, a picture is really worth a thousand words. There is no need to type up your presentations or make wordy bullet points on every slide when a simple image can share the message for you.
Visual presentations put across an immediate message. Images are emotive and can deliver a story much faster than words, visuals are processed 60,000 times faster in the brain than text . An image that can share an idea, can be more memorable than trying to remember very specific terminology.
Creating visuals becomes part of a wider conversation in inclusive communication. Images are universally understood, and the eyes can “read” a picture with less effort than reading and comprehending several paragraphs. Imagine describing the color blue as a phrase. It is much easier to present it as it exists.
Graphics are easy to share, and 65% of us are Visual learners . For anyone who has missed out on the meeting, a visual booklet can do the job of sharing the subject with them, and the added benefit of being able to view it in their own time. The power of social media also plays a huge part in the spreading of information and well-designed infographic slides can take your presentations and workshops outside of the room, with the potential to make a global impact. Sharability goes further with visual elements.
For me, a visual presentation is a lifesaver! Using slides has saved me a lot of time and made me feel more confident whilst presenting too. I don’t fumble around with notes, as the visuals can act as a prompt to remind me of where I’m at in my talk.
When presenting online, I find the value of visuals and slides even more important. It takes the attention away from my actions, and onto the graphics themselves. The participants can hear what I’m saying, but their eyes focus on the visual information which helps in retaining information and ideas beyond the workshop.
What to consider when creating a visual presentation
I’m naturally quite a visual person, and I’ve often wondered if I could make a visual presentation without planning first what it is that I want to say. As an experiment, I gave it a go and it was a huge struggle. So, if you think that designing visuals is something that only designers can do and that they find it easy… it doesn’t and they don’t.
As a starting point: get out a pen and paper and write down everything you want to say. This ensures you have all of the ideas and information out in black and white . I find that by leaving space between the writing and structuring, coming back at it with fresh eyes is a perfect way to work without feeling rushed. I rarely add to what I’ve written, it’s mostly about removing.
Recently I had written a LOT of information for an event. A day later, I took a second view to edit. A lot of writing is quite self-indulgent, so it helps to consider the audience . I cut up sections of the paper, keeping only what was the most necessary information , and collated it together. The rest of the sentences didn’t make the cut. You can try the editing exercise here .
Less is More- an exercise in editing #presentation #presentation skills #writing #workshop #meeting design This exercise is ideal for editing written content in a hands-on way. A simple and effective exercise for editing workshop content or presentation text for talks. Use it when you have to write for a specific audience and want them to stay focused on the most important information.
As an expert in your field, it’s likely you’ll have a lot of content, and editing is so valuable to ensure your audience has relevant details. Don’t bore their socks off 😉
So now that you have an idea of your core content, you can move along the process, considering these factors before jumping into the design stages:
Let’s start by asking, “ who is your audience? “
- if you are being commissioned to present a topic to a pre-determined group, then you’ll need to cater to their understanding of the topic. You’ll want to ensure that the information will be relevant and meets or goes beyond their expectations.
- if the topic is of your own choice, and the angle you’ve chosen to take, who do you want to take part? Finding them, and attracting them to the workshop will be part of your marketing efforts, as well as how you plan your structure and content.
We wouldn’t plan a workshop for ten-year-olds in the same way we might for adults. Consider what tone of voice you might use, the style in which we present how we use slides, and the content itself. You won’t be able to do this for each and every individual, but how you determine and empathize with your listeners can be done by creating a persona, or several personas .
Create an overarching idea of who might be present, then consider how to engage them and meet their needs by asking yourself the following in more depth:
Why are they there?
Let’s look at their reason for attending your event. Have they come to learn from you in particular? If you are a specialist in your field and the workshop is an area of great interest to people, you’ll most likely have a deep understanding, and along with that, expectations to be filled.
Have they come to gain a better understanding of the topic? Are they there to challenge themselves and their existing views, or perhaps yours?
How much do they know already?
Are your participants already proficient in the topic you’re delivering? You’d hopefully know this in advance of your workshop so you can adapt your material, and create a pitch in line with the group’s knowledge. If their experience level is unknown, an opener to your discussion might be to ask about their subject knowledge, ideas and expectations. That way you can tailor your language and approach.
It helps to be well versed in your workshop, to select sections you can skip out in favor of diving deeper into more advanced information. Improvisation isn’t usually a skill you’d immediately connect with presenting, but with practice, learning how to improvise can become an empowering tool to have.
For beginners, you’ll most likely take an introductory approach. This doesn’t mean it has to be dry or boring. Make it more interesting and engaging by weaving in an interactive exercise, or team debate within your presentation design. That way, the participants can gather more hands-on experience to support their understanding. This can of course use visual handouts, such as a workbook, or include a well-designed visual exercise on an interactive whiteboard.
What is their background and communication style?
Your presentation style, language, and cultural references should be considered in the writing and designing process. I recently attended a workshop on how we can create better inclusion for diverse audiences by considering the language we use. It really made me think about how we often lean towards using English as a “default” language, and how words often hold different weights and contexts in other languages.
Remote workshops and presentations mean we may have a very diverse audience than if we were presenting in-person, in one location. Online could mean 140 people in different time zones across different countries with different backgrounds. Being aware of differences makes it easier to use inclusive, easy-to-understand language in your presentation so that no one feels alienated. Speaking with clear articulation will make a big difference in how you are understood.
You might have the best workshop on the planet, but if you don’t communicate in the style of your group, the impact will be lost. Do they want a short and snappy talk with a clear outcome at the end? Some audiences appreciate a motivational and inspirational talk that is led through emotional storytelling. Knowing their communication preferences can win over or lose your audience.
Before you begin designing your presentation, it’s important to consider what your purpose is. This is your mission statement, your project brief and your raison d’être. Here is where you want to ask yourself, what is it that you want your audience to think, feel or do? Are we creating an emotional impact or an educational goal?
Be as clear as possible with your core message, making it as specific as possible, so that you can keep this in mind throughout the process of writing, editing, designing and delivering presentations. This will keep your focus sharp, and avoid any unnecessary derailments taking your viewers away from what it is you hope to achieve.
Common purposes are to: inspire, inform, persuade or entertain .
- I want to inspire the audience to help reduce food poverty by leading a cookery workshop using supermarket waste.
- I want to inform the group about the future of rural tourism, so they might consider how they could adapt their own farming businesses to host visitors.
- I want to persuade my team to reduce our use of plastic in the fashion industry, by presenting a viable alternative made from mushrooms.
- I want to entertain by pretending to be a Martian visiting Earth for the first time . My purpose is to help the participants understand their product from a new perspective!
A Martian Sends a Postcard Home #creative thinking #idea generation #remote-friendly #brainstorming #energizer #team Use Craig Raine’s poem A Martian Sends a Postcard Home to spur creative thinking and encourage perspective shifting in a group. After a warm-up, you can then use this martian perspective to describe your product or service and gain new insights and ideas.
I recently designed a workshop called Design Thinking for Beginners and ran a SessionLab show and tell session aimed at facilitators who would like to run the workshop for teams new to design thinking. If you missed it, you can watch it back here. My purpose was to inform the attendees of the challenges newbies have with design thinking, and how they can make it a fun and digestible process.
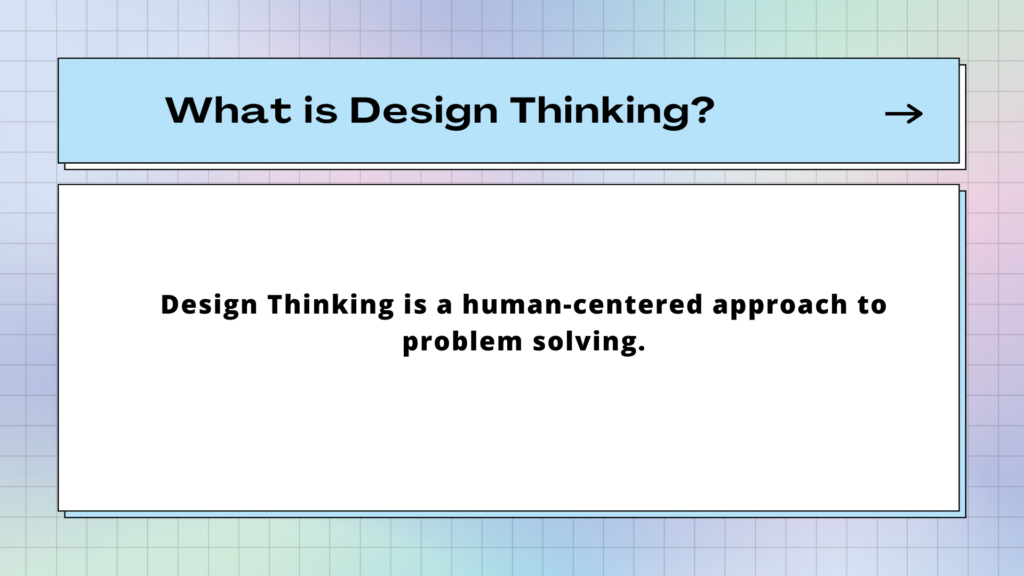
I chose to relate each stage of design thinking to an everyday project of choosing or baking a birthday cake. My presentation was broken down into manageable chunks. Describing design thinking could be a laborious task, but keeping the text definition simple, with plenty of white space highlighted the point in one sentence.
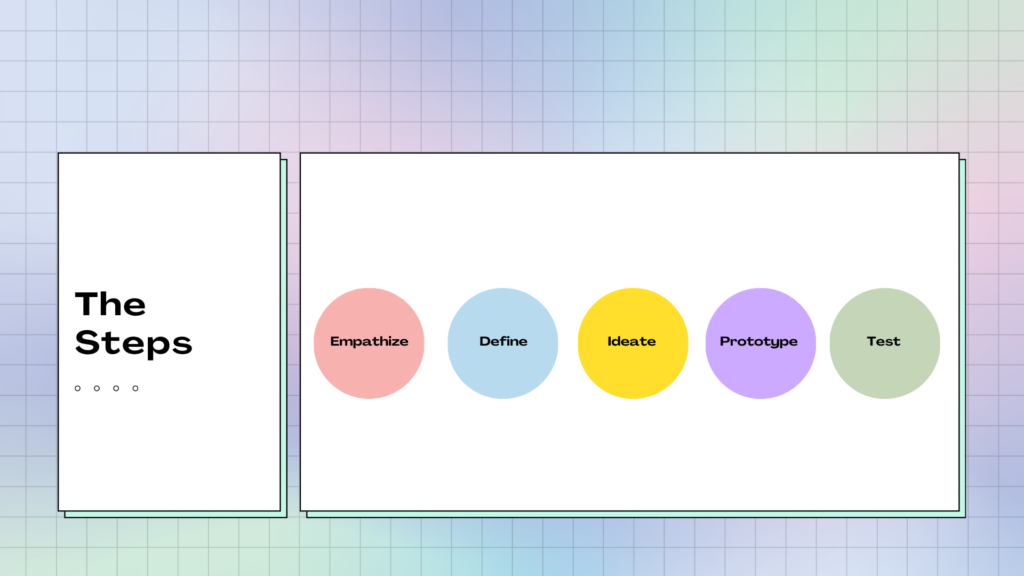
For the workshop itself, I incorporated interactive exercises throughout the process to lock in the understanding of design thinking and how we generate ideas. For the ideate stage of design thinking- I created a game show style exercise called the Ideas Vault where I chose to create a fun layout like a 90s computer game. The design process worked by gathering inspiration using a mix of pre-made Canva templates and adding my own twist. I talk more about Canva and design tools here .
The way you choose to structure a visual presentation will depend wholly on the purpose. The way you communicate your key message should be crafted in a way for the audience to follow along easily and act on those all-important takeaways at the end.
A solid structure will also make sure your points are clear so that you stay calm and on track when presenting. The structure of your topic, when written down and broken into manageable chunks will help hugely when it comes to creating the visual elements later. (we’ll get to that in the next section!)
Some common ways to structure your presentation could be
- Problem > Solution > Impact. Which you might use if your purpose is to inspire the audience to take action on a topic, by showing them a viable solution.
- You may start with an informative session and create a workshop as we mentioned before, to lead people through a learning process.
- A creative structure might be through storytelling , which might inspire and entertain. Once upon a time, this event happened, followed by the outcome and moral of the story.
- In any case, your presentation could follow the classic layout of: introduction, main body & conclusion, and you’d have a good foundation for your content.
Introduction
You have the first few seconds to grab people’s attention. First impressions are just as important as they’re made out to be! The introduction is the most important part, where the group will connect with you and decide if they want to listen to you or not. What would be a great hook for the audience to immediately buy into your presentation from the start?
Some people introduce themselves at the beginning- but you don’t have to. If you’re beginning with a story, this can be a very effective way to warm up your participants and make sure they’re really listening to you. Then you can introduce yourself when you know they have your attention, and they value what you have to say.
A quote or a provocative question or fact can get people thinking. You may use a thought-provoking image, which could be a prop, a video or a photo that introduces your presentation from the get-go. If you are offering a solution, go straight to the problem in your introduction.
Main body of presentation
Now that you’ve got your audience’s attention, and they have gathered an understanding and are intrigued to learn more, we can delve into the juice of your subject.
The main body involves presenting the data, and the important pieces of information. If you are offering a solution to the problem you introduced, expressing this with a visual, we place the subject right in front of them, and they don’t have to work so hard and use their imagination.
The main body doesn’t have to be a one-sided conversation. Listen! You might ask the group to interact, asking for their perspective. A talk or workshop can be a dialogue between the presenter and the group.
Your conclusion should be as snappy and engaging as your introduction. It may even loop back to the provocative question, or challenging problem. You’ll want to consider the impact on the attendees and most importantly, what you want them to do next! What action do you want them to take beyond the workshop?
What are the key takeaways? Highlight them as Problem > Solution > Impact.
An effective class should tie up the opening question and objective, but still leave space for further exploration and discussion. Like a great film! They should not be saying, “I’m glad that’s over”. If it’s been designed with the audience in mind, they should feel something- energized or excited.
Now that you’ve written the content and designed the structure, here are our top tips to get you creating impactful visuals to complement what you present verbally. We’ll cover:
- How to design your slides and what information to include
- How typography impacts accessibility and design
- Making smart color choices for both emotional connection and accessibility
Designing your slides
When approaching a blank canvas, it can be hard to know where to start. Some people start with deciding how many slides they’ll use- the question, “How many slides are too many slides?” crops up regularly in these types of articles. Expert presenters say not to go over 20 visual slides, but this will of course depend on the length and complexity of your subject. Another tip is not to spend more than a minute on each slide to keep it snappy and people engaged.
If I am creating a presentation from scratch, I’ll start with the first slide, and keep it very simple before moving on to the next one. Always asking “what is this slide saying? ” The first slide will be the title of my discussion, which will be visible to everyone joining the room. It sets the tone for what the topic will be about. If we were creating one around the topic of designing workshop slides, it might look like this:
I think the most important thing to remember is that each slide should have its own purpose, and not be overloaded with text. Where possible, use an image rather than words and think about how we might convey this message visually. Always start by defining the message and asking what the key takeaway for participants is. You can always further explain verbally.
When choosing an image, consider the audience and their context- a local photograph they can relate to, or a familiar face will often have more to say than a generic stock image.
Text will likely be used on your slides, and how much text is too much? If you begin planning your content by writing it all out and keeping only the most important parts, designing your slides will be a lot easier. I’d always recommend editing continuously throughout the process to create a meaningful message. If you can say something in 3 bullet points rather than 10, please do! Your audience will have a much easier time retaining the information.
“Good design is invisible”
Unless the subject of your presentation is about typography, it’s probably not the best time to be cracking out your most recently found, favorite font that’s “a bit different” or unusual. Stick to standard, trusted and most legible fonts that audiences can read and are familiar with. Otherwise, they’ll distract from the content. And content is King.
“Good design is invisible”, a true and very useful phrase from Dieter Rams, who considers functionality in design as honest, long-lasting and with as little design as possible. This is a good theory to take throughout the design process. When looking for the right font, consider the tone you are using throughout your delivery too, and the overall message you are giving.
Good typography is your best friend for a presentation. When creating visuals for screens, as mentioned before, we are not typing out our speech word-for-word. Any text that is visually presented will have a very definite purpose as to why it is being displayed. This might be a quote, some data or the title of a book along with some further information in short form. Presentation slides are not a book.
Legibility is the most important thing when it comes to designing your visuals. Sans serif fonts are typically the best option for reading on a screen. Help your audience understand what you are communicating as quickly and easily as possible by ensuring the font sizes are easy to read.
Create contrast and visual interest by choosing two fonts, one for headers and one for any body text. The contrast should still be harmonious, and not jarring to the eyes. Font hierarchy can help the audience differentiate between key points and more specific information. By choosing different weights and sizes, you can ensure your message is clearly heard and understood.
- Minimum font size for main copy and bullets: 18 points
- Preferred font size for main copy and bullets: 24 points
- Preferred font size for headers or titles: 36 to 44 points
Personally, I like to choose font sizes slightly larger than recommended for body text. When we have a text-heavy page, I prefer to give the text plenty of surrounding white space and edit the copy as much as possible. From a design perspective, it helps legibility; and from a content perspective, it doubly ensures only the relevant text is presented on screen. I would definitely edit again at this stage. In this example for screens, the body text is 28pt and written in Open Sans, and the “Ideate” heading is 44pt in Agrandir wide.

Before creating any printed material for presentations, consider if it will truly be used and the environmental impact. I’d usually opt for sharing a digital version for people to refer back to after the workshop. It’s good practice to create a black and white version so that if it is printed out, the printing costs will be lower. There are of course digital accessibility issues, and some people might prefer a printed version. If so, select a serif font for any long text in a workbook or feedback form, with a minimum font size of 10-12pt.
Key points:
- Use Contrast
Deciding on the color scheme for a presentation is one of my favorite parts! Of course, you may have been given a branded color scheme to use, but if you have free reign in color choice and you enjoy the creative process, it can be a lot of fun.
For my show and tell on Design Thinking, I used the analogy of baking a cake and I felt that they conjure up an image of pastels. I used a gradient on the background so that I could use an array of colors without it being overbearing. I selected five key pastel colors for each stage of design thinking and to evoke a playful feel throughout. I was careful not to allow the colors to take over, so you’ll primarily see black and white use of color at the forefront for legibility.
Here are the key elements of how to choose a color scheme to complement your content :
The first, and most important point when choosing colors, is to use contrast. Make sure your text and graphics stand out from the background and are easily seen. Contrast is the difference in opposing colors so that they don’t blend in together A light background should use dark text and perhaps one or two bold accent colors to highlight key points. A dark background should use light fonts.
If you’re unsure of how easy a slide is to read, there are an array of online tools that can check the contrast for you by following the web accessibility guidelines. On Contrast Checker , you can enter the HEX code of the background and foreground colors, and you’ll get an idea of legibility. The sliders in the tool can be used if you need to improve the contrast and amend the color choices. There are also resources to guide you in how to select the color with an online eyedropper tool in case you’re not familiar with the HEX color codes.
Another contrast checker tool also shows the background and foreground with text examples and gives a rating to the accessibility of the text. This website has a whole host of tools, and can even pick a suitable palette for you.
If you’re working with a client, they may already have their own brand packaging and presentation template, including their colors. You may feel that this removes your choice of colors as it has been decided already, for example, they may use an in-house color language to refer to particular data on a graph. But the opposite may be true and might mean further considerations for visuals. It is important to know how to choose because when you create graphics or diagrams because you may have to select colors so that explanatory text can be seen on top of a shape or part of a graph.
When working with a client, it is important to share any documentation with their design team, and the best way to do this is by providing editable files. Working with a designer can massively lift the load on creating your presentation visuals. If there is no design team, but you are given design assets to work with, sharing both your visuals and your presentation agenda for collaboration and sign-off is a must. Create your agenda in SessionLab , and attach your visual presentation for ease of sharability.
Studies have shown that color has an effect on expressing or feeling emotions. It will help to consider the tone that you are using throughout your presentation, the message you are delivering, and how you might want your audience to feel.
Warm colors, in the middle of the color spectrum, that aren’t too bold or too light create a warm and comfortable feeling. Bright reds and oranges can feel energetic and powerful. Or even create a sense of danger. In contrast, cooler colors such as greens, blues and purples can feel calm or evoke a sense of sadness.
We have an exercise that can help identify emotions and grow a better emotional vocabulary, the feelings wheel . It includes a visual attachment displaying the emotions in a range of colors- this may help select a tone for your color scheme.
The Feeling Wheel #emotional intelligence #self-awareness #icebreaker #team building #remote-friendly By growing our emotional vocabulary, we can better identify our emotions, and check in with ourselves. Doing so can help bring a level of self-awareness, and a better understanding of others.
How to choose an engaging presentation format
We are almost there! The content is edited and your visual slides are ready, the next stage is to consider the format in which you’ll deliver your workshop or meeting. This is when you can consider any additional tools that you can use to your advantage when presenting. This might be video, photography or visual data. Or even props. Consider which other visual aids may help people to better understand the process or story you are conveying.
What presentation method will keep them engaged? How will you inspire and capture their imagination?
I’d recommend simplicity, and not try to include every form of media. Consider the purpose and message and select which format delivers it most effectively. Used with intention, video can be great. But animated graphics or flashy text is unnecessary and will add to the cognitive load of your audience, especially if they have any visual impairments.
Video can be very effective, so long as it’s kept brief. If it’s longer than a minute, you may lose the attention of the audience, and the momentum of your presentation. A film clip should be creative and add another dimension, not an infomercial or promo piece, it’s a tool to say something that you cannot put across otherwise.
Films can have great benefits of showing a story. In a TED Talk about the intelligence of crows, the scientist showed a clip of the crow bending a hook to create a tool and fish a piece of food out of a tube. It put across his point better than anything he could’ve said.
I use recordings in situations like this, to demonstrate a case study. It’s often more powerful to have the original storyteller sharing their experience than me giving a second-hand account of the tale. Bringing in other voices in this way can add further diversity to your workshop.
Still images
JPEGs are compressed files and are used for photo formats. When a photo is taken, it is a RAW file that is editable. Once it’s compressed to a JPEG, it retains around a tenth of the information, meaning it is a smaller and less detailed file. JPEGS are used in photography, but not in vector graphics (drawings, typography, graphs, etc), as the detail lost can create pixelation if you aim to blow the image up to a larger size.
PNGs retain detail and are editable. They are still compressed files, but the pixels aren’t lost. Any graphics you create should be saved as a PNG, as you’ll be able to keep the image sharp, regardless of the size.
The photography you choose must be relatable. I’m definitely not against stock imagery per se, it’s amazing to have access to a library of searchable images to strengthen what you are saying. But, often you’ll see the same images repeated in different workshops and presentations and they’ll start to lose their meaning, or become too familiar. There are great free resources like Unsplash and if you spend time looking for a more unique way to put your point across, there are lots to choose from.
I’ve also had an Adobe Express subscription which gives access to photography and graphics and templates which you to customize in editing with little design skills. Ideally, being able to take your own photographs, or work with a professional photographer to capture exactly what you want is going to give your audience a far more unique experience. This is often a luxury.
As facilitators, a way around this could be to create our own library of photos that we capture at each presentation. When I’ve run crafting workshops, it feels quite natural to take photographs of the work we are creating. And those who are camera-shy, they’re more open to photographs of their hands in action. Over time, we’ll have a whole collection of resources.
If you enjoy photography, having a good camera as part of your kit might intrigue people, invite people to take photos of each other and the workshop process. This could be an exercise that you do to open or close your talk. Or in some cases, especially if it’s a visual presentation, and not too distracting, invite people to take their own photos and share after with a #hashtag (promo and photos in one!) And of course, get everyone’s signature attesting they are OK with photos.
Visual data & symbols
Visualizing data makes it more interesting, engaging and memorable than cold hard figures. For the majority of audiences, it’s easier to understand in a visual format than in a list of forgettable numbers. By creating charts, graphs or maps, we are able to see patterns and understand the context of the statistics. A pie chart displaying percentages in corresponding colors tells our brain quickly which section has the largest number.
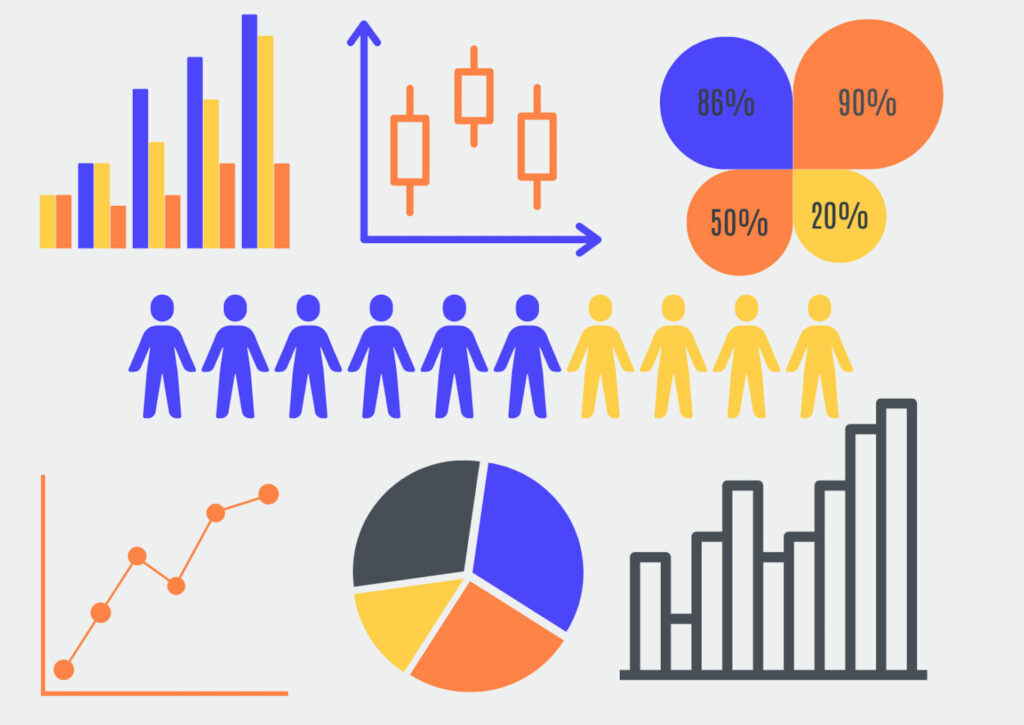
Even when we analyze word-driven data, a visual representation is easier to see straight away. When I’ve worked with community groups in the design thinking process, we’ve often used Google surveys to capture written evidence. This type of qualitative data can be a challenge to sift through, so for an initial overview, a tool like word cloud can show how many times a particular word or phrase appears and turns it into an image. The more times a word appears, the larger it is on the image.
The use of icons and emojis (sparingly! And in context 😉) can add another element of visual understanding to presentations. Illustrations and hand-dawn symbols might better express your point than a photograph too. An opportunity to work with a live scribe or graphic facilitator whilst presenting could add an interesting dimension to a talk. If it involves audience participation, having someone on hand to capture the conversation visually can keep engagement and attention going!
The best tools for designing your presentation
Canva has become a much more powerful tool than it was. You can even edit your workshop recordings with it now! It’s perfect for anyone with little design knowledge as it has great templates for presentations, lots of which are free. It has social media templates too, which are perfect for advertising your upcoming workshop.
Adobe Creative Suite
I do love Creative Suite , and it still is a great package of tools for designers. Photoshop, Illustrator and InDesign are the industry standard for design tools and have all the capabilities you’d need as a graphic designer. If that package is beyond your scope, Adobe Express is a great option for pre-made templates and stock imagery. Like Canva, it also works well as an app on a smartphone.
Keynote
Keynote comes as standard with MacBook and has had a whole new upgrade including being able to use the camera on your Mac or an external camera to show yourself directly on the slides. Super handy for an online event! You can also show the screen of a connected iPad or iPhone and it now has co-hosting capabilities.
Of course! SessionLab is where you can keep all of your presentation notes, and break down the agenda into blocks, so if you decide to switch up parts of your presentation- you can drag and drop to a different section of your talk. It is a much easier process, as it will also keep any other attachments or exercises in that block neatly collated in one place. It’s easy to share with any co-hosts or clients before the presentation day arrives!
How to deliver a workshop presentation with visuals
Some people memorize their speech word for word, which can work well if you’re a dab hand at amateur dramatics.
On the other hand, that might feel too stressful or rigid. Bill Murray is famously known to read a script once and throw it away! For you, it may be better to consider the key points you’d like to make, and really know your subject matter so whatever arises, you’ve got it covered. Your visuals might act as a prompt for you too, the main message will be communicated visually, and you can feel free to go into more depth.
The best way to ensure that you nailed the slide design for your session is to practice. It’s important to practice noting your timing, that you’ve covered all the important points, and that each slide transitions smoothly from one to the next. You want the presentation to be as seamless as possible. The best way to practice is in front of someone and gather feedback.
Before our design thinking for beginners show and tell, I rehearsed in front of my fellow team members, instructing them to wear their “facilitator’s hats” whilst listening, so they could hear from a facilitator’s perspective and give constructive feedback.
Afterward, you can continue to add and edit, removing some sections, and making room for more key discussions to be had in-depth. If it is an informal presentation that you will run more than once, it could develop over time. If it is a one-off very important meeting, it’s vital to get as much preparation practice as possible.
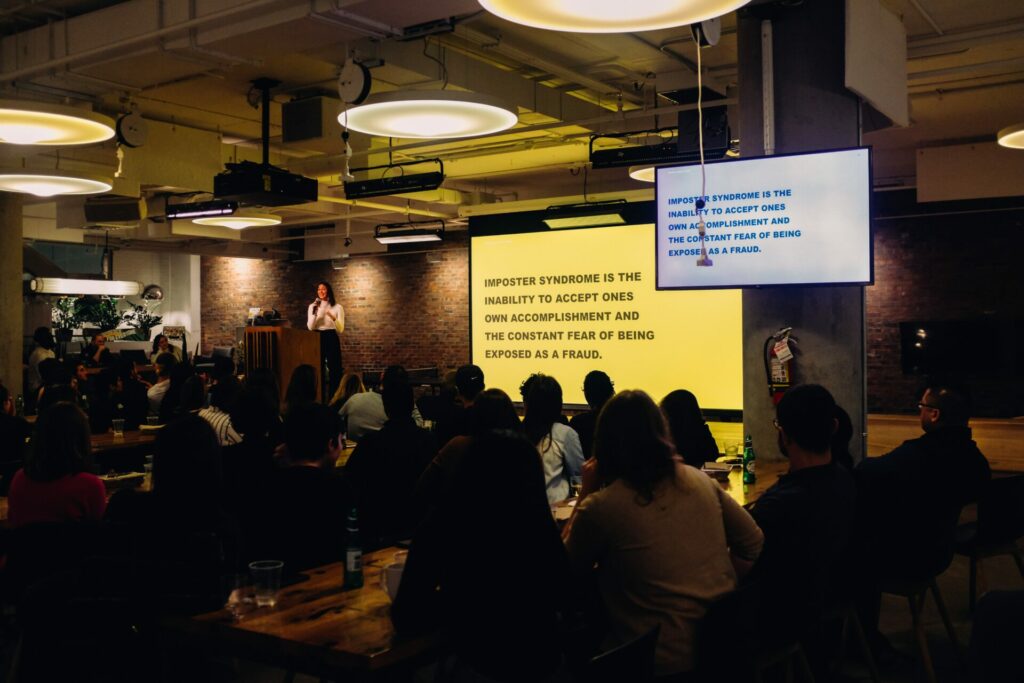
Expect nerves
If I get nervous, I purposely talk slightly slower than I usually would naturally, and it calms the nerves down. There’s also no harm in mentioning that you’re nervous, it’s an honest approach and can create an authentic connection.
We’re all human. And no one would expect you to not be nervous. Nerves, to an extent, can be a good thing. They bring a bit of energy and focus to your talk, and a little adrenaline. If you know your subject matter inside out, all you really need to do is breathe, and talk.
Speaking with one of our community members, Yvonne Chin Irving on the subject of nerves, she suggested diaphragmatic breathing, or more a more fun term, “balloon breathing”:
Belly breathe. Slowly. Imagine your tummy has a balloon that fills up when you breathe. Exhale all the air. Notice your tummy as it flattens. Next, breathe in slowly and fill your “balloon” with breath 🎈. Do this a few times to help calm yourself down. You can start this on the way to your session, do it in the car or while you’re setting up for your session. (It really works) Yvonne Chin Irving
We’d love it if you joined the conversation in our SessionLab community!
Having a technical rehearsal beforehand can help avoid blips. Ensure the right people have screen-sharing abilities, and that screens in the in-person space work. Iron out any microphone issues or problems with echo prior to the big presentation! On the day itself a technical disaster could strike, so here are some practical tips to circumnavigate these and stay professional:
- Create different formats for your presentation. If it’s a Keynote or Powerpoint, have a PDF version available in case of any tech issues you’ll still have a high-quality version available.
- If including video, have backup screen-shots as images to demonstrate your points in case the video doesn’t run.
- Be analog ready. Know your presentation without the use of slides- or print them out so that if there is a complete technical breakdown, you can confidently present. This might include creating printed handouts for people to refer to when you direct them to do so. Or, if they have their own smartphones, send them the link to your visuals or any important videos to watch back after your talk, to avoid distractions as you speak.
Accessibility
Ensuring your audience has the best experience, requires being aware of accessibility needs. Is access to the building easy for anyone with physical disabilities? Are the seats comfortable, and allow for ease of viewing for people of different heights?
We’ve discussed the best way to use typography for ease of reading for anyone with visual impairments, and when setting up your screen, it is a good idea to see how it will look in the actual event environment. Additionally, you may share larger-print handouts on yellow paper for anyone with dyslexia. This is another reason why knowing your audience in the planning stage will make sure your presentation is enjoyable and accessible for everyone.
Agenda planning
SessionLab is an agenda planning tool that makes presenting a lot smoother! You are able to allocate time to each section of content to keep yourself on track throughout. In your preparation stage, you can attach all of your materials to your SessionLab agenda, knowing exactly when you’ll use each of them. It’s so neatly organized and easy to edit and shift blocks if you decide to change the order of content for a future session.
In conclusion
I hope you have found this guide valuable, and that it inspires lots of ideas when planning your next presentation! There are a wealth of resources dotted around this article, and I’ll include a few more here that I highly recommend:
Lean Presentation Design A whole website by Maurizo la Cava dedicated to presentation strategy
Ted Talk: How to Write Less, but say more is an excellent talk by Jim VandeHai about short and effective communication.
Five Things to Know About Your Audience Before You Present if You Want to Be Successful useful tips on how to empathize with your group for a more successful presentation.
Let us know below in the comments if you have any questions, or any tips of your own to add to the conversation!

Carrin is the community and partnerships manager at SessionLab. She’s helped community initiatives and NGOs tackle complex problems through facilitated design thinking workshops. As a lifelong learner, you’ll find Carrin hosting SessionLab community events featuring guest facilitators, trainers and coaches sharing their experiences.
Leave a Comment Cancel reply
Your email address will not be published. Required fields are marked *

Going from a mere idea to a workshop that delivers results for your clients can feel like a daunting task. In this piece, we will shine a light on all the work behind the scenes and help you learn how to plan a workshop from start to finish. On a good day, facilitation can feel like effortless magic, but that is mostly the result of backstage work, foresight, and a lot of careful planning. Read on to learn a step-by-step approach to breaking the process of planning a workshop into small, manageable chunks. The flow starts with the first meeting with a client to define the purposes of a workshop.…

Effective online tools are a necessity for smooth and engaging virtual workshops and meetings. But how do you choose the right ones? Do you sometimes feel that the good old pen and paper or MS Office toolkit and email leaves you struggling to stay on top of managing and delivering your workshop? Fortunately, there are plenty of great workshop tools to make your life easier when you need to facilitate a meeting and lead workshops. In this post, we’ll share our favorite online tools you can use to make your life easier and run better workshops and meetings. In fact, there are plenty of free online workshop tools and meeting…

How does learning work? A clever 9-year-old once told me: “I know I am learning something new when I am surprised.” The science of adult learning tells us that, in order to learn new skills (which, unsurprisingly, is harder for adults to do than kids) grown-ups need to first get into a specific headspace. In a business, this approach is often employed in a training session where employees learn new skills or work on professional development. But how do you ensure your training is effective? In this guide, we'll explore how to create an effective training session plan and run engaging training sessions. As team leader, project manager, or consultant,…
Design your next workshop with SessionLab
Join the 150,000 facilitators using SessionLab
Sign up for free
We use essential cookies to make Venngage work. By clicking “Accept All Cookies”, you agree to the storing of cookies on your device to enhance site navigation, analyze site usage, and assist in our marketing efforts.
Manage Cookies
Cookies and similar technologies collect certain information about how you’re using our website. Some of them are essential, and without them you wouldn’t be able to use Venngage. But others are optional, and you get to choose whether we use them or not.
Strictly Necessary Cookies
These cookies are always on, as they’re essential for making Venngage work, and making it safe. Without these cookies, services you’ve asked for can’t be provided.
Show cookie providers
- Google Login
Functionality Cookies
These cookies help us provide enhanced functionality and personalisation, and remember your settings. They may be set by us or by third party providers.
Performance Cookies
These cookies help us analyze how many people are using Venngage, where they come from and how they're using it. If you opt out of these cookies, we can’t get feedback to make Venngage better for you and all our users.
- Google Analytics
Targeting Cookies
These cookies are set by our advertising partners to track your activity and show you relevant Venngage ads on other sites as you browse the internet.
- Google Tag Manager
- Infographics
- Daily Infographics
- Popular Templates
- Accessibility
- Graphic Design
- Graphs and Charts
- Data Visualization
- Human Resources
- Beginner Guides
Blog Data Visualization 18 Presentation Design Tips For Success
18 Presentation Design Tips For Success
Written by: Midori Nediger May 15, 2023

Bad presentations. We’ve all had to sit through them. Heck, we’ve probably all given one or two. I know I have.
You know the type: twice as long as they need to be, slides chock-full of text, no visuals in sight.
How can you ensure you don’t fall victim to these presentation faux-pas when designing your next presentation for your team, class, or clients?
In this blog, I’ll walk you through tips on how to design an impactful presentation along with presentation templates that can help you deliver it with style to leave a lasting impression.
Tips for designing and delivering an impactful presentation
What makes a presentation memorable?
It usually comes down to three things:
- The main idea.
- The presenter.
- The visuals.
All three elements work together to create a successful presentation. Just like how different presentation styles serve different purposes, having a good presentation idea will give the audience a purpose for listening.
Here are some top tips to consider to help you design and deliver an impactful presentation:
- Include less text and more visuals in your presentation design
- Identify one core message to center your presentation design around
- Eliminate any information that doesn’t immediately support the core message
- Create a strong presentation outline to keep you focused
- Use text to reinforce, not repeat, what you’re saying
- Design your presentation with one major takeaway per slide
- Use visuals to highlight the key message on each slide
- Use scaffolding slides to orient your audience and keep them engaged
- Use text size, weight, and color for emphasis
- Apply design choices consistently to avoid distraction
- Split a group presentation by topic
- Use a variety of page layouts to maintain your audience’s interest
- Use presentation templates to help you get started
- Include examples of inspiring people
- Dedicate slides to poignant questions
- Find quotes that will inspire your audience
- Emphasize key points with text and images
- Label your slides to prompt your memory
1. Include less text and more visuals in your presentation design
According to David Paradi’s annual presentation survey , the 3 things that annoy audiences most about presentations are:
- Speakers reading their slides
- Slides that include full sentences of text
- Text that is too small to read
The common thread that ties all of these presentation annoyances is text. Audiences are very picky about the text found in presentation slide decks .
In my experiences speaking at conferences and in webinars over the past few years, audiences respond much more positively to presentations that use visuals in place of text.
Audiences are more engaged, ask more questions, and find my talks more memorable when I include lots of visual examples in my slide decks.
I’m not the only one who has found this. We recently surveyed nearly 400 conference speakers about their presentation designs and found that 84.3% create presentations that are highly visual.
A great example of a high visual presentation is the iconic AirBnB pitch deck design , which includes no more than 40 words per slide. Instead of repeating the speaker’s script on the slides, it makes an impact with keywords, large numbers, and icons:

Learn how to customize this presentation template:
To help you take your presentations to the next level, I’d like to share my process for creating a visually-focused presentation like the one above. I’ll give you my top presentation design tips that I’ve learned over years of presenting:
- Class presentations
- Online courses
You can then apply this process to our professional presentation templates or pitch decks , creating unique presentation decks with ease! Our user-friendly editor tools make customizing these templates a breeze.
To leave a lasting impression on your audience, consider transforming your slides into an interactive presentation. Here are 15 interactive presentation ideas to enhance interactivity and engagement.
We’ll cover the most important steps for summarizing lengthy text into a presentation-friendly format. Then we’ll touch on some presentation design tips to help you get visual with your slide decks. Read on for the best creative presentation ideas .
2. Identify one core message to center your presentation design around
We know from David Paradi’s survey that audiences are easily overwhelmed with lots of text and data, especially when presentations are long.

(You when you see a presentation with lots of text and data and it’s long)
So unlike in a white paper , report , or essay , you can’t expect to tackle many complex ideas within a single presentation.
That would be a recipe for disaster.
Instead, identify a single central message that you would like to communicate to your audience. Then build your presentation around that core message.
By identifying that core message, you can ensure that everything you include in your presentation supports the goal of the presentation .
As seen below, a great presentation tells you exactly what you’re going to learn (the core message), then gets right to the facts (the supporting information).

To ensure you create an asset that’s clear, concise, impactful, and easy to follow, design your presentation around a single core message.
3. Create a strong presentation outline to keep you focused
Think of your outline as a roadmap for your presentation. The outline will shape the presentation structure and guide you through your content. Creating a strong presentation outline straight away helps make sure that you’re hitting all of the key points you need to cover to convey a persuasive presentation .
Take this presentation outline example:
- Introduction and hellos
- Vision and value proposition
- Financial profit
- Your investment
- Thanks and questions
These are all things that we know we need to talk about within the presentation.
Creating a presentation outline makes it much easier to know what to say when it comes to creating the actual presentation slides.

You could even include your presentation outline as a separate slide so that your audience knows what to expect:

The opening moments of your presentation hold immense power – check out these 15 ways to start a presentation to set the stage and captivate your audience.
4. Eliminate any information that doesn’t support the core message
Next, use that core message to identify everything that doesn’t belong in the presentation.
Aim to eliminate everything that isn’t immediately relevant to the topic at hand, and anything remotely redundant. Cut any information that isn’t absolutely essential to understanding the core message.
By cutting these extra details, you can transform forgettable text-heavy slides:

Into memorable slides with minimal text:

Here’s a quick checklist to help you cut out any extra detail:
Get rid of:
- Detailed descriptions
- Background information
- Redundant statements
- Explanations of common knowledge
- Persuasive facts and figures
- Illustrative examples
- Impactful quotes

This step may seem obvious, but when you’re presenting on a topic that you’re passionate about, it’s easy to get carried away with extraneous detail. Use the recommendations above to keep your text in check.
Clarity is key, especially if you’re presenting virtually rather than in-person. However, Lisa Schneider (Chief Growth Officer at Merriam-Webster) has had plenty of experience making that adjustment. She recently shared her tips for adapting in-person presentations into virtual presentations on Venngage that you can check out.
Watch: How to design a presentation [10 ESSENTIAL TIPS]
5. Use text to reinforce, not repeat, what you’re saying
According to presentation guru Nancy Duarte , your audience should be able to discern the meaning of your slides in 6 seconds or less.
Since your audience will tend to read every word you place on each slide, you must keep your text to an absolute minimum. The text on your slides should provide support for what you’re saying without being distracting.
Never write out, word for word, what you’re going to be saying out loud. If you’re relying on text to remember certain points, resist the urge to cram them into your slides. Instead, use a tool like Venngage’s speaker notes to highlight particular talking points. These can be imported into PowerPoint — along with the rest of your presentation — and will only be viewable to you, not your audience.

For the actual slides, text should only be used to reinforce what you’re saying. Like in the presentation design below, paraphrase long paragraphs into short bulleted lists or statements by eliminating adjectives and articles (like “the” and “a”).

Pull out quotes and important numbers, and make them a focus of each slide.

6. Design your presentation with one major takeaway per slide
As I mentioned above, audiences struggle when too much information is presented on a single slide.
To make sure you don’t overwhelm your audiences with too much information, spread out your content to cover one major takeaway per slide.
By limiting each slide to a single simple statement, you focus your audience’s attention on the topic at hand.
My favorite way to do this is to pick out the core message of whatever I’m talking about and express it in a few keywords, as seen in this presentation slide below.

This helps ensure that the visuals remain the focus of the slide.

Using the text in this way, to simply state a single fact per slide, is a sure-fire way to make an impact in your presentation.
Alternatively, pull out a significant statistic that you want to stick in your audience’s minds and make it a visual focus of the slide, as seen in this popular presentation by Officevibe .

This might mean you end up with a slide deck with a ton of slides. But that’s totally ok!
I’ve talked to many professionals who are pressured by their management teams to create presentations with a specific number of slides (usually as few as 10 or 15 slides for a 30-minute presentation).
If you ask me, this approach is completely flawed. In my mind, the longer I spend sitting on a single slide, the more likely I am to lose the interest of my audience.
How many slides should I use for a 10 minute presentation?
A good rule of thumb is to have at least as many slides as minutes in your presentation. So for a 10 minute presentation you should have at least 10 slides .
Use as many slides as you need, as long as you are presenting a single message on each slide, (as seen in the lengthy presentation template below). This is especially important if you’re presenting your business, or delivering a product presentation. You want to wow your audience, not bore them.

7. Use visuals to highlight the key message on each slide
As important as having one major takeaway per slide is having visuals that highlight the major takeaway on each slide.
Unique visuals will help make your message memorable.
Visuals are a great way to eliminate extra text, too.
You can add visuals by creating a timeline infographic to group and integrate information into visual frameworks like this:

Or create a flowchart and funnels:

Or by representing simple concepts with icons, as seen in the modern presentation design below. Using the same color for every icon helps create a polished look.
Using visuals in this way is perfect for when you have to convey messages quickly to audiences that you aren’t familiar with – such as at conferences. This would also make the ideal interview presentation template.
You can alternatively use icons in different colors, like in the presentation templates below. Just make sure the colors are complimentary, and style is consistent throughout the presentation (i.e. don’t use sleek, modern icons on one slide and whimsically illustrated icons on another). In this example, presentation clipart style icons have been used.

Any time you have important stats or trends you want your audience to remember, consider using a chart or data visualization to drive your point home. Confident public speaking combined with strong visualizations can really make an impact, encouraging your audience to act upon your message.
One of my personal favorite presentations (created by a professional designer) takes this “key message plus a visual” concept to the extreme, resulting in a slide deck that’s downright irresistible.

When applying this concept, don’t fall into the trap of using bad stock photos . Irrelevant or poorly chosen visuals can hurt you as much as they help you.
Below is an example of how to use stock photos effectively. They are more thematic than literal and are customized with fun, bright icons that set a playful tone.

The content and visual design of a presentation should be seamless.
It should never seem like your text and visuals are plopped onto a template. The format and design of the slides should contribute to and support the audience’s understanding of the content.

8. Use scaffolding slides to orient your audience and keep them engaged
It’s easy for audiences to get lost during long presentations, especially if you have lots of slides. And audiences zone out when they get lost.
To help reorient your audience every once in a while, you can use something I like to call scaffolding slides. Scaffolding slides appear throughout a presentation to denote the start and end of major sections.
The core scaffolding slide is the agenda slide, which should appear right after the introduction or title slide. It outlines the major sections of the presentation.
At the beginning of each section, you should show that agenda again but highlight the relevant section title, as seen below.

This gives audiences the sense that you’re making progress through the presentation and helps keep them anchored and engaged.
Alternatively, you can achieve a similar effect by numbering your sections and showing that number on every slide. Or use a progress bar at the bottom of each slide to indicate how far along you are in your presentation. Just make sure it doesn’t distract from the main content of the slides.

You can imagine using this “progress bar” idea for a research presentation, or any presentation where you have a lot of information to get through.
Leila Janah, founder of Sama Group, is great at this. Her Innovation and Inspire talk about Sama Group is an example of a presentation that is well organized and very easy to follow.
Her presentation follows a logical, steady stream of ideas. She seems comfortable talking in front of a crowd but doesn’t make any attempts to engage directly with them.
9. Use text size, weight and color for emphasis
Every slide should have a visual focal point. Something that immediately draws the eye at first glance.
That focal point should be whatever is most important on that slide, be it an important number, a keyword, or simply the slide title.

We can create visual focal points by varying the size, weight, and color of each element on the slide. Larger, brighter, bolder elements will command our audience’s attention, while smaller, lighter elements will tend to fade into the background.

As seen in the presentation template above, this technique can be especially useful for drawing attention to important words within a long passage of text. Consider using this technique whenever you have more than 5 words on a slide.
And if you really want your audience to pay attention, pick a high-contrast color scheme like the one below.

When picking fonts for your presentation, keep this technique in mind. Pick a font that has a noticeable difference between the “bold” font face and the “regular” font face. Source Sans Pro, Times New Roman, Montserrat, Arvo, Roboto, and Open Sans are all good options.

The last thing to remember when using size, weight, and color to create emphasis on a slide: don’t try to emphasize too many things on one slide.
If everything is highlighted, nothing is highlighted.
10. Apply design choices consistently to avoid distraction
Audiences are quick to pick out, and focus on, any inconsistencies in your presentation design. As a result, messy, inconsistent slide decks lead to distracted, disengaged audiences.
Design choices (fonts and colors, especially), must be applied consistently across a slide deck. The last thing you want is for your audience to pay attention to your design choices before your content.
To keep your design in check, it can be helpful to create a color palette and type hierarchy before you start creating your deck, and outline it in a basic style guide like this one:

I know it can sometimes be tempting to fiddle around with text sizes to fit longer bits of text on a slide, but don’t do it! If the text is too long to fit on a slide, it should be split up onto multiple slides anyway.
And remember, a consistent design isn’t necessarily a boring one. This social media marketing presentation applies a bright color scheme to a variety of 3-column and 2-column layouts, remaining consistent but still using creative presentation ideas.

11. Split a group presentation by topic
When giving a group presentation it’s always difficult to find the right balance of who should present which part.
Splitting a group presentation by topic is the most natural way to give everybody the chance to attempt without it seeming disjointed.

When presenting this slide deck to investors or potential clients, the team can easily take one topic each. One person can discuss the business model slide, and somebody else can talk about the marketing strategy.
Top tips for group presentations:
- Split your group presentation by topic
- Introduce the next speaker at the end of your slide
- Become an ‘expert’ in the slide that you are presenting
- Rehearse your presentation in advance so that everybody knows their cue to start speaking
12. Use a variety of page layouts to maintain your audience’s interest
Page after page of the same layout can become repetitive and boring. Mix up the layout of your slides to keep your audience interested.
In this example, the designer has used a variety of combinations of images, text, and icons to create an interesting and varied style.

There are hundreds of different combinations of presentation layers and presentation styles that you can use to help create an engaging presentation . This style is great for when you need to present a variety of information and statistics, like if you were presenting to financial investors, or you were giving a research presentation.
Using a variety of layouts to keep an audience engaged is something that Elon Musk is an expert in. An engaged audience is a hyped audience. Check out this Elon Musk presentation revealing a new model Tesla for a masterclass on how to vary your slides in an interesting way:
13. Use presentation templates to help you get started
It can be overwhelming to build your own presentation from scratch. Fortunately, my team at Venngage has created hundreds of professional presentation templates , which make it easy to implement these design principles and ensure your audience isn’t deterred by text-heavy slides.
Using a presentation template is a quick and easy way to create professional-looking presentation skills, without any design experience. You can edit all of the text easily, as well as change the colors, fonts, or photos. Plus you can download your work in a PowerPoint or PDF Presentation format.
After your presentation, consider summarizing your presentation in an engaging manner to r each a wider audience through a LinkedIn presentation .
14. Include examples of inspiring people
People like having role models to look up to. If you want to motivate your audience, include examples of people who demonstrate the traits or achievements, or who have found success through the topic you are presenting.
15. Dedicate slides to poignant questions
While you might be tempted to fill your slides with decorative visuals and splashes of color, consider that sometimes simplicity is more effective than complexity. The simpler your slide is, the more you can focus on one thought-provoking idea.

16. Find quotes that will inspire your audience
A really good quote can stick in a person’s mind for weeks after your presentation. Ending your presentation with a quote can be a nice way to either begin or finish your presentation.
A great example of this is Tim Ferriss’ TED talk:

Check out the full talk below.
17. Emphasize key points with text and images
When you pair concise text with an image, you’re presenting the information to your audience in two simultaneous ways. This can make the information easier to remember, and more memorable.
Use your images and text on slides to reinforce what you’re saying out loud.
Doing this achieves two things:
- When the audience hears a point and simultaneously read it on the screen, it’s easier to retain.
- Audience members can photograph/ screencap the slide and share it with their networks.
Don’t believe us? See this tip in action with a presentation our Chief Marketing Officer Nadya gave recently at Unbounce’s CTA Conference . The combination of text and images on screen leads to a memorable presentation.

18. Label your slides to prompt your memory
Often, presenters will write out an entire script for their presentation and read it off a teleprompter. The problem is, that can often make your presentation seem too rehearsed and wooden.
But even if you don’t write a complete script, you can still put key phrases on your slides to prompt jog your memory. The one thing you have to be wary of is looking back at your slides too much.
A good presentation gets things moving! Check out the top qualities of awesome presentations and learn all about how to make a good presentation to help you nail that captivating delivery.
Audiences don’t want to watch presentations with slide decks jam-packed with text. Too much text only hurts audience engagement and understanding. Your presentation design is as important as your presentation style.
By summarizing our text and creating slides with a visual focus, we can give more exciting, memorable and impactful presentations.
Give it a try with one of our popular presentation templates:

Discover popular designs

Infographic maker

Brochure maker

White paper online

Newsletter creator

Flyer maker

Timeline maker

Letterhead maker

Mind map maker

Ebook maker
How to create visual presentations and eLearning
- Written by: Richard Goring
- Categories: PowerPoint design , Visual communication
- Comments: 4

Most presentations are a cascade of text-heavy Death-by-PowerPoint slides, while online learners suffer the torture of wading through page after page of brochures converted to click-through-eLearning. However you look at it, a wall of text doesn’t work to engage people or compel them to action, so it really can’t be effective. That’s why most people now recognize that using visuals is the way to go. But how do you create visual presentations and eLearning that works? We think there are six steps you need to follow.
Step 1. Understand the audience
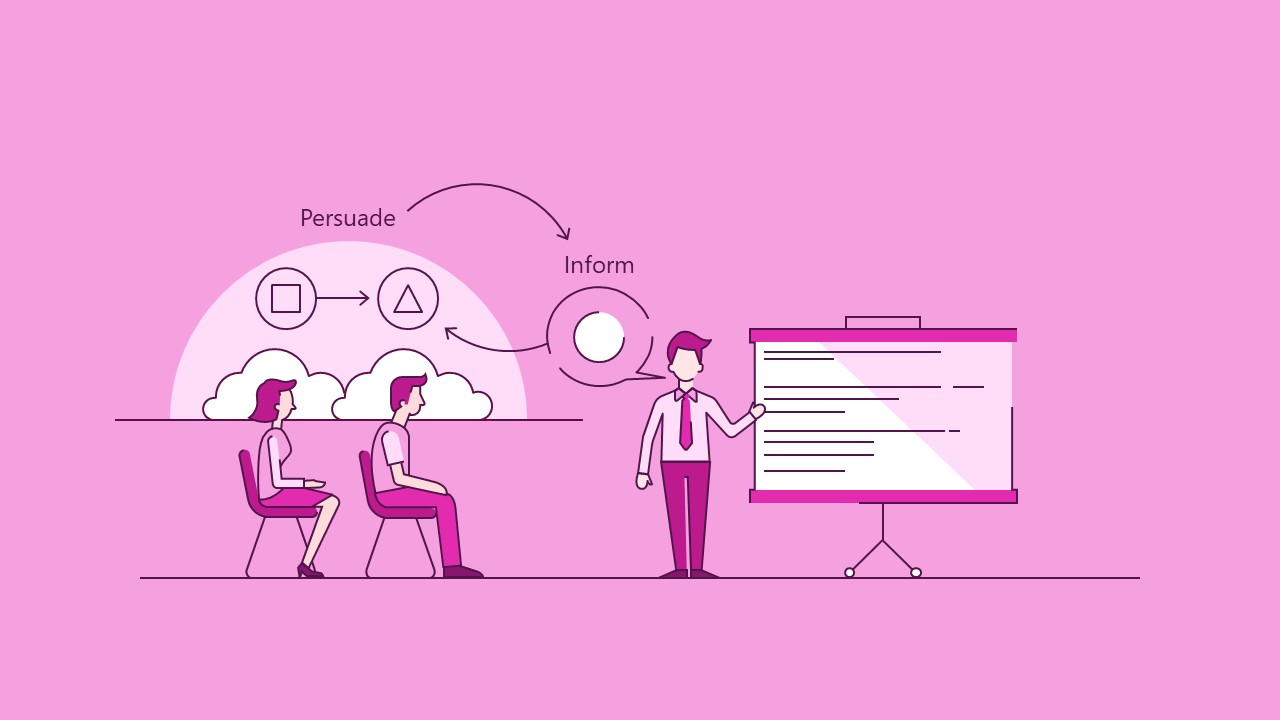
To know how to make a presentation effective, you need to understand the person on the receiving end and also decide what you’re trying to achieve. Are you trying to inform the audience of something – i.e. give them information they don’t have and help them understand it. Or persuade them to do something or change their behaviour – i.e. convince the audience the reasons to act in a certain way are stronger than the reasons not to. (Selling is typically a subset of this).
And it’s worth noting that a lot of the time, when you’re trying to inform people of something as your primary objective, you’ll also need to do at least a little persuasion, to get them to believe that your information is valid, valuable, and worth acting upon. Likewise, if you’re persuading people, you need to inform your audience so that they understand enough to be able to buy into your ideas.
When informing, you should have a clear idea of what exactly you are trying to inform about, and note it down in a couple of words so that you can easily refer back to it throughout the process.
If you’re persuading people, the same thing applies, but more specifically, we find it most helpful to think about this in terms of how the audience will benefit. What’s in it for them?
The options are many and various, but something short and punchy helps you to focus your story on what’s important to your audience and will make the story worth listening to.
Step 2: Identify key message or story
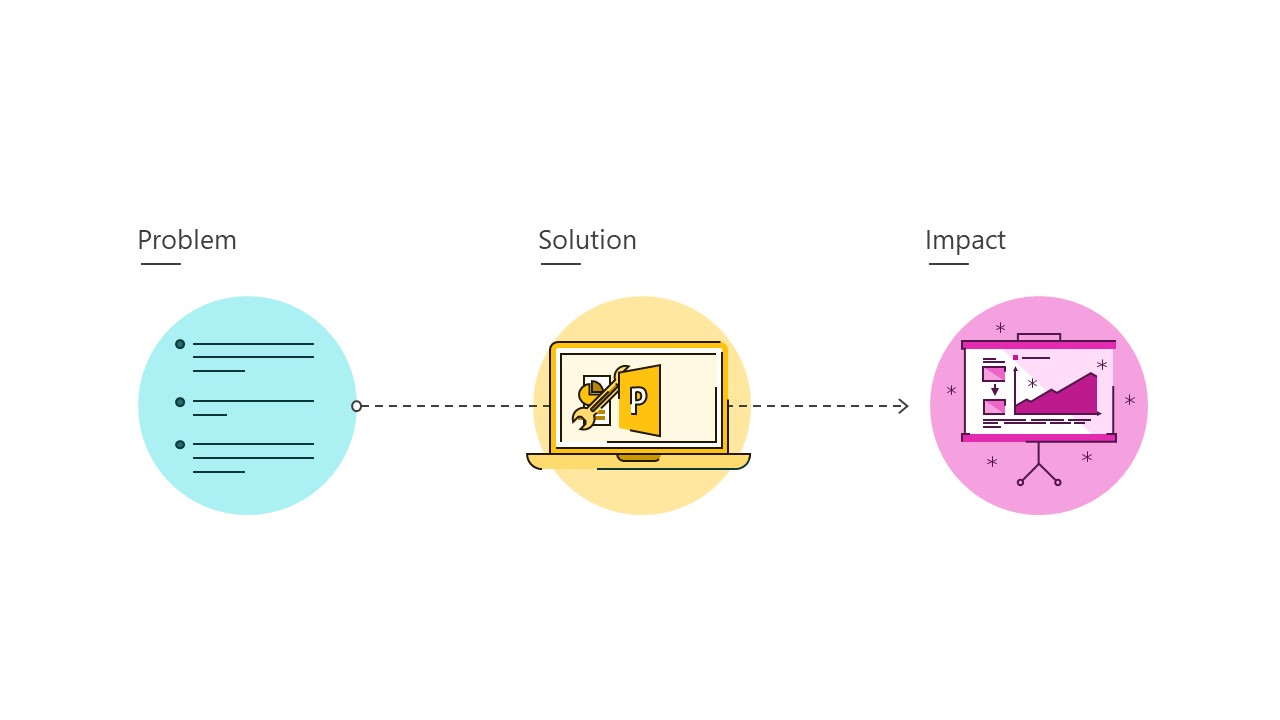
Now you need to decide what information to present to your audience in order to achieve your goal. And assess how much your audience already know about the topic, so you don’t repeat unnecessarily.
Typically, anything you’re attempting to visualise into a visual presentation has a lot of detailed content with relatively little structure. So to help, we recommend you simplify down to the core message in a nicely structured way that’s easy to understand, which then helps you to pick out what detail is most important and how to bring everything together.
Then take the necessary pieces of information and organise them into a story that flows, so it’s easy to follow. Often the framework of Problem -> Solution -> Impact is a good one to follow.
- Problem sets up the context and shows why this is something people need to know and pay attention to. It helps to frame the rest of the story.
- Solution is the details of what happens, or how something works.
- Impact is the end result – that will often lead to the outcome that your audience will achieve.
Step 3: Identify key objects
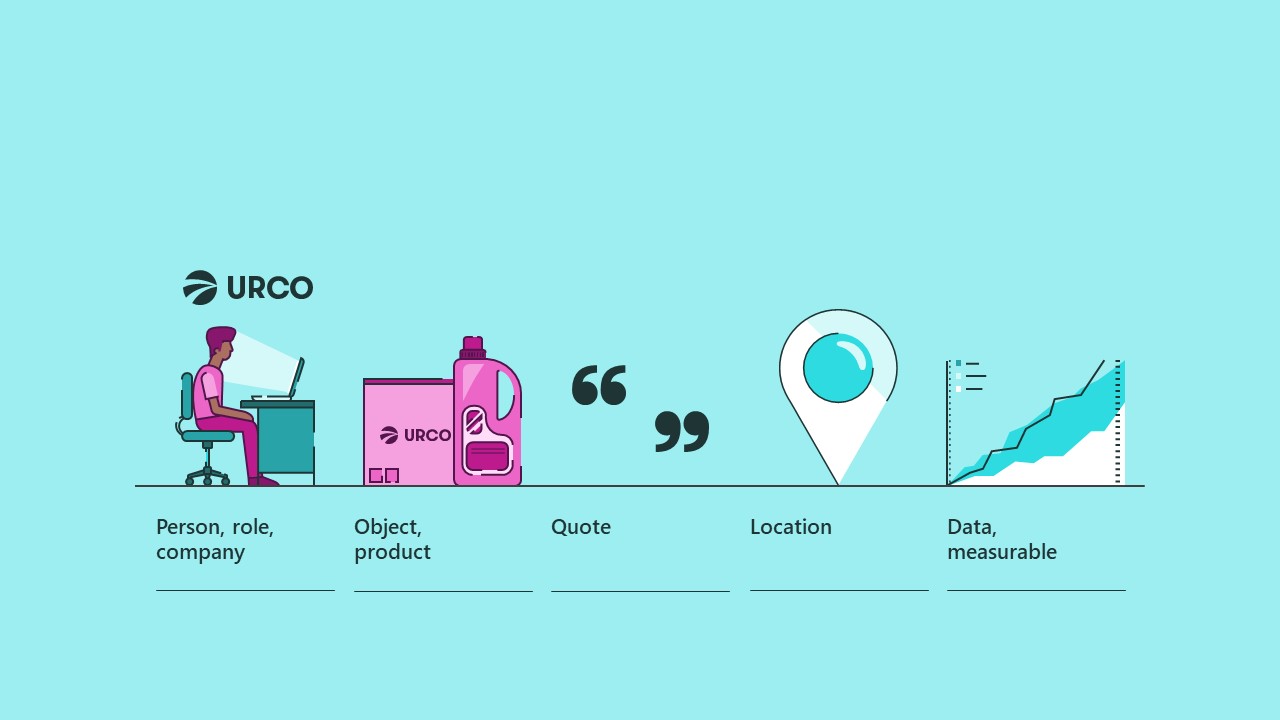
The next job, within these short sentences, is to identify the objects that are crucial to telling the story.
Person, role, company – Typically these are physical things, like objects or people. You can easily spot some of these – any mention of people, groups of people, job roles, or companies, could be represented by a photo of someone, or a silhouette, or a logo.
Object, product – You may have things that aren’t people, but are still easily recognizable entities, like objects – a computer, a phone, a bicycle, a hippopotamus – or a product or service, which might be a little bit more abstract, like ‘consulting’ or ‘water treatment’ – but still a concept that you can easily put a label on. Pretty straightforward visually, you could use an icon if you just want to get across the idea of a deliverable, or a photo of the product, or a label of the product or service, or you might even have a logo for it, especially if it’s something fairly abstract.
Quote – If you want to show a direct quote from someone, try to keep it short and to the point. It should really speak for itself, which means you’re going to have to keep quiet and let the audience read it.
Location – Then you might have locations – a point on a map, like a city, or maybe a type of building, like a hospital or office tower, or it could be an office floor plan. It could be something more abstract like an objective or a target you’re aiming towards.
Data, measurable – And then you might be able to pick out some data, like figures, percentages, dates, costs, that sort of thing, or some kind of measurable quantity, which are similar but they’re more vague – concepts that you can quantify, but that don’t really have any ‘number’ attached to them – things like a level of risk, or confidence, or effort.
That’s a starter gallery of different types of key objects. What these things all have in common is that they can all be represented with some sort of visual device that can be easily recognized, so you don’t have to do too much explanation and the audience doesn’t spend too long trying to figure out what it is. You might be using pictures, or icons, or labels to represent these things to create your visual presentation, or they might make up part of a diagram, which is what we’re going to look at in the next part of the process.
Step 4: Establish relationships
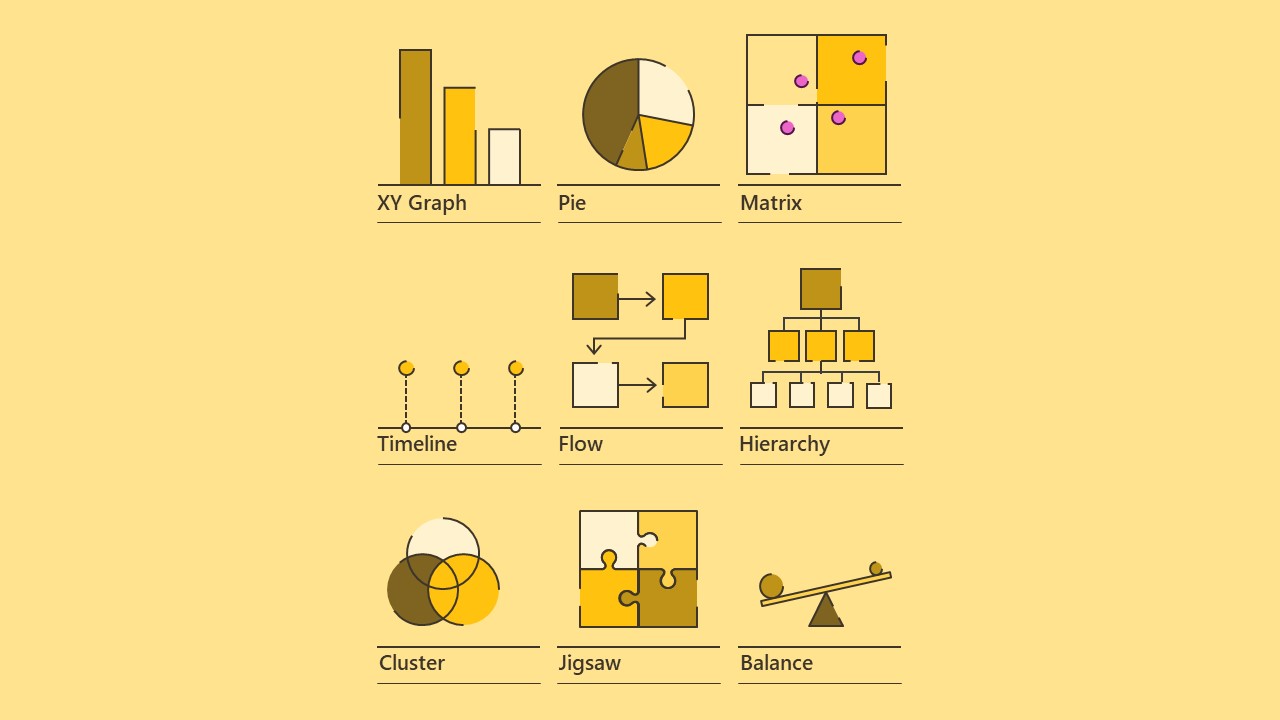
Once you know what’s involved in the story, start to look at the relationships between each of the key objects, and how they interact, which will give you the layout of the slide, the framework, or the diagram. There are plenty of options, but there are a few reliable regulars that you can draw on.
First you’ve got your different types of graph , which will probably be the first choice if you’re showing data. You could make an XY graph , two axes, and the data might be bars or lines, or an XYZ graph that shows a three dimensional data set, which might shrink or stretch across the three axes. A pie chart , to show proportions – this might be useful if you have percentages, as long as they all belong to the same category. Or you could have a Matrix arrangement, showing where elements are placed in different regions.
Then you’ve got a few ways of laying out elements that are distinct from one another. If you’ve got a sequence of dates in your information, a timeline might be a good choice, or if you haven’t you could just show a process diagram . You might just want to lay out the elements in a two dimensional space , or play around with the proportions to make a three dimensional scene , to add focus in on some elements and put others in the background. A hierarchy arrangement can show how elements are ranked in layers, useful for organization diagrams , or you could use a mind-map style layout to show connections between one big idea and a few other ideas that are linked up to it, or to each other.
A few other options for showing how things relate to one another might be a cluster or Venn diagram , to show connections or intersections between ideas, a jigsaw if you’ve got a number of things that fit together to form a larger picture, or just to get the idea across that a couple of things are well-suited to one another, and if you’re talking about a causal relationship, where one thing directly affects another, a balance diagram might work well, or a sequence that shows a push-pull relationship between two things.
This is a fairly small selection of the types of layouts you could come up with to create a visual presentation or eLearning, and a lot of slides might use two or more of these at once in order to get a complex idea across. To work out which ones to go for, you’ll have to look at your information and think about how you’d explain it, the order you’d point to your key objects, and how those key objects are related to one another. Crucially, you also have to think about the overarching message that the slide is supposed to be getting across, which you established in steps 1 and 2.
Step 5: Create visuals
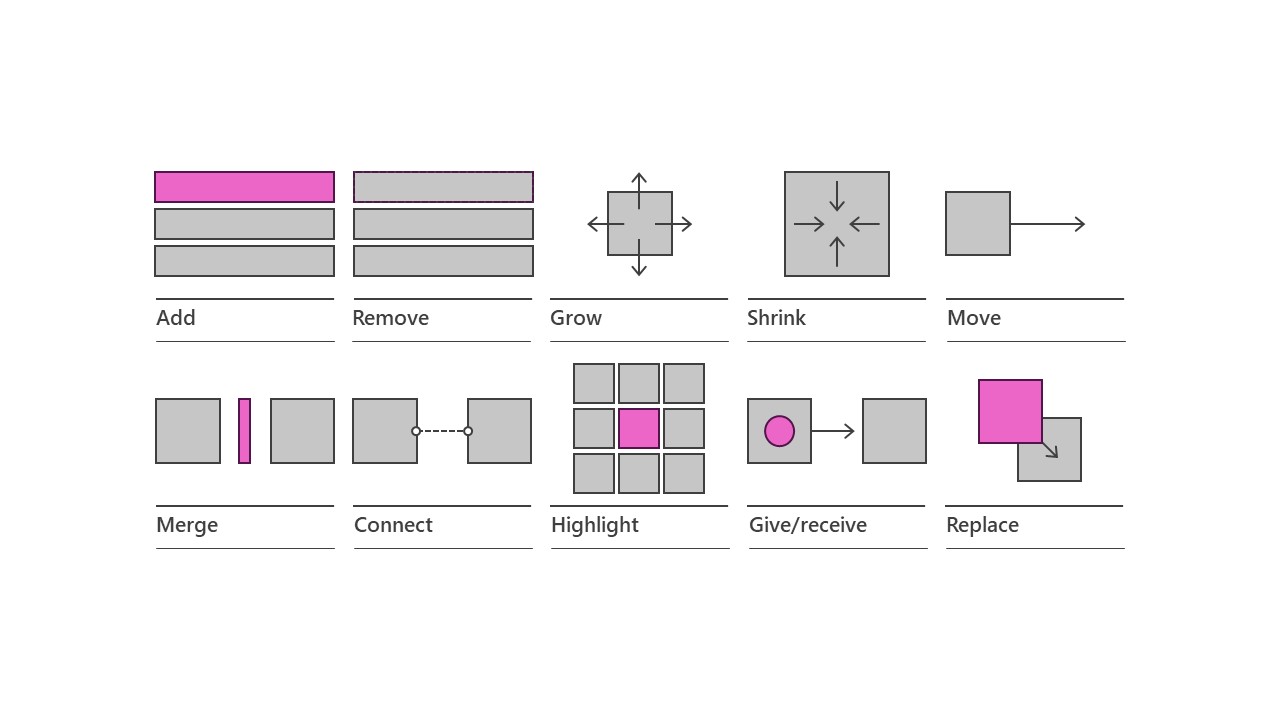
Now is the time to bring everything together. The individual key objects that you’ve got, with the layouts that show the relationships between them. Think about the order you want the story to be told, which will inform the layout of your visual slides, but also the sequence in which you’ll want to use the individual elements. And animations are a real help here, as they can pace the flow of information and ensure that you keep the audience focused on the right thing at the right time. They can also be a key part of actually telling the story, to make things happen, change elements, and emphasize the relationships between your key objects.
So if you’re introducing new ideas you can add things onto the slide. If you’re simplifying a diagram or removing things you don’t need, you can remove . You can make things grow , or shrink to show changing amounts, or changing importance, and you can make things move around to new locations. If you want to combine elements together you can merge them into one, or connect them together. You can highlight something that’s especially important, for your key message, and show something being passed along from one person to another, or data being transferred. You can also change something into something else, by replacing it.
Again, there are countless examples of these, and you’ll probably want to use a few of them for each slide, but this should give you a few good ideas of ways to move your key objects around, change the relationships, and end up with the right kind of visual punchline. These things can all be done with native PowerPoint animation (and check our animation articles and masterclass schedule for a lesson on animation if you’re not already a master at it!).
Step 6: Design
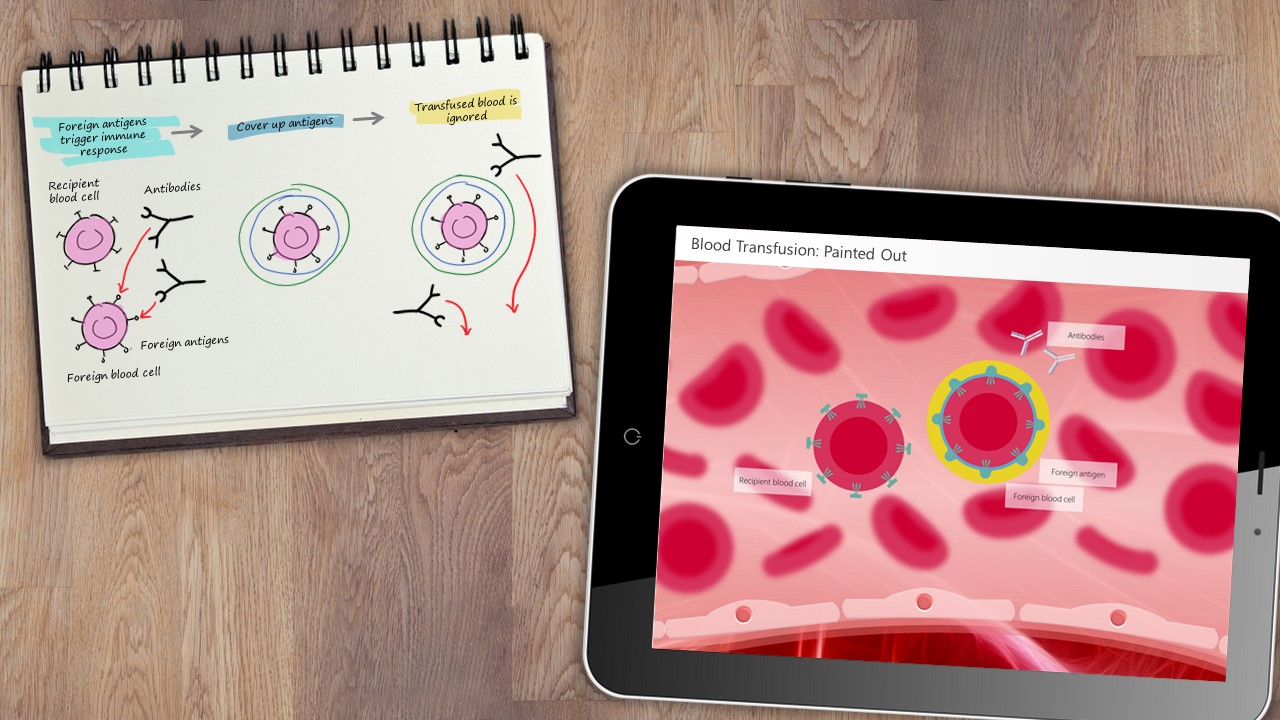
What you should have now is an idea or sketch of everything that’s going to happen on your slide to tell the story. You ‘just’ need to bring it to life and share your ideas. That’s not always an easy task, but if you check out this post by my colleague Bethany on some practical tips to achieve good presentation design , this post on some of our favorite websites for free design resources , and this one on presentation design in general, you’ll have a good head start. And of course the various PowerPoint tutorials and master classes are a wealth of information to help you out.
And if you’d like to see some examples of presentations that we’ve developed using these ideas, and then created in PowerPoint, you can draw inspiration from our presentation portfolio , showing you that pretty much anything is possible in PowerPoint.

Richard Goring
Related articles, how to create powerpoint templates that work.
- PowerPoint design
Without a proper PowerPoint template, presentations can be a bit of a mess. Here are the building blocks for developing a PowerPoint template that works!

Presentation design principles for better PowerPoint design
- PowerPoint design / PowerPoint productivity
- Comments: 17
By applying some key principles of presentation design, you can make your PowerPoint design really standout and deliver both a more ‘popping’, but also more effective presentation.

How to print multiple slides on one page
What’s the secret for how to print multiple PowerPoint slides on one page? We've got a few solutions up our sleeves, from simple and quick to completely custom!

Thank you very much, you are helping me to understand how to produce presentations so my students will want to see and learn from.
Great Estrella, lovely to hear that it’s working so well.
Its really helpful, thanks for providing such informative data in a unique way.
Just came across this while searching for Colour-Vision-Deficient-friendly PowerPoint tips. Aside from giving excellent advice, it’s wild that you’ve got graphics of what looks like Coronavirus in an article from 2017 – did you know something we didn’t 🙂 ?
Leave a Reply Cancel reply
Save my name and email in this browser for the next time I comment.
Join the BrightCarbon mailing list for monthly invites and resources
BrightCarbon staff are knowledgeable with excellent skills, and are unfailingly enthusiastic for each new presentation. Sarah Appleton Brown Practice Plus Group

The Visual Communication Guy
Learn Visually. Communicate Powerfully.

- About The VCG
- Contact Curtis
- Five Paragraph Essay
- IMRaD (Science)
- Indirect Method (Bad News)
- Inverted Pyramid (News)
- Martini Glass
- Narrative Format
- Rogerian Method
- Toulmin Method
- Apostrophes
- Exclamation Marks (Points)
- Parentheses
- Periods (Full Stops)
- Question Marks
- Quotation Marks
- Plain Language
- APPEALS: ETHOS, PATHOS, LOGOS
- CLUSTER ANALYSIS
- FANTASY-THEME
- GENERIC CRITICISM
- IDEOLOGICAL CRITICISM
- NEO-ARISTOTELIAN
- O.P.T.I.C. (VISUAL ANALSYIS)
- S.O.A.P.S.T.O.N.E. (WRITTEN ANALYSIS)
- S.P.A.C.E.C.A.T. (RHETORICAL ANALYSIS)
- BRANCHES OF ORATORY
- FIGURES OF SPEECH
- FIVE CANONS
- LOGICAL FALLACIES
- Information Design Rules
- Arrangement
- Organization
- Negative Space
- Iconography
- Photography
- Which Chart Should I Use?
- “P” is for PREPARE
- "O" is for OPEN
- "W" is for WEAVE
- “E” is for ENGAGE
- PRESENTATION EVALUTION RUBRIC
- POWERPOINT DESIGN
- ADVENTURE APPEAL
- BRAND APPEAL
- ENDORSEMENT APPEAL
- HUMOR APPEAL
- LESS-THAN-PERFECT APPEAL
- MASCULINE & FEMININE APPEAL
- MUSIC APPEAL
- PERSONAL/EMOTIONAL APPEAL
- PLAIN APPEAL
- PLAY-ON-WORDS APPEAL
- RATIONAL APPEAL
- ROMANCE APPEAL
- SCARCITY APPEAL
- SNOB APPEAL
- SOCIAL APPEAL
- STATISTICS APPEAL
- YOUTH APPEAL
- The Six Types of Résumés You Should Know About
- Why Designing Your Résumé Matters
- The Anatomy of a Really Good Résumé: A Good Résumé Example
- What a Bad Résumé Says When It Speaks
- How to Write an Amazing Cover Letter: Five Easy Steps to Get You an Interview
- Make Your Boring Documents Look Professional in 5 Easy Steps
- Business Letters
- CONSUMER PROFILES
- ETHNOGRAPHY RESEARCH
- FOCUS GROUPS
- OBSERVATIONS
- SURVEYS & QUESTIONNAIRES
- S.W.O.T. ANALYSES
- USABILITY TESTS
- CITING SOURCES: MLA FORMAT
- MLA FORMAT: WORKS CITED PAGE
- MLA FORMAT: IN-TEXT CITATIONS
- MLA FORMAT: BOOKS & PAMPHLETS
- MLA FORMAT: WEBSITES AND ONLINE SOURCES
- MLA FORMAT: PERIODICALS
- MLA FORMAT: OTHER MEDIA SOURCES
- Course Syllabi
- Checklists and Peer Reviews (Downloads)
- Communication
- Poster Prints
- Poster Downloads
- Handout & Worksheet Downloads
- QuickGuide Downloads
- Downloads License Agreements

How to Design a PowerPoint: A Visual Guide to Making Slides with Impact
Home > Speaking > How to Design a PowerPoint
A quick Google Images search for “worst PowerPoint slides” proves two very clear realities: 1) anybody can create a PowerPoint; and 2) many don’t know how to do them well.
That’s understandable, though. Unless you’ve recently taken courses or training in design, data visualization, and public speaking, you likely haven’t had any more education on how to create an effective slide deck than a ten-year-old.
And you’re not alone.
Bad PowerPoints are everywhere: professor lectures, science conferences, human resources trainings, team meetings, sales review gatherings, thesis and dissertation defenses, product pitches, job interviews, you name it. Some of the brightest people in the world have created some of the most awful PowerPoints. For most, it’s just not a natural skill.
That’s unfortunate, too, because a well-designed slide deck can make a tremendous difference in the reception of the message you’re trying to convey.
To start designing excellent slide decks right away, follow my quick guide to designing better PowerPoints right after this paragraph. To get a whole workshop’s worth of information about how to design better slides, scroll below. 🙂
Click image to enlarge.

The question is, does designing a nice PowerPoint actually matter?
Well, if you’ve made it this far, you already know my opinion. But the short answer is, YES! Effective slide decks can make a HUGE difference in the outcome of your presentation. Why? Because slides—which should be used to supplement and enhance your well-prepared script (not be the presentation, as we often see in slides that are nothing more than bulleted lists)—significantly improve engagement during the presentation and recall after the presentation.
Basically, if you want people to both pay attention AND remember what you said, good slides can make all the difference. Plus, research has shown that people trust information more when it’s well-designed. In sum, good slides will cause your audience to:
- Pay attention more and stay more engaged;
- Remember the key messages from your presentation better;
- Trust you and your information more; and
- Believe you are super smart and awesome. (I mean, you already are, but good slides will seal the deal.)
Bad slides, on the other hand, are not only distracting, but they can actually damage a person’s ability to understand and follow your message.
At best, poorly designed slides will make you look less professional. At worst, they’ll encourage people to not listen to anything you have to say. Bad slides (which are caused by a whole range of things, including being too text-heavy, too busy, too inconsistent, or too color crazy, etc. [see my article on 40 Ways to Screw Up a PowerPoint Slide ]), overwhelmingly distract from your presentation.
If a slide has too much text, people try to read it and listen to you at the same time—which damages their ability to do either well. If your slides are too busy, your audience won’t be able to understand the information quick enough. If it’s ugly, well…people just tune out and ignore (and judge you, to boot).
Okay, so enough of the why . Let’s get to making better slides!
The 9 Steps to Designing a Better PowerPoint Slide
Step 1: empathize with your audience.

The term “empathy” in this context comes from a relatively new theory called “design thinking,” in which you can apply the mindset of a designer to a variety of contexts. So, whether you’re creating a toothbrush, a video game, an automobile, or…a PowerPoint, you need to be thinking a like a designer—which starts with empathy.
Empathizing with an audience is like applying the Golden Rule: present unto them as you would like to be presented to. Of course, the content of presentation itself comes first and foremost, but the design of your slides should support and enhance your content, so you’ll be thinking of your script and your slides at the same time. To begin, it’s best to start with a few concrete questions about your audience:
- Why are they there? Are they at your presentation because they want to be, or because they have to be? Is your presentation the only one of the day, or is it one of many (like at a conference)? Are they expecting to learn, be entertained, be inspired, be trained? In essence, you want to know their state of mind before coming so you can plan to accommodate that as best you can.
- Why would they care? Dig deep here. Does your audience actually care about the topic as much as you do? And…if you don’t care, why don’t you? If the topic isn’t meaningful and you can’t make it feel that way, then why even present? But…if they do care, know why they do. What will they hope for and expect out of it? What can you do to meet and exceed their expectations?
- What do they need to know? And what DON’T they? How much about your subject do they already know? Are they novices, experts, or a blend of both? Does it make more sense to break your topic into separate presentations on separate days, rather than giving it all at once? Is it focused and narrow enough to make an impact? Can you leave anything that is irrelevant out?
- What will keep them engaged? Consider your content and your big takeaways. Consider the personalities and knowledge base of the audience? What can you do to keep them engaged? Now…remember that “engaged” doesn’t mean “entertained” (though it can). If you’re a scientist presenting on bacterial infections in the liver, entertainment is obviously not appropriate. But…if you don’t engage them, they may not appreciate your research, no matter how valuable it is. What will they want to see, hear, and know and how can you display that to them in a way that will keep them interested?
Once you have clear idea about your audience’s needs and desires, you can begin to develop slides (along with the content of your script) that will give them exactly what they’re looking for rather than wasting their time (and yours).
Step 2: Define the Story

Think of your presentation as a story and you, the presenter, as an author in real time. As you deliver a presentation, you are creating the tone, setting, and plot for what happens. Your execution of the presentation will, if done right, create a climax/conflict and an important resolution. Consider how your slide development functions like the five components of a story, then write down how you plan to control (define) that story:
- The Setting. You create a mood and presence by the way you enter the room, interact with the audience, and display your title. While you may not have full control over who comes and what the room looks like, you do have relative control over the tone and ambiance and how they will react to your message. Consider the title of your presentation. Does it capture your message while also creating a buzz about your topic? Can you add a photo on the title slide that will intrigue your audience? What colors will you use? How do you plan to interact with the slides and how will you keep the audience involved?
- The Characters. You may not know all the people in the room, but you should know as much about them as possible (start with Step 1). Still, you have a way to shape their interest and engagement in this topic. Characters in this story are stakeholders. Your ultimate goal for giving should be one of three things: help them think about something in a new, meaningful way; learn something valuable they didn’t know before; and/or act as a result of what they learned. If you can’t get them to one of those three points, you’ve never really developed the characters.
- The Plot . A plot in storytelling is a series of events that build towards a conclusion. A plot needs to have direction, with clear and meaningful series of events. As you develop your script, you should be thinking about your rhetorical progression of ideas—your building towards a final outcome or conclusion. The development of slides can help you with this and they can help your audience stay on track. The key is, you need to make sure your audience is following the plot. If the plot starts to feel loose, disconnected, fragmented, or…all over the place, you’ll lose them faster than a 0-star rated movie.
- The Conflict. There must be some reason why everyone is there to see you presentation. It’s possible they don’t fully understand it themselves, but you, as the presenter, must make their purpose evidently clear. You must make them care. The more and more you pull them into your subject matter, the more you have effectively built a climax, which is the key to any successful story.
- The Resolution . The resolution is the takeaway—it’s what resolves the conflict. If you’ve built a strong climax, you now need to make sure your audience leaves with something valuable. If they leave thinking in a new, meaningful way; if they have learned something valuable that they can apply today; or if they are ready and knowledgeable about how to act, then the resolution is there and you, the author, have done your job.
Step 3: Brand Your Message

Jeff Bezos is famous for having said, “Brand is what others say about you when you’re not in the room.” You might think similarly about your presentation. How will your audience feel about your presentation afterwards, when you’re not around?
That can be an intimidating question to ask. And, it may seem a little odd to think about your message as a “brand.” But…applying brand theory to messaging makes a lot of sense. You want people to get on board with what you have to say. To do that, you have to establish what they value, what motivates them, and what you’ll have to do meet or exceed their expectations.
Brand experts use a lot of terms to describe and define brands. Let’s address a few, and apply them to slide design:
- Differentiation. How yours is different from the rest. What can you do to make your message stand out from a world of clutter and information? What makes yours unique? Is it your approach, the stories you tell, your language, your humor, your ideas, something else?
- Authenticity . How much you genuinely care. Audiences can tell if you’re passionate or not. They know if you care about both your topic and them learning it. If you fake it, the message gets diluted. Use your slides to help showcase how much you care.
- History . What people already know about you, your topic, or your experience. Do you need to establish credibility, or do you already have it? Do you have experience you can lean into? Does your audience already like/agree with this topic? Is it totally new and unfamiliar to them? How can you bring the history of your topic and yourself into the presentation? Will you audience need a primer on the history or does it matter?
- Simplicity. Making the most important things stick. Good brands almost always have simple logos, simple taglines, and simple brand positioning statements. Many also focus on limited products—they focus on what they do well. Your message can work the same way. Can you simplify your entire message into 2 – 5 key points? Can you reduce the amount of information that has to be taken in all at once? Can you help organize and chunk information to be clearer and simpler to follow? People generally have a hard time remembering complex information all at once—determine what the real purpose of your presentation is and what your audience can reasonably get out of it, then simplify to make sure that happens.
- Visual Identity . Your message, like a brand, can be enhanced if people resonate with the overall look and feel. Just like with buying a brand of shoes, people will be drawn to the design of your information. If it looks static, cliche, poorly design, or just plain ugly, you’ve created an undesirable visual identity and people will have a harder time buying into it. But if you can take your message and harmonize with strong design and imagery, people will be more likely to be attracted by, latch onto, and “buy in” to what you have to say. What should your visual identity look like, considering your topic?
Step 4: Select Your Fonts

The choice of your font may seem a small thing, but it can make the difference between a sleek, professional presentation and one that is static, boring, or, worse, painfully obnoxious.
If you’re not a professional designer, being font savvy may not come natural. Fortunately, there just a few rules you can follow to help you make your choices:
- Avoid the Defaults . In PowerPoint (as in MS Word), the default font is Calibri. Before 2010, the default was Times New Roman. Other programs use Arial or Myriad Pro as the default. What’s wrong with defaults? The fonts themselves are actually fine fonts—that’s why Microsoft went with them. BUT…because they’re the defaults, they are so widely used that they’ve become dull. If you just leave the defaults, your audience will subconsciously feel that you didn’t design your PowerPoint (because you probably didn’t). Just changing the font can bolster your PowerPoint’s professionalism quickly.
- Stick to Simple, Modern Fonts. Okay, so you don’t want to use the defaults, but what DO you use? Something simple. Don’t go crazy. Find something that is similar to the default, with just a little variation. Find something that is super easy to read and looks clean, simple, and sleek. Nothing distracting. Remember: you want people to focus on your story and message, not the lettering. Look at the graphic above for a list of some good, simple, modern fonts. Avoid, at all costs, the notoriously ugly or cliched fonts: Comic Sans; Chiller; Papyrus; Algerian; Curlz MT; and so forth.
- Make Sure Your Fonts Are on the Computer(s) You’re Presenting On. Remember: fonts are installed on individual computers, not attached to a program. A misunderstanding that many people have is that a font comes with PowerPoint (or any other program you’re working on). That’s NOT accurate. Fonts are installed on your computer. So…if you use a cool font that was on your desktop PC, but you are presenting your slides on a MacBook laptop, you’ll want to check that both computers have the font you’re using. Some fonts are pretty standard and you’ll find them on pretty much all computers: Palatino Linotype, Century Gothic, Segoe UI, Garamond. Others, however, are proprietary and may not be on other computers: Acumin Pro, Raleway, Helvetica. If you know you’ll be presenting on multiple different computers, find a standard font. One I’ve always liked to use is Century Gothic.
- Consider Using Two Fonts . The “two-font rule” suggests that designs will be more attractive if they use two fonts—one for headings and titles, the other for body text. You can get away with just one font if you make your headings stand out in some way—by size, weight, or color—but it’s often a nice aesthetic to use two. Just be sure that the two fonts are obviously different from each other (don’t use both Arial AND Century Gothic—they’re too similar, which will look like an accident) and that they harmonize well together. It’s often good to use a serif font (the type with little “feet” like in Palatino Linotype) paired with a sans serif font (the kind without “feet,” like Century Gothic).
Step 5: Narrow Your Colors

A hallmark of any good design is a simple, consistent color scheme. Keep your slide designs to fewer than four colors. Often, it’s good to use black, white, gray, and then one or two accent colors. Years ago, when I was new to design, I had someone tell me that a brochure I created looked like a clown exploded on the page. You DON’T want your slides to look like a clown exploded! To avoid that, find your color scheme in advance and stick to it.
Color can be tricky. If you work for a company that already has a pre-established style guide and color scheme, definitely use it! Not only is that important for your company’s brand, it makes your life a whole lot easier. If you do have to choose colors yourself, though, consider going to this website first: color.adobe.com . You can type things into the “explore” bar and you’ll be led to color schemes that look nice.
What you want to look for are colors that are a bit muted and won’t overwhelm the eyes of your viewers. Remember that you want to keep a high contrast so it doesn’t strain your audience members’ eyes. So…stick to black or really dark gray for text. Keep a white or very light background. Use the accent color for headings or important pieces of content. And…just make sure the colors match your topic or industry.
Step 6: Divide into Sections

Good presentations are well organized. Your slides should visually reflect your organization by using different slide “types” for different parts of your presentation or content.
All presentations should have at least three slide types: a title slide, a body slide, and a closing slide. Most presentations will have a fourth: a section slide. Section slides are used to transition your presentation from one major topic to the next. Many presentations can also benefit from callout slides, which are used to designate unique types of content that show up periodically—like for direct quotes or polling questions to audience members.
If you’ve ever taken a college course on public speaking, you probably remember your professor telling you to use “signposts.” A signpost is a metaphor for visual or oral cues that let your reader know where they’re at in the journey. Signposts keep your audience oriented. Sectioning your slides provides a visual signifier to your audience that you are shifting gears—plus, it just makes your slides feel cohesive, professional, and organized.
Take the time to design your slide types first. Then, fill in the content from your presentation script.
A quick note about body slides, though. These are going to be the most frequently used slides, the ones that you put the majority of your content on. Note that body slides don’t all have to look identical. They need to be consistent in design—repeating the same fonts, colors, photography style, highlights, etc.—but the layouts can change. Providing some visual variation is good for your audience.
Step 7: Visualize Every Slide

One of the biggest errors inexperienced presenters make is believing that audience members need to be able to read a lot of text to understand the message.
The reality is, when you put a lot of text on the screen—even if it’s in a bulleted list—you end up creating more difficulty for your audience. They’ll try to read while also trying to listen to you, creating a conflict of noise that will eventually cause them to only catch about half of what you wanted them to. Plus, a lot of text is boring and not efficient for the human brain.
Research has actually shown (and there is significant evidence to prove this) that making information visual is good for humans for four reasons: engagement, cognition, trust, and recall.
- Visual information is more engaging . Most all people will tell you that they are “visual learners.” The reality is that pretty much all humans are. We pay attention to visual information because our brains are designed to process visual information faster. When you provide visuals—photographs, charts, diagrams, icons, etc.—people will pay far more attention than if you just have text. In fact, if you just have text on a screen, people will likely zone out.
- Visual information is easier to understand. If designed well and related to the topic, people will understand visual information faster than they will from reading. Even as you read this article (assuming you’re still here!), the information that is really going to help you are the visual examples and explanations I’ve added for each section. That’s the stuff where you’ll say, “aha! now I know what Curtis is telling me to do.” All this text—it’s just ancillary stuff to provide more detail. But the photos/graphics are what you’ll really learn from.
- Visualized information builds trust. For better or for worse, humans are wired to trust information more when it has been visualized, especially when it looks professional. If you take a table of data and turn it into a data visualization that is professionally design, people will tend to trust it more. Something about taking the time to visualize information makes people assume you know what you’re talking about. Now, that said, you have to make sure your data visualizations are accurate. The real pitfall here is that people will tend to trust it more, even if it’s misleading. If they discover any flaws, your entire argument (and credibility) will go out the window.
- Visual information is easier to remember . Research studies have shown that visual information will be retained more than six times better if visuals are attached to it. If you actually want people to remember your presentation you must do two things: tell stories and use pictures. If you simply regurgitate information and make it very text-heavy, your audience will forget almost everything you said within three days. If you add pictures, though, they’ll have mental images to trigger memory, helping them retain your message much longer.
Find ways to visualize every chance you can, making sure that your visuals emphasize, clarify, or enhance the content you are talking about. Look at the examples above. Find ways to reduce text and enlarge graphics; turn bullets into images or icons; and use simple, easy to understand graphics that draw attention to the most important point.
Step 8: Play with Photos and Layouts

This is the one that takes the most practice, but it can be the most fun and rewarding. Recognize that your body slides can take multiple forms and that there are endless ways to organize, crop, and adjust visualizations, photos, headings, and designs. As long as you keep your color scheme, fonts, and highlighting techniques consistent, the slides will still feel uniform and professional, while giving variety to your slides.
Some things to think about as you play with the design of your slides:
- CONTRAST: Make sure you use high contrast in colors, especially for areas where you have text (black text on white backgrounds almost always work best). In addition, make sure that things that are different actually look significantly different. If two fonts are different sizes, make them obviously different sizes. If you’re using two colors, make them completely different colors. When two things look similar, there isn’t much contrast, which looks accidental and/or visually dull.
- REPETITION: Repetition is all about consistency in design. Repeat design elements throughout: fonts, colors, highlights, logos, shapes, styles, etc. Repeat the same visual feel for photos. Use the same types of icons and graphics. The more unified the design, the strong the appeal and the more professional you look.
- ALIGNMENT: Make sure everything on your slide is aligned with something else. Nothing should be “floating,” or placed arbitrarily. Align photos to titles, words to other words, rules/lines to other elements. Keep it all tightly aligned and crisp.
- PROXIMITY: Put things that are related close together and things that aren’t apart from each other. The brain will automatically assume that, if two things are next to each other (like a photo and a caption) that they are connected. Avoid confusing your audience by separating things that are different and connecting things that go together.
- Move Photos to the Bleeds . The term “bleed” is a graphic design principle that describes moving photos to the edge of page (where the ink “bleeds” off) in order to reduce visual noise. An old design principles developed by Josef Albers, 1+1=3, suggests that when you insert two objects, you automatically create a third—the space between. When you insert a photo, you end up creating a margin of white space around the edges. If that white space isn’t necessary, just make the image larger and push clear to the edge of the screen. This will remove the margin and the noise. Plus, it just makes slides look simpler and more professional and it really draws the eyes to the photo.
Step 9: Orient Your Audience

In addition to creating section slides (see Step 6 above), you can help your audience—and yourself—stay organized by giving visual cues and textual information in footers, slide counts, and headers or sidebars.
These orienting features of a slide deck can be especially valuable if you’re giving a long presentation, workshop, or training.
Start by creating a footer. These aren’t required and you don’t need them on every slide, but in most costs, presentations will benefit from some information in the footer. Some of the most common things to include in a footer:
- Company logo
- Company name
- Name of presenter
- Name of event or conference
- Title of presentation
- Copyright information
Beyond the footer, you can also include a slide count (in example above, look at the bottom right of the slide). While some argue that this can be distracting, most would say that a slide count will help audience members know how much more to expect, putting their “I’m being held hostage by this presenter!” fears away.
If your presentation is particularly long (like, say, 45 minutes or more) or you’re giving a workshop, you can really help your audience by giving them a sort of contents or guide, so that they know where they’re at in relation to everything else. You might, for example, create a small sidebar on the left that includes the section they’re in with the subsection. Or, as in the example at the top (see top left of example), you might just include which section you’re on and a summary title of that section.
There is no one or perfect way to orient your audience members. Just make sure it’s on the forefront of your mind as you work to build empathy into your slide design. The presentation is for them, after all, not you. Give them as much as you can to help them appreciate the message you’re delivering.
- ← Is a Doctor of Nursing Practice Degree Worth it?
- 6 Things You Should Do to Preserve Your Wealth →
Shop for your perfect poster print or digital download at our online store!
Home Blog Design What is Visual Communication and How Can It Improve Your Presentations
What is Visual Communication and How Can It Improve Your Presentations

Look around; how is the world communicating with you? Is there music? Are your shoes pinching your heel? Are there a million visual triggers trying to get your attention? We don’t have a crystal ball to answer the first two questions, but the third is a definite YES. What’s behind it? It’s visual communication.
Visual communication is the magic behind all the visible things in the world that tell stories, share information, and attract interest. As a person who makes presentations, you own the power of visual communication to impact, inform and attract your audience with visuals. All you need is the knowledge and the tools to make it work.
In this guide, we’ll share essential facts you need to know about visual communication and how they can help improve your presentations.
Table of Contents
Visual Communication Strategy
Visual communication design.
- Why is Visual Communication Important for Presentations?
7 Types of Visual Communication Techniques in Presentation Design
- How to Use Visual Communication at Work Beyond Presentations
Final Words
What is visual communication.
Simply put, visual communication is the practice of communicating through the sense of sight. In a more profound sense, It democratizes communication in general because with visuals, there’s less need for language or translation.
But what does visual communication do? It tells stories through images, video, illustrations , and anything the audience can see.

Visual communication sits at the top of the list of effective communication strategies and designs for all industries and fields. It’s in all the conversations about marketing, community building, and the future of work. If your presentation design still hasn’t embraced the need to thrive on visual communication, it’s time to fix that.
A visual communication strategy is key to a presentation’s overall mood and message. To create a visual communication strategy, follow the same steps as any communication strategy, and develop them simultaneously.
To give you an idea of the scope of influence of a visual communication strategy, consider all the advertisements you see regularly. Regarding the most successful ones, their visual qualities have been minutely strategized to inspire emotional reactions from you.
Do you want to get reactions when making your presentations ? Use a visual communication strategy to create an overarching visual quality for your presentations’ slides.
FYI: Professionals building visual communication strategies include; brand specialists, marketing strategists, content designers, UX/UI designers, publicists, art curators, and anyone that understands how important planning and strategy are for every project.

Once a visual communication strategy is in place, it’s time to take care of the visual communication design. This is the actionable part of the process; the strategy is the plan, and the design is the creation.
Visual communication design is essential for your presentations. You’re telling a story with your information, and visual techniques will help you add interest. Even a text section can have visual communication techniques applied. For example, the font, spacing, and layout.
Your visual communication strategy will help you choose the proper visual layout, data visualizations, and graphics for the presentation slides.
Why Is Visual Communication Important for Presentations?
If you aren’t aware, storytelling is a massive factor in effective presentation design. To achieve it, you can’t depend on text content; you need visuals to support the information and create connections with the viewer. On a presentation slide, what’s better? A bullet point list or an infographic widget composition? The answer to this question would be the most visual option, in this case, the infographics .

Surely you’ve heard of “Death by PowerPoint.” It’s the perfect example of how visual communication influences the audience. In this case, how can it go wrong and get undesired effects? Humans create emotional and memorable connections with everything they see. As soon as a presentation proves to be a drab PowerPoint, your audience clocks out and checks their phone.
Thankfully, visual communication harnesses many benefits for your presentation designs:
- Ideas and concepts are easier to understand and transmit in visual form.
- Visuals deliver information faster and more directly.
- A good visual communication strategy is attention-grabbing and engaging.
- Visual elements and characteristics make an impact on the viewer.
- A strong visual component improves the credibility of the message.
Visual communication is vital in presenting a slide deck to an audience. Your outfit, body language, and poise all matter. The audience isn’t just looking at your presentation; they’re looking at you. Take the time to expand your presenting skills by practicing, trying new things, and improving your confidence.

Visual communication techniques are the puzzle pieces of successful content. They are so important that there are psychological applications for all of them.
Here’s a quick list to give you an idea of their importance.
1. Shapes
Shapes have subliminal, subconscious, and even cultural perceptions. The shapes you choose to include across the slides will set the tone for the entire presentation. For example, circles represent completeness, triangles represent up and forward motion, lines represent connection, and rectangles represent stability.

2. Colors
In design, colors are the trigger for emotion in content and visualization. Each color has a meaning and an association. Combining colors to create palettes is a practice in mood and emotional communication through vision. If a presentation is all blue and gray, it feels corporate, a vibrant color combination feels happy and inspiring. Muted and desaturated colors feel calm and inviting.

3. Typography
The way letters look brings a sense of meaning from content to the eyes—from text to visual. There are two main font types; serif and sans serif. Serifs are more serious, while sans serifs are friendlier and easygoing. On top of that, each type has a personality that emanates through the content. The visual style of the typography in your presentation must match energetically with the tone and message of both visual and textual content.

4. Infographic elements
Infographics are the poster boy for visual communication. Data visualization and information design are at the core of data stories and exciting business communication. Data viz graphics simplify complex ideas that can take up lots of text space in a presentation slide. Your regular charts and graphs can fall through the cracks if you don’t add a good dose of visual communication strategy and design.

5. Photography and Illustration
Photography and illustration are classic tools for storytelling. Every slide can be easily turned into a pictorial presentation to tell your story, and you have the power to structure it how you want. Be wary of stock photography; overused images will negatively affect your presentation. Custom imagery adds integrity and uniqueness that only a visual communication strategy can achieve.

When using icons in your presentation templates , remember to keep a visual unity between them. Icons can also tell a story from slide to slide in your presentation. Stay consistent in terms of style, color, size, and positioning.

7. Layout & Visual Hierarchy
Viewers use their eyes to see, read and understand your content. When the layout is designed in a way that helps them absorb the information subconsciously, engagement is seamless. It’s as simple as following visual hierarchy and placing elements in the viewer’s line of sight in a Z or F reading pattern.

How To Use Visual Communication At Work Beyond Presentations
Visual communication doesn’t stop at presentations. There are countless other ways to incorporate visual communication at work. Here’s a—not complete—list of the design practices that embody visual communication.
- Infographics
- Visual guides
- Flowcharts and processes
- Employee training
- Internal communication
- Work attire
- Body autonomy
If someone can see it and understand it, it can be communicated visually. Take advantage of that and harness the power of perception, association, and emotional response.
In visual communication, it’s important to remember that first impressions matter. Your presentations and the message they deliver depending on the value of the visuals throughout the slides. Discover more techniques for improving your presentations in the SlideModel blog . Learn how to incorporate SlideModel templates into your PowerPoint slide decks and leave your audiences satisfied and informed.
Like this article? Please share
Design, Presentation Approaches, Presentation Skills Filed under Design
Related Articles

Filed under Presentation Ideas • August 22nd, 2024
How to Write a Presentation Script
The script of a speech is a vital aspect for a presentation’s success. Join us here to learn the process of writing a presentation script.

Filed under Google Slides Tutorials • August 20th, 2024
How to Insert an Emoji in Google Slides
Add a creative touch to your slides by learning how to insert an emoji in Google Slides. Step-by-step instructions and third-party extensions list.

Filed under Design • August 14th, 2024
Creating Custom Themes for PowerPoint and Google Slides
Do you want your slides to go beyond the average result from a template? If so, learn how to create custom themes for presentations with this guide.
Leave a Reply
- Presentations
- Most Recent
- Infographics
- Data Visualizations
- Forms and Surveys
- Video & Animation
- Case Studies
- Design for Business
- Digital Marketing
- Design Inspiration
- Visual Thinking
- Product Updates
- Visme Webinars
- Artificial Intelligence
7 Ways to Structure Your Presentation to Keep Your Audience Wanting More

Written by: Orana Velarde
The most successful and memorable presentations have one thing in common.
They all tell a story.
No matter how many facts or charts need to be presented, incorporating stories into a presentation will keep your audience focused and intrigued.
Using stories to support data is a well-known technique in all aspects of public speaking, from motivational talks to in-company sales pitches.
Here’s a short selection of 8 easy-to-edit modern presentation templates you can edit, share and download with Visme. View more templates below:

In this guide, we will look at 7 ways to structure your presentations using storytelling techniques to keep your audience engaged until the very end.
Look closely at each one to see which fits your presentation’s purpose best!
Planning Your Presentation Structure: Like Building a Lego Model

Is it easier to separate the correct pieces before you start building? Or is it better to search in a big bucket with mixed parts for every new piece you need?
We’re pretty sure you will pick the first option. In the beginning, it might seem like this option would take longer, but the opposite is true.
The first step to a successful presentation structure is to brainstorm your ideas and combine them into a rough draft. But first, consider the message you want to relay to your audience.
RELATED: A Non-Designer's Guide to Creating Memorable Visual Presentations
The Message
What is the message you want to convey with your presentation?
A good starting point is to decide if it will be informative, entertaining, inspiring or persuasive.
In a business setting, you might want your presentation to do two of these things: inform and persuade. If you are a mindset coach for companies, then you might want to entertain and inspire.
The main message should be easy to grasp from the title on your first slide. Think of an appropriate way to word what you want to give your audience in one or two sentences. This can of course be changed later, but having a preliminary title will help get your ideas in order for what comes next.
RELATED: 150+ Presentation Topic Ideas for Students [Plus Templates]
Once you know which direction your presentation will take, it’s time to jot all your ideas down on paper to create a presentation outline and rough draft of all the points you will cover.

7 Ways to Structure Your Presentation
Now that the brainstorming and rough draft are out of the way, it’s time to start structuring your presentation. This is when we introduce the storytelling aspect into the equation.
All the information you have gathered and organized in your rough draft now needs some attitude to really get your message across.
We are going to look at 7 different styles of storytelling structures that work great for presentations. They all have a different style of delivery and cadence. Choosing one for your presentation will depend on your message and who your audience is.

Embed on your site: <script src="//my.visme.co/visme.js"></script><div class="visme_d" data-url="6xo6gwg6-7-ways-to-structure-your-presentation-to-keep-your-audience-wanting-more" data-w="800" data-h="4325" data-domain="my"></div><p style="width: 220px; font-family: Arial; border-radius:3px; padding: 3px; background-color: rgba(0, 0, 0, 0.1); font-size: 10px; color: #333333" >Speak Visually. Create an infographic with <a href="https://www.visme.co/make-infographics?utm_source=CTA&utm_medium=Embed" target="_blank" style="color: #30a0ea"><strong>Visme</strong></a></p>
Fact and Story
The first structure we will look at is Fact and Story . The premise is that the presentation moves back and forth between facts and stories.
Presentation guru Nancy Duarte wrote about this presentation structure in her book " Resonate ." She suggests that mixing storytelling with the relay of facts can help your audience stay interested until the end of your presentation.

According to Duarte, this type of structure should start off with an initial setting of the present reality: the “what is.” From there, an invitation to adventure is presented and the first instance of “what could be” is told as a story to illustrate how the initials facts can be improved.
This comparison of presenting the facts as what they are at the present moment with stories that show how things could be improved is what keeps your audience interested and waiting for more.
The conclusion should end at a high point, considerably higher than where it began. The audience should feel like they learned something and, at the same time, inspired to change.
This structure maintains a level of suspense and excitement, perfect for presentations that need to inspire AND inform.
This TED talk by David McCandless about the The Beauty of Data Visualization is a perfect example of the Fact and Story structure. He presents a collection of data visualizations which he created himself, along with a story of why he chose each particular set of data.
The topics he chose were extremely relevant to our present day and the audience related to all of them. The personal stories added to the intrigue and the audience left feeling like data visualizations are not only beautiful but also quite important.
Create a stunning presentation in less time
- Hundreds of premade slides available
- Add animation and interactivity to your slides
- Choose from various presentation options
Sign up. It’s free.

The Explanation
According to Gavin McMahon, co-founder of fassforward Consulting Group , the presentation structured labeled as The Explanation is meant to teach new insights and abilities.
Its main purpose is to inform about a process or plan to either fix a problem or learn something new. A good way to incorporate storytelling into the structure is to show the progression of the facts along with the progression of a story.

The presentation progresses in an upward motion following these steps:
- The Lay of the Land shows how things stand right now, what the destination is and how you plan to get there. The point is to get the audience excited and on board as quickly as possible by showing them the entire process straight up. Tell a story that relates directly to the introduction. Better yet, start with a story.
- The Roadmap is a visual map of how you will get to the final destination and reach the resolution. Set the audience on the right track.
- The First Step begins the adventure to get where you want to go.
- T he Next Steps is the middle section of the presentation, where all the steps are laid out one by one.
- Almost there is the catharsis where you look back at how much has changed and progressed since the first step.
- The Arrival is the celebration of the end of the journey. The audience should feel like they have learned something new and gained new knowledge.
The Explanation structure can be used for presentations by consultants that want to teach new ways of doing things inside a company or department. It could also perfectly fit in a sales meeting where a presenter can explain their process of a masterful sales plan.
This TED talk by Amy Cuddy about how your body language shapes who you are is a great example of an Explanation structure. She tells us about her experiment on power poses and how they can affect the outcome of a difficult situation.
The presentation starts off with a discussion on the natural animal and human condition of power and ends with a personal invitation to change your life with a 2-minute practice of power posing.
If you are a lover of the show "Grey’s Anatomy," this is the idea behind the power pose that the neurosurgeons do before a big procedure.
As you know, a pitch in the business sense is when a presenter uses the power of a presentation or speech to convince the audience of something he/she believes will improve a system or solve a problem, according to Gavin McMahon, co-founder of fassforward Consulting Group .
The Pitch presentation structure is like a climb uphill that takes you over a hurdle and on to a positive resolution.
It shows how the presenter’s idea can really improve a situation. By using a real and relatable story, the pitch makes more sense and feels more important.

- The Wind Up is a quick summary of what’s going on right now to presents the facts in a way that is easy to grasp and relatable to the audience.
- The Hurdle presents the problem that needs to be solved . Relay the problem with a story so that the emphasis is doubled.
- The Vision presents a glimpse into the main idea on how the problem can be solved.
- The Options is the moment when two different options are laid out as possibilities to solve the initial problem. The idea is to give an average option first, followed by a great option second. If there have already been tests and experiments to prove these facts, then these are the story.
- The Close is the point where the ideal option is presented as the best and only option.
- The Fine Print tells the audience exactly how the problem will be solved, the steps that need to be taken and the tasks to be resolved.
- The Hook is the uplifting conclusion to the presentation which relays an added bonus to the solution of the problem.
Use The Pitch presentation structure when you want to convince someone that your idea is the best for their problem. This structure also works when a new startup is looking for new funding or sponsorship opportunities.
This TED talk by Enric Sala about how to turn the high seas into the world’s largest natural reserve is a great example of a Pitch structure. He starts off with a story of how a group of fishermen revived an area of the ocean by stopping all the fishing there and turning it into a natural reserve.
Ten years later, that piece of ocean makes more money from scuba diving tourism than it ever did from fishing. He continues to talk about the same problem at a larger scale, the diminishing supply of fish and the destruction of the oceans.
His pitch to solve the impending problem is to turn the high seas into a natural reserve. He finishes by telling the audience that the plan is being pitched to the UN and that every individual can help their country abide by the new agreement if it goes through.
There is a well-known structure in literature called “The Hero’s Journey” which follows the plight of a main character from the beginning of a story to the end and leaves the reader feeling like they've learned a lesson they will never forget.
This type of presentation structure, The Drama , has a strong storytelling aspect. This is often used to tell the story of an influential company from founding days, through trials and tribulations, and then finishes with an inspiring show of success.

Another perfect presentation for The Drama structure is an inspiring personal story.
These are the steps of a Drama style presentation structure:
- One Fine Day . The introduction sets the stage with a situation where things are not perfect but just average. Imagine as if it were the first page of a book, where the setting is laid out and the audience gets an idea of a time and place.
- The Challenge. Suddenly a problem appears that can’t be ignored. The things that need to be solved are presented as a challenge.
- Descending Crisis . At this point, the problem is attacked head on but things gets worse until it hits rock bottom.
- Rock Bottom. When all seems lost and everything is at its worst, the story arrives at a standstill. As an added bonus, the presenter can pause for effect.
- The Discovery . This is the moment when a glimmer of light shows up and there is a discovery, a new way of resolving the problem.
- The Rise . By discovering new abilities, the problem can be tackled in a positive way.
- The Return . Not only are the problem and challenge resolved, the character and the audience break through and reach an unexpected happiness threshold, opening the world to a whole new range of possibilities.
- The Lesson . The conclusion is reached with an unforgettable lesson and resolution. The audience will feel inspired, informed and entertained.
This TED talk by Adam Driver about his journey from Marine to actor is the perfect example of The Drama structure.
He begins the story by telling the audience about what his life was like before he joined the Marines and what drove him to do it.
He tells how the Marines became his family, and closest friends. Then, right before deploying to Iraq or Afghanistan, he had an accident that separated him from the Marines for good.
He continues to explain how he went on to become an actor, followed by the creation of his project to unify theater with military service.
His talk ends with an example of the theater pieces he coordinates to be presented at military camps. Listeners are left with their hearts full of a newfound hope for humanity.
RELATED: This Classic Storytelling Model Will Help You Give a Mesmerizing Presentation
Situation - Complication - Resolution
According to Gavin McMahon , co-founder of fassforward Consulting Group, most presentations in the realm of B2B sales and business consultancy follow the Situation - Complication - Resolution structure. It is a three-element storyline linked by the words but and therefore .

The starting point is The Situation , where current conditions are shown in an unbiased and transparent way. The situation connects to the next step through the word but .
A simple example: Our home decor company is selling pretty well this month, but…
This is when The Complication is presented.
In the above example, it could look something like this:
Our home decor company is selling pretty well this month, but … we have been spending too much on international shipping.
When presenting The Complication , use facts to prove it. Present it as the challenge that needs to be overcome. The Complication is a low point, but from a low point we can only go up.
The final destination is The Resolution , which is connected to The Complication with the word, therefore .
Our home decor company is selling pretty well this month, but we have been spending too much on international shipping. Therefore, we need to start using a new company that has a better price range and great service.
Back up all of your information with real facts and proof.
Situation - Opportunity - Resolution
A similar structure to the one above, the Situation - Opportunity - Resolution replaces Complication with Opportunity . This three-part structure is also joined by the words but and therefore .
The difference is that instead of the movement going down and then up, it goes slightly up and then levels out.

This structure is perfect when you need to show that something is not that hard to fix; that the problem might not be so big after all and that the solution is easy to grasp.
A presentation that follows this structure could turn out to be quite short, if only the facts are presented, but that would leave the audience feeling like “is that it?” Adding an interesting story to help the audience relate makes the overall presentation more effective.
This TED talk by Adam Galinsky about how to speak up for yourself is a perfect example of the Situation - Opportunity - Resolution presentation structure. He starts off by saying: “Speaking up is hard,” and instantly everyone in the audience can relate.
He gives a few personal stories about times when he should have spoken up and others when he shouldn’t. He gives contextual proof and explanations about how sometimes we feel powerless, other times powerful, and how this affects if we speak up or not.
His solution to the problem is not a huge effort but rather a personal mindset change. The presentation ends with an inspiring quote by the speaker’s father which leaves the audience feeling like they will know exactly when it’s the perfect time to speak up, or not.
Hook, Meat and Payoff
This presentation structure, like The Drama, is deeply founded in the art of storytelling. While the Hero’s Journey is more of a literary technique, Hook, Meat and Payoff is more like a spoken-word progression.

The idea is that with the Hook , the presenter gives the audience a sense of place and time, plus a situation that will put them at the edge of their seats, wanting more.
The Meat is the middle section and usually the longest part of the presentation where the story progresses and all the information is relayed in an interesting and inviting way.
The Payoff is the inspiring conclusion that circles back to the beginning and leaves the audience feeling inspired.
It's like when you come out of the movie theater: You feel better about yourself and the world around you, as if you've learned something important that will make your life a little better.
This TED talk by Jill Bolte Taylor about her stroke of insight is a perfect example of a Hook, Meat and Payoff presentation structure.
One of the most famous TED talks of all time, this presentation starts with her personal story of the time she suffered a brain hemorrhage and stroke.
She is a neuroanatomist; she studies brains for a living. Her experience of having a stroke is one of the deepest stories you'll ever hear about the union between science and spirituality.
Her presentation hook, a real human brain which she shows to the audience, very much grabs your attention. The meat of the talk is also entertaining and interesting; she has the audience laughing and crying right along with her.
In the end, she recounts the moment when she felt her body die and then woke up feeling like she was a different person. She had lost all capacities with the stroke, and it took her eight years to learn to talk and walk again.
The Payoff is her invitation to everyone to feel like they have Nirvana at their fingertips, that being conscious of the world around us is not an impossible task.
RELATED: 7 Storytelling Techniques Used by the Most Inspiring TED Presenters
Make a Storyboard
Now that we've looked at the seven different ways that you can structure your presentation with storytelling techniques, it’s time to make a storyboard.
A storyboard is what film makers use to set up the structure of their movie before filming it. It is created with the help of the screenplay, following the flow of the story. Each rectangle in the storyboard is a scene in the film.
Presenters use this process of storyboarding to set up their presentations because it really helps with productivity. A storyboard is essentially a visual draft of your presentation.
(A note for the “un-artistic”: Don’t worry about things looking amazing right now! Uneven squiggles and weird shapes work the same way as perfect squares. The designed and finished look will come later when you set it all up in the Visme editor.)
As you add the story aspect to your presentation, make sure you don’t get too wordy and try using visuals instead of too much text. Use one or two sentences at most for each slide.
The best way to make a storyboard is with index cards, using each card as a slide. You can add things or easily take them away before you even start to design the final draft.
If it makes things easier, you can take a look at some presentation templates in Visme to see how we've created different slides. This might visually inspire the cards in your storyboard.
Image Source
Build it with Visme
You are now ready to move on to the final step: building your presentation with Visme. Okay, you can create it with whichever presentation software you like, but we think you'll conclude Visme is one of the best choices out there.
Promotions aside, it’s time to bring it all to life.
First, open a new presentation canvas, then choose a template or start from scratch. When you start from a blank canvas in Visme, you can add pre-built slides one by one from the slide library.
Create your slides by following the storyboard. For an added bonus, you can use animations, videos and audio to make your presentation unique.
Record your own audio and voiceovers within Visme
If your presentation is meant to be seen on its own, online or sent as a scrollable PDF, there might need to be more text than on a visual presentation which accompanies a speech. You can try animating the text so it's not just a big block of words.
Using audio also helps, but if the viewer has their computer on mute, they might miss it. Make sure your first slide gives the instruction to turn up the volume.
If your visual presentation is going to be used as a backdrop for a speech, you can forgo some of the text and make it more visual.
Remember to rehearse your speech along with the slides so it all flows seamlessly. TED speakers suggest you rehearse a spoken presentation at least 10 times until it flows naturally.
If you need more help with your presentation design, don't forget to grab our free e-book below.

Create beautiful presentations faster with Visme.

Trusted by leading brands
Recommended content for you:

Create Stunning Content!
Design visual brand experiences for your business whether you are a seasoned designer or a total novice.
About the Author
Orana is a multi-faceted creative. She is a content writer, artist, and designer. She travels the world with her family and is currently in Istanbul. Find out more about her work at oranavelarde.com

- Tips & Tricks
- PowerPoint Templates
- Training Programs
- Free E-Courses
Visual Presentations – The Right and Wrong Way
Home > Presentation Concepts > Presentation Ideas > Visual Presentations
Presenting visually is not just about cute pictures on your slides. Learn the real difference between ‘beautiful slides’ and ‘effective visual slides’ in a business presentation.
Recent trend in presentation skills:
Presentations have come a long way in the last few years. With the growing popularity of presentation sharing sites like Slideshare, we see two clear trends emerging:
- More and more presenters are realizing the value of visuals in presentations
- Many of them confuse cute or philosophical photos slides with effective presentations
As a result, slides like these are being worshiped for their design excellence.

Another typical slide looks like this:

The slides are so beautiful that the point of the presentation is forgotten by the audience. Such presentations may get you raving fans on Slideshare and lots of readers on your blogs. But, they just don’t cut it when it comes to a business presentation. That requires a different approach to presentations.
We believe that an effective presentation in business is something that helps you convey your message clearly and effectively. Period.
Here is a simple rule that differentiates ‘beautiful slides’ and ‘effective visual slides’:
In a ‘beautiful slide’ – picture is the hero. In an ‘effective visual slide’ – Message is the hero.
Let us evaluate 3 different set of slides with different objectives. One conveys a fact, another conveys a concept and the third conveys an emotion.
Presentation visual to convey facts:
Here is a beautiful slide that talks about the seriousness of tobacco related deaths.

The hero in this slide is the picture.
The picture is so intense that it takes away the attention from the presenter. Audience gets so busy admiring the image, that the message is lost.
Consider this alternative representation of the same information:

The hero in this slide is the message.
The attention of the audience is retained on the subject in hand. The image puts the numbers in context.
Visual presentation to convey a concept:
Here is a ‘beautiful slide’ that represents the 3 step process in creating presentations.

The hero of the slide is the picture.
A photo of two pretty executives celebrating success might look relevant to the subject of presentations. But, the picture dominates the slide without adding any specific clarity to the message. So, the slide is ineffective.
Consider this alternative:

The hero here is the message.
The 3 steps in creating a presentation are clearly illustrated without taking the attention away from the message and the presenter. We have used simple visual diagrams to make the point.
Visual presentation to convey emotions:
Here is a ‘beautiful slide’ that talks about the inadequacy of basic healthcare facilities in India.

The hero is the picture.
An image plays a significant role in triggering emotions. When you want your audience to feel your message, it is a good idea to use full bleed images. But, in this particular slide, the choice of image is not strong enough. The image illustrates the words and leaves the feeling out.
Consider this alternative which considers the emotions:

The hero is still the picture.
But, the picture does the intended job. It captures the feeling of helplessness.
Evaluating business presentations…
The next time you see a slide with a picture on it, find the hero: Is it the picture or is it the message? In an effective visual slide, message is always the hero. However, if the objective is to express feelings, the picture should play the dominant role.
If a picture is used to express feelings, find if the picture illustrates the words or captures the feelings. If it captures the right feelings, the slide is visually effective.
Go ahead and evaluate your favorite slides with new eyes.
To express ideas in an effective way using visuals is not easy. Learn a simple 3-step process to convey your ideas visually with…
Visual Presentations eBook.
It teaches you our proprietary approach to creating diagrams with examples and exercises meant for business presenters.

Get Your copy of Visual Presentations here and change the way you present…
Return to Top of Visual Presentations Right and Wrong Way Page
Share these tips & tutorials
Get 25 creative powerpoint ideas mini course & members-only tips & offers. sign up for free below:.
August special: Financial Reporting PPT Templates. Save with bundles 30%

Presenting Process and Procedure Ideas on a PowerPoint Slide [concept visualization]

- August 10, 2021
- Icons of Business Concepts
Need an appealing symbol to illustrate a list of actions, process steps, or a set of activities? We suggest using visual metaphors to transfer your ideas to the slides effectively and keep the presentation consistent. Get inspired by our ideas on presenting the process concept.
Elevate your business performance presentations with our curated resources – visit our financial performance PPT reports webpage.
Four criteria for you to consider while choosing an icon – idea, visual contrast, space, and style.
- The first thing you look for is a metaphor that the icon should represent. In the case of process, what general concept fits your business context.
- The second thing to consider is the contrast and visual power you want to give to symbols. How much do you want to expose the symbol versus the text content? The bigger the icon, the more attention it will take from the reader. The same with icon color – a light grey icon will be less “screaming” than a dark black pictogram.
- The third criterion is the space you have on the slide. If your slide is already overcrowded with content, choose icons that are still recognizable even if they are tiny. For example, a flat icon below is like that.
- The fourth criterion is the style you want to express. Do you want to stay neutral, do you want to appear modern or express out-of-the-box thinking and a creative approach? Whatever you choose, try to stay consistent in your presentation. Don’t mix styles too much.
Use universal flat PowerPoint icons to show process concept
Below you can see several icon examples in a plain flat flat-filling style. Those symbols look good even if they have a small size. You can enrich your presentation with one of those symbols to make it more engaging:

- brain or head with gears can be used for showing mental and thinking processes – function or processes of the mind, or cognitive processes, such as attention, memory, language use, reasoning, and problem-solving
- pencil & gears are great symbols for illustrating design process, creation
- blocks with arrows as a general process icon, changing from one step to another
- conveyor belt as a metaphor of production process
These and many other symbols are part of the Simple Flat PowerPoint Icons Library .
Illustrating process and procedure ideas with scribble graphics
If you want to create more personalized slides and add a creative touch, use hand-drawn icons for presenting the process concept ideas. You can find the specific visuals below:

- gears to visualize processing machinery or process that is active/ is working
- legal process can represent any formal notice or writ by a court obtaining jurisdiction over a person or property
- blocks with arrows as symbols of general process idea
- document with points for list of actions to take, or process steps
You can find the above visuals in the Scribble PowerPoint Symbols Collection .
Present the process concept with elegant outline symbols
Such icons in elegant outline style are widely used in many modern presentation slides. You can enrich your presentation with one of those symbols to make it more attractive:

- chain icon can represent casual chain and ordered sequence of events in which any one event in the chain causes the next.
- paper with points to show list of actions to take, plan, process steps
- loop as a metaphor of reoccurring processes
- gears to show operation that is active/ is working
- cubes with arrows – general procedure icon, changing from one step to another
All icons mentioned above can be found in a collection of Outline Icons for PowerPoint , which we have designed over the last few years.
Whether you prefer sketched, or more formal style, or just looking for inspiration to search your ideal icon of a process, it’s worth using graphics to support your story and presentation.
We hope those ideas of illustrating the procedure or process concept will help you pass the message effectively and create a consistent professional-looking presentation.
If you need liked icons from above and want to get graphics from multiple icon sets, consider a subscription to InfoDiagram . A subscription will grant you access to any icon in our resource library.
Explore our YouTube channel for more creative inspiration:
More concept icons ideas
If you need to present abstract ideas or complicated concepts – be sure you are using visual metaphors. We put together a Concept Visualization Master List blog post so finding our concept visualization articles would be easier to find. See if we can help you make your next presentation more intuitive and memorable.
infoDiagram Co-founder, Visual Communication Expert
Related Posts

Presenting Current vs New Ideas on a PowerPoint Slide [concept visualization]
- August 24, 2021
How to Show Clarity Idea in a PPT Presentation [concept visualization]
- July 16, 2021

Use Visual Metaphors to Illustrate Competence [concept visualization]
- July 10, 2021
Simplify complex workflows and wow your audience with our 740 free Process diagrams for PowerPoint and Google Slides. Choose from linear, circular, alternating, stairs, and bending workflows to visually explain any process with clarity and impact.
Stepwise Chevron Flow
Google Slides , PPTX

Line Pedestal Process

Directional Steps

Process Arches

Sine Wave Triangle Flow

Neumorphic Sine Wave Process

Alternating Hook Timeline

Neumorphic Hook Timeline
Octagon Arrow Line Diagram
Heptagon Arrow Line Diagram
Hexagon Arrow Line Diagram
Pentagon Arrow Line Diagram
Search templates by categories, search templates by colors.
Love our templates? Show your support with a coffee!
Thank you for fueling our creativity.
Charts & Diagrams
Text & Tables
Graphics & Metaphors
Timelines & Planning
Best-Ofs & Tips
Terms and Conditions
Privacy Statement
Cookie Policy
Digital Millennium Copyright Act (DMCA) Policy
© Copyright 2024 Ofeex | PRESENTATIONGO® is a registered trademark | All rights reserved.

To provide the best experiences, we and our partners use technologies like cookies to store and/or access device information. Consenting to these technologies will allow us and our partners to process personal data such as browsing behavior or unique IDs on this site and show (non-) personalized ads. Not consenting or withdrawing consent, may adversely affect certain features and functions.
Click below to consent to the above or make granular choices. Your choices will be applied to this site only. You can change your settings at any time, including withdrawing your consent, by using the toggles on the Cookie Policy, or by clicking on the manage consent button at the bottom of the screen.
Thank you for downloading this template!
Remember, you can use it for free but you have to attribute PresentationGO . For example, you can use the following text:
If you really like our free templates and want to thank/help us, you can:
Thank you for your support

How to improve process visualization
Reading time: about 6 min
Knowing this can help you harness the benefits of process visualization in your everyday work. For example, when you map out business processes, data flows, systems, and so on, improved visual designs can help your team to more easily diagnose issues, communicate across departments, and build or update systems.
In this article, we’ll talk about process mapping and how to improve visualization, even if you are not a visual presentation expert.
What is process mapping?
Process maps are visual representations of the stuff your company does. A process map can represent software development, product manufacturing, IT infrastructure, employee onboarding, and more. These maps show you the specific steps, task owners, and expected timelines.

The idea is to help team members, management, and stakeholders to more clearly understand the process flow, who does what, how it gets done, and when it gets done. In addition, process mapping helps you to improve current processes and develop new ones. Process maps can help you train employees, assign tasks, stay in compliance, and more.
Process mapping is helpful when your company decides that changes need to be made. Mapping current processes gives stakeholders and team members an overall view of how things are done in your organization. This encourages everybody to think through workflows and to see how everything fits together. Looking at current processes objectively and getting input from multiple interested parties helps you to see where improvements can be made so you can work more efficiently and get products to market faster.
What are the benefits of process visualization?
Process visualization is important because it gives you the opportunity to learn, analyze, improve, and standardize processes. Other benefits include:
- Brings everybody together : Creating a process map is not a one person job. Bringing together everybody involved helps you to see things from different perspectives, which gives you better insight into how things are done in your company. This helps everybody to see the big picture so they can see how their work fits in the overall process and affects others. Bringing everybody together can also increase employee morale by helping team members feel like they are making meaningful contributions.
- Effectively communicates insights : Seeing the big picture gives you a better idea of how everything works together. This gives the team insight into how things are done in the company, which helps them to make better decisions and look for ways to improve processes and procedures.
- Simplifies the complex : Because a process map gives you a bird’s-eye view, it makes complicated processes easier to understand. It also helps you to more easily identify and fix problem areas.
- Documents best practices : The process of creating visualizations helps you to refine and streamline processes and makes it easier to spread the information throughout the company. This is especially helpful for new members of your team who are trying to understand their roles and how they fit into the process.
- Better organization and efficiency : Process visualizations can help your company to be more efficient and organized as you streamline processes and define best practices.
How do you improve visualization?
Every process map will be different and will focus on different things. This can take some time and should take some consideration. But don't overthink it or make it more complicated than it needs to be. The goal is to produce a document that is easy to read and understand so it will be used by its intended audience. Following are a few tips on how to improve visualization.
Identify the start and end points
It helps to know where the process begins and where it ends before you start identifying specific steps in the process. This helps you with setting limits and finding the fastest and most efficient route from the beginning to the end. Knowing the start and end points also helps you to identify what is really important.
Simple is better
Keep your process maps as simple as possible so that they can be easily read by anybody in your organization. Overly complicated visuals are hard to read and understand and likely won’t be used by the people who need them.
Remove unnecessary and redundant information
Leave out any unnecessary or redundant information, excessive color, obscure jargon, or anything that distracts and takes focus away from important information. Also, realize that your process visualization will never be perfect. Instead, aim for a level of detail that is necessary to make the process understandable.
When visualizing processes, be sure to incorporate color in your designs. While a black and white map is better than text alone, it looks static and does not draw the attention that color can draw. Color can be used to represent specific symbols, steps, or data. And color helps you to categorize, organize, and highlight important information. Consistent use of color makes it easier to understand what the information is telling you at a glance.
Use shapes and symbols
There are standard shapes and symbols that should be used when creating specific types of maps and charts. Be consistent when using shapes and symbols so you don’t confuse your audience. For example, some of the simplest shapes include:
- Ovals or circles to represent process start and end points
- Rectangles for tasks and activities
- Diamonds to represent decisions that need to be made in the process
- Arrows to indicate the process flow
Indicate hierarchy
The use of color, the order of different elements, and sizing can indicate the importance of different tasks and procedures in the process flow. It can also be used to highlight dependencies between tasks.
Use process mapping software
Process visualization software like Lucidchart includes templates and libraries of standard shapes and symbols to keep your visuals simple and consistent. It also lets you draw maps and charts quickly and encourages collaboration and input from all team members.
Group data
Grouping data into logical categories improves readability and helps your audience to see and digest the information they need easily and quickly.
Process visualization can take your work to the next level. But once you have created your process map, you’re not quite done. You need to implement the process, monitor it, manage it, and make improvements where warranted.
Ready to create your own process map? Explore templates and examples here.
About Lucidchart
Lucidchart, a cloud-based intelligent diagramming application, is a core component of Lucid Software's Visual Collaboration Suite. This intuitive, cloud-based solution empowers teams to collaborate in real-time to build flowcharts, mockups, UML diagrams, customer journey maps, and more. Lucidchart propels teams forward to build the future faster. Lucid is proud to serve top businesses around the world, including customers such as Google, GE, and NBC Universal, and 99% of the Fortune 500. Lucid partners with industry leaders, including Google, Atlassian, and Microsoft. Since its founding, Lucid has received numerous awards for its products, business, and workplace culture. For more information, visit lucidchart.com.
Related articles
3 diagrams to make your processes more visual.
To help you visualize processes, there are different types of visuals that are particularly helpful—in this blog post we talk about three.
How to effectively implement business process change
In this article, we discuss why implementing business process change can be challenging, plus offer some tips for pivoting processes efficiently.
Bring your bright ideas to life.
or continue with
By registering, you agree to our Terms of Service and you acknowledge that you have read and understand our Privacy Policy .
IMAGES
COMMENTS
A visual presentation is a communication method that utilizes visual elements such as images, graphics, charts, slides and other visual aids to convey information, ideas or messages to an audience. Visual presentations aim to enhance comprehension engagement and the overall impact of the message through the strategic use of visuals.
Apply the 10-20-30 rule. Apply the 10-20-30 presentation rule and keep it short, sweet and impactful! Stick to ten slides, deliver your presentation within 20 minutes and use a 30-point font to ensure clarity and focus. Less is more, and your audience will thank you for it! 9. Implement the 5-5-5 rule. Simplicity is key.
Get started with TED Masterclass. When preparing for your presentation, there are 5 steps to keep in mind when preparing for your presentation. These include: choosing the right software for your needs, organizing your files, preparing your presentation materials, practice, and make sure to do a final test run.
Presentation design focuses on finding ways to make the presentation more visually appealing and easy to process, as it is often an important tool for communicating a message. It involves using design principles like color, hierarchy, white space, contrast, and visual flow to create an effective communication piece.
The best way to make sure the attention stays on you is to limit word count to no more than 10 words per slide. As presentation expert Nancy Duarte says "any slide with more than 10 words is a document.". If you really do need a longer explanation of something, handouts or follow-up emails are the way to go.
When in doubt, adhere to the principle of simplicity, and aim for a clean and uncluttered layout with plenty of white space around text and images. Think phrases and bullets, not sentences. As an ...
A well designed visual presentation has a great story behind it and a well rehearsed voice telling it as well. Engaging the audience is also a great way to associate meaning or connection to the content of your slide decks. Ask questions and tell stories while showing off a great visual presentation! Think of writing the copy like writing for ...
Apple® founder Steve Jobs was known widely for his great presentations. His unveiling of the iPhone® in 2007 is considered to have been one of his best presentations ever, and, if you were one of the millions who watched it online, you'll know why. The presentation was engaging, and passionate. Jobs was particularly well known for building his presentations around powerful visual aids.
In the "Insert" menu, select "Table" and opt for a one-by-one table. Change the table color to a light gray shade, elongate it, and position it neatly to the left of your text. To improve readability and aesthetics, increase the spacing between text phrases. A small adjustment in the before spacing setting (setting it to 48) significantly ...
The design process worked by gathering inspiration using a mix of pre-made Canva templates and adding my own twist. I talk more about Canva and design tools here. Structure. The way you choose to structure a visual presentation will depend wholly on the purpose.
A great example of a high visual presentation is the iconic AirBnB pitch deck design, which includes no more than 40 words per slide. Instead of repeating the speaker's script on the slides, it makes an impact with keywords, large numbers, and icons: ... You can then apply this process to our professional presentation templates or pitch decks ...
Effective visual presentations are a must. They cater to the expectations of modern audiences and help you tell a story with images, graphs, and more. The visual angle of a presentation explains ideas in a way that reaches your audience. The easiest way to tell a great visual story is to start with a template that already has a wealth of visual ...
We think there are six steps you need to follow. Step 1. Understand the audience. To know how to make a presentation effective, you need to understand the person on the receiving end and also decide what you're trying to achieve. Are you trying to inform the audience of something - i.e. give them information they don't have and help them ...
Many presentations can also benefit from callout slides, ... We pay attention to visual information because our brains are designed to process visual information faster. When you provide visuals—photographs, charts, diagrams, icons, etc.—people will pay far more attention than if you just have text. In fact, if you just have text on a ...
Once a visual communication strategy is in place, it's time to take care of the visual communication design. This is the actionable part of the process; the strategy is the plan, and the design is the creation. Visual communication design is essential for your presentations. You're telling a story with your information, and visual ...
Presentation skills are the abilities and qualities necessary for creating and delivering a compelling presentation that effectively communicates information and ideas. They encompass what you say, how you structure it, and the materials you include to support what you say, such as slides, videos, or images. You'll make presentations at various ...
Presentation aids help the presenter stay within an allotted set of time. For those of us who have a hard time sticking to the main points, visual presentation aids help us progress forward in our thought process and give a good presentation.. Here, we have a second illustration of a presentation aid — this time in the form of a timeline.
Presenters use this process of storyboarding to set up their presentations because it really helps with productivity. A storyboard is essentially a visual draft of your presentation. (A note for the "un-artistic": Don't worry about things looking amazing right now! Uneven squiggles and weird shapes work the same way as perfect squares.
Visual presentation to convey a concept: Here is a 'beautiful slide' that represents the 3 step process in creating presentations. The hero of the slide is the picture. A photo of two pretty executives celebrating success might look relevant to the subject of presentations.
We suggest using visual metaphors to transfer your ideas to the slides effectively and keep the presentation consistent. Get inspired by our ideas on presenting the process concept. Elevate your business performance presentations with our curated resources - visit our financial performance PPT reports webpage.
8-Blade Pinwheel Diagram. The 8-Blade Pinwheel Diagram is a versatile PowerPoint and Google Slides template that helps you illustrate eight-step cycles and processes. Spice up your next presentation with customizable process diagrams that simplify complex ideas into visual step-by-step flows. Free downloads.
In addition, process mapping helps you to improve current processes and develop new ones. Process maps can help you train employees, assign tasks, stay in compliance, and more. Process mapping is helpful when your company decides that changes need to be made. Mapping current processes gives stakeholders and team members an overall view of how ...